
How To Start A Blog in 2026 And Make Money
This article may contain affiliate links, please read our disclosure policy.
Want to learn how to start a blog in 2026 AND make money?
You keep reading everywhere about how easy it is to start a blog and how you can make money blogging instantly.
But can you really create a successful blog if you don’t know where to start?
In this in-depth, step-by-step guide, I will show you the exact things I did to start a successful blog. You see: blogging changed my life. I have been able to earn over $3,800 after only 3 months with no previous experience.
Crazy right?
And now, I want to help you do the same!
Table of contents
By going through this free, in-depth guide, you will start a blog the right way to be able to make money. Click right here to jump straight down to learn how to set up your blog.
One last thing before we dive in: this is not your usual How To Start A Blog guide. I spent over a month writing it because I wanted to make sure it was as complete as possible for you. I want to help you create the lifestyle you deserve and make money from something you truly love. And that’s why this guide is completely and 100% free.
But who am I to tell you how to start a blog?
For the past 12 years, I have been working in a very demanding job. I have been lucky enough to work with people I love, but the job itself was very time-consuming. I used to work 12-14 hours a day in a high-demanding environment.
I kept dreaming of a stress-free life and being able to do what I loved.
So in the evenings, I started researching online for alternative options. I found many interesting creative ways to make money that could give me more freedom, but what I really wanted was:
- Something that would fulfill me and that I could enjoy doing every day
- Something that made money and helped me to live the life of my dreams
I then realized I spent a lot of time reading blogs, looking at people currently living the life I want to live.
Some stay at home and raise their kids away from the corporate world, some can travel every day of the year using their savings and investments, and some have created a new life for themselves that allow them to do what they love.
What did they all have in common?
They had a blog!
So I thought: maybe I should start a blog as well!
And in November 2017, Gathering Dreams was born.
My goal with my blog was to make $1,000 a month after a year of blogging. If I couldn’t do that, I would quit this blogging business and move on to new adventures.
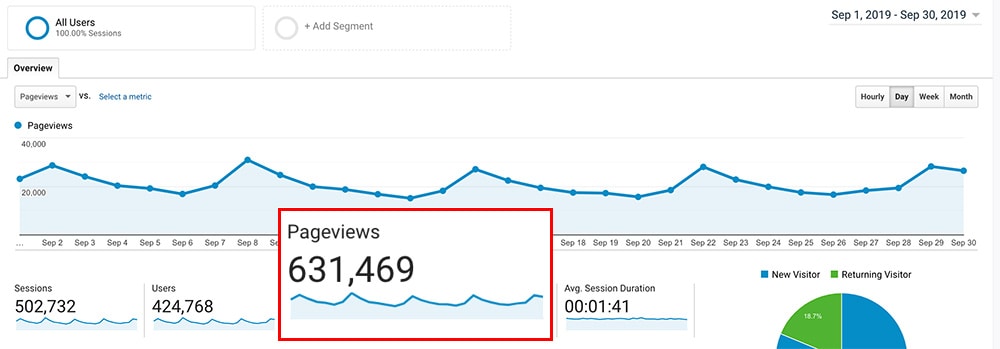
And this is what happened after 3 months of having my blog online. I made…
And within the first year, I made over $35,000!
And now, in my second year of blogging, I transformed Gathering Dreams into a 6-figure blog that receives over 600,000 page views a month!
Can you believe that?
And the incredible thing is that I’ve managed to create a successful blog even though:
- I had no previous experience in online marketing (or marketing of any sort!)
- I never really liked social media, and I am somehow an introvert (as you can see, there are no pictures of me on this blog. Yes, I am shy!)
- I had no idea how to write (writing essays at school was one of my nightmares!)
I am not going to lie to you:
If you want to find out how to start a blog that makes money, you will need to put in a lot of hard work.
Starting a blog might take you less than an hour to set up, but building a successful blog that will earn you money will take more time.
But it is possible to make money blogging, and I will show you how.
Get a strong cup of coffee, tea, or whatever you love to drink, and let’s get started!
TIP: There is a lot to learn and digest in this post. Don’t feel like you need to read all of this today. Bookmark it and come back to it every time you need guidance or are ready to move to the next step of your blogging journey.

How to Start A Blog (and Make Money) in 7 Detailed Steps


CHAPTER 1. What is a blog, and how do you select a profitable niche?
CHAPTER 2. Techy stuff: how to set up your blog
CHAPTER 3. The secret to creating viral content
CHAPTER 4. Why Pinterest needs to become your best friend
CHAPTER 5. Get Google to love you: the power of SEO
CHAPTER 6. The proven ways to make money blogging
CHAPTER 7. The essential resources you need for your blog
BONUS: Where to find click-worthy images for your blog and your pins
CHAPTER 1
What is a blog, and how do you select a profitable niche?
What exactly is a blog, and how can you decide what to write about?
Disclosure: I started Gathering Dreams on Bluehost. Because I am an affiliate with Bluehost, if you use this link, I will get a commission from them, which helps me to keep this guide free for you and up to date. Rest assured that I would never recommend a product, tool, or service I never personally used and love!
What is a blog?
A blog is just a website that is updated with new content on a regular basis. It’s normally written in an informal or conversational style (think about writing to your friends). Your aim as a blogger is to charm your readers to stay as long as possible on your website, turn them into loyal fans, and create opportunities to sell.
Should you start a blog?
Oh, please! Don’t ask me! Of course, you should!
Starting a blog today is by far, one of the easiest ways to make money online and to build the sort of freedom that not many jobs can give you. It took me 12 years of hard work in my previous job to reach the level of income I managed to generate with blogging in 18 months.
And the magical thing?
You don’t have to be an expert or a professional writer to start a blog. Your readers are looking for personable advice. As long as you can help them and be relatable, you can become a successful blogger.
How long will it take to build a profitable blog?
Let’s be clear: over 70% of blogs don’t make any money. Or at least they don’t make a significant amount of money worth talking about. And the majority of the bloggers that do make money don’t make enough to be able to quit their job.
Do you know why?
Because:
Blogging is really hard.
No one is going to give you money for free. It isn’t enough to set up a blog, write a couple of posts, and sit back waiting for the money to come in.
In the first few weeks:
- You’ll be doubtful because no one knows about your blog, and you are not getting any traffic.
- You’ll be frustrated by how much time it can take to do the most simple things (like finding out how to install a plugin).
- You’ll be overwhelmed, struggle, and lose motivation.
Thousands of bloggers quit in their first year because they have expectations that are far too high!
What no one tells you: if you want to start a blog and make money, you need to be prepared to work hard for at least 12-18 months before throwing in the towel. Are you ready to do that? If you are, like I was, keep reading.
How to pick a niche to blog about
When I started my blog, I knew it could take time. But I also knew I wanted to set it up to make money as fast as possible.
And I wanted to write about things I loved. This meant I had to combine writing about something I was passionate about with something profitable.
Deciding what niche you want to write about is the first step to starting your blog.
So, how do you decide what to blog about?
Writing about what pops into your mind isn’t a tremendously clever strategy if you want to make money as quickly as possible. Also, it’s improbable that you will unveil a secret and obscure profitable niche that no one has ever cracked before.
The point is:
Successful blogs are successful for a reason. They are successful because they nail how to help people solve their daily life problems. And this can space from how to lose weight to what to cook for dinner in the 10 minutes you have between getting home and putting the kids to bed.
Don’t try to be very original, especially when you are starting out. And don’t get stuck because you think you are not expert enough or good enough at anything. That’s not true! As long as you can create valuable, well-researched content, you don’t need to be an expert. You just need to know more about the subject than the person who is reading your blog.
I mean, how many Michelin-star restaurant chefs own a food blog? As a reader, you want easy recipes that you can quickly put together on a Sunday night that are simple and delicious. You don’t want to learn from the “experts” out there.
And this is true of many blogging niches.
Top Niches That Will Make You Money
Let me be clear:
This is not the ultimate list of all the niches that will make you money. There are plenty of other niches and topics that can generate an incredible amount of income. These days you can make money pretty much in every niche you can think of. But the niches below can make you money quickly. With other niches, it might take you more time and effort to get there.
Let’s dive in.
1. Personal Finance
Personal finance can range from teaching people how to budget and manage their money, to saving money and living frugally. I love this niche because it has many potential revenue streams, especially if you get the affiliate side of it right.
Some of my favorite blogs in this nice:
- DollarSprout – made $167,390 in February 2019
- Making Sense of Cents
- Mr. Money Mustache
- Millennial Money
2. Make Money Online
So how do you make money blogging? By selling courses that teach you how to make money blogging, of course! Lol. When I was doing my research about blogging, I thought that talking about making money online was the only way to make money. It turns out the truth is very different, but the Make Money Online niche is very profitable.
Working from home and starting a side hustle are other proven spins on the same topic. You can make lots of money with affiliate marketing and digital products (like courses to teach others how to make money or start a business).
Bonus points if you can share how much money you actually make.
Some inspiring blogs in this niche:
- I Will Teach You To Be Rich – Ramit’s blog makes over 7-figure a month!
- Smart Passive Income – Pat made $167,553 in December 2017
- Side Hustle Nation
- Pro Blogger
3. Health and Fitness
In this category, blogs go from nutritional advice to yoga and fitness, from green living to holistic wellness. If you are an expert in health and fitness, there is an incredible amount of money to be made in this space.
Yes, it’s a very competitive niche, but you can become very successful if you nail down your message. You can monetize with ads and affiliate marketing by recommending, for example, the best supplements or fitness equipment. Another very profitable way to make money in this niche is to create your fitness courses or nutritional plans.
Some successful blogs in this niche:
- Fit Mum Journey – made $10,124 in December 2018
- Organize Yourself Skinny
- Easy Living Today
- Run To The Finish
4. Travel
Travel blogging is a profitable niche to consider if you are passionate about exploring the world or you live near a tourist destination and can share your tips to visit the area.
It does really well on Pinterest if you pick popular destinations. And if you narrow down your niche and become a travel expert on a specific subject, you’ll get solid traffic from Google too. This means you could become an expert on budget traveling (like Nomadic Matt) or backpacking (like The Broke Backpacker). The top ways to monetize this niche are advertising, affiliate marketing, and sponsorship.
Some blogs that have nailed the monetization in this niche:
- Adventure In You – made $19,233 in June 2018
- Practical Wanderlust – made $10,029 in September 2018
- Nomadic Matt
- Goats On The Road
- The Broke Backpacker
5. Food
Food bloggers can be incredibly profitable (up to 7-figure), but the monetization strategy isn’t very diversified. Most food bloggers need a lot of traffic to make good money, and their income is based mostly on advertising revenues. It’s quite difficult to make a lot of money with affiliate sales (how many of you bought a pan after reading a recipe?).
The good news is that getting traffic from Google, Pinterest, and Social Media isn’t difficult if you know how to create beautiful, mouthwatering pictures and/or videos.
Some incredible examples of food bloggers that nailed it:
- Pinch Of Yum – made over $100,000 in November 2016
- RecipeTin Eats
- Budget Bytes
- Minimalist Baker
6. Parenting
I am not an expert in this field, as I have no kids, but all the mums out there are looking for advice from those who have already done it. These blogs can range from tips during pregnancy to how to deal with a newborn baby. Most revenues are made through affiliate sales, sponsored posts, and advertising.
Some blogs worth checking in this niche:
- What Mums Love – makes around $30,000 a month
- Mommy on Purpose
- Rookie Mums
- Swaddles ‘n Bottles
7. Beauty and Fashion
Beauty and fashion are superb niches to make money. To be successful, you need to rely a lot on your personality and getting yourself out there. Most bloggers in this niche aim to become influencers on Instagram or YouTube.
And once you become an influencer, it’s much easier to get people to buy everything you mention. You’ll need to bring your unique perspective to highlight your favorite products, merchandise, and brands to make money with affiliate sales and partnerships with brands.
Some top fashion and beauty blogs that will inspire you:
8. DIY and Craft
This is an area that your readers can become insanely passionate about. And when people are insanely passionate about something, they are prepared to spend a lot of money on it! It can go from crochet to DIY home decor, from paper crafts to homemade beauty products.
Some of my favorite DIY and Craft blogs:
- Jennifer Maker – made over $230,000 in September 2019 on a 3-year-old blog!
- A Beautiful Mess
- Kaleidoscope
- The Harper House
9. Lifestyle
Lifestyle blogs (or online magazines – however you want to call them) normally write about a few or several of the niches above, plus organization and living. You can have how many topics you like on a lifestyle blog. For example, a blog like The Everygirl writes about personal finance, career development, travel, home decor, food, beauty, fashion, and more.
That’s why I think lifestyle blogs are magical: you can write about several topics, help people, and test out different niches until you narrow it down to what you really love.
Remember that some of the biggest lifestyle blogs have many paid writers, which means they can write a lot of content on several topics every week. If you decide to write a lifestyle blog alone, pick 2-4 topics. Otherwise, it will be much harder for you to create enough blog posts for each category. And if your blog is too broad, you will find it more difficult to rank in Google.
The main monetization strategies for lifestyle blogs are affiliate marketing, advertising, and sponsored posts or partnerships.
Lifestyle blogs I love:
- My Domaine
- The Everygirl
- Brit+Co
- Just A Girl And Her Blog – made $41,700 in December 2016
TIP OF THE DAY: No matter what niche you pick, focus on solving people’s problems or write about things people are incredibly passionate about. Do not write about your life to start with unless it’s about an example that will help others! No one cares about you, other than your mum!
Of course, there are bloggers and influencers out there that make tons of money writing about themselves. But it will take you much longer to build an audience and monetize your blog if you decide to go down this route.
How broad should your niche be?
Many blogging experts suggest narrowing down your niche as much as possible to become the number one resource online for that particular topic.
This will help you identify your potential audience much more, and with a targeted audience, the potential for sales is bigger.
I don’t entirely disagree with this approach. It’s particularly true if you want to sell a particular product or become a top affiliate for a specific service.
For example, if you wanted to sell coffee machines, you are much better off creating a blog that talks only about coffee than a more generic blog on every type of drink out there.
But narrowing down your niche isn’t the only way to create a money-making blog. Gathering Dreams is a perfect example of that.
What is essential if you decide to keep your niche broader is that your underlying message is consistent. You still need to identify your target audience, and every blog post you write needs to be tailored for your ideal reader.
Let me give you an example:
Gathering Dreams is all about healthy living, financial freedom, and how you can achieve a balanced lifestyle. If all of a sudden I started to write a review about the most expensive luxury hotels in the world, it wouldn’t fit with my overall message, and my audience might be wondering if I’ve gone crazy.
ACTION PLAN
- Write a list of things that interest you. You don’t have to be an expert, but it needs to be something that you are prepared to learn and research. Don’t stop at your first idea but brainstorm a list of potential topics. Make sure you pick something you have a real interest in. Otherwise, you will get tired of your blog very quickly. And during the first few months of blogging, you need your passion to fuel you. Otherwise, you are going to give up!
- Go through the list of top niches above and make sure you can fit your niche in there if you want a good chance to be successful. If you are blogging to make money, you need to write about what people want to read. You need to help people to solve their problems.
- Research your blogging niche. Come up with ideas of possible posts you can write about, and research successful bloggers in that niche that inspire you. Find out how they make money and how much money they make (if they publish any reports). Before you commit to any niche, make sure you can create a successful blog!
AND REMEMBER: No matter what niche you pick, you need to love it. I don’t care what people say about just picking a topic to make money. If it’s going to take you a year to earn any serious cash, you’ll probably lose interest in that topic before you see any money coming in. And you will fail before you even start!


CHAPTER 2
Techy stuff: how to set up your blog
All the technical jargon you need to know and how to set up your blog the right way
1. Pick a domain Name
A domain name is just a more complicated way to say website’s name.
So you finally chose your blog topic/s, now you have to decide on a name for it. I wish this was easier! But I ended up spending days coming up with my blog name.
My top tips for picking a name are:
- Catchy: pick a name easy to remember
- Easy: make it easy to spell
- Short: and sweet
- Memorable: pick a name that relates to you and what you want to write about
You will also need to make sure your domain name is available and not registered with another website.
You can check if your domain is available by clicking here:
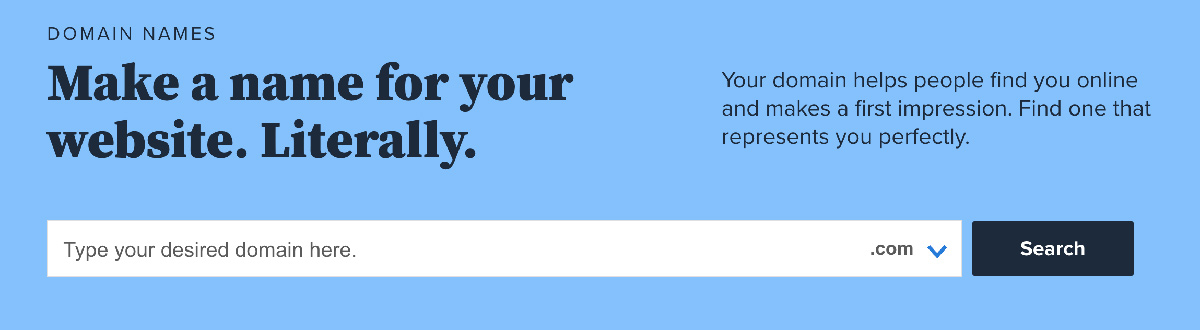
If you are struggling to find the perfect name, write down lots of words that describe how you want people to feel about your blog or what you want your blog to be about. Then try to combine them, use catchy phrases, and try to swap words out with your own.
And test out the name you picked with your friends!
So, let’s get started with choosing your blog’s name.
I knew my blog was going to help me live my dreams. And then, I thought it could be a diary to store all my dreams: so I came up with Gathering Dreams.
Once you have chosen your domain name and checked that it is available, you need to register the right to use it.
If you haven’t registered your domain yet, it’s time.
Take 30 seconds right now to get your domain name and hosting with Bluehost, the blog hosting provider I’ve used to start Gathering Dreams. By using Bluehost as your web host (see Step 3), you can get a FREE domain for the first year as long as you buy 12 months worth of web hosting.
2. Choose the right blogging platform
When you start a blog, you need to pick a blogging platform.
What is a blogging platform?
A blogging platform is a software or service that you use to publish your content online. It allows you to create posts and manage everything you create. There are several blogging platforms out there, some are completely free, and some you will need to pay for.
Some of the most common blogging platforms:
- WordPress.com (free)
- WordPress.org (the same software, but you need to install it on your web host)
- Wix
- Weebly
- Squarespace
- Medium
But one thing you need to know is that:
You are not going to be able to make money from a free blog.
And these are the reasons:
- If you use a free service, you WILL NOT own your blog or your website content.
- You will have limited options to customize your design, and you will have limited support.
- You will have restrictions to put ads on your website to be able to monetize it.
- Some free platforms will put their own distracting ads on your website.
- Your blog won’t look as professional, and you might not be able to get approval for some affiliate marketing programs.
If you want to make money from your blog, your website will need to be self-hosted on a web server that allows you to customize it.
Blogging with WordPress
WordPress.org is the most popular website platform in the world. It powers around 36% of all the websites in the world. It offers the most flexibility for design and monetization!
It’s free and extremely flexible, and it’s what I am using for Gathering Dreams.
But a word of warning:
It’s NOT the most user-friendly platform out there to start with. WordPress has a steeper learning curve than some other platforms, and it will take you some time to understand everything you need to know. I don’t think of myself as a stupid person, but believe me, navigating WordPress in the first 2-3 weeks made me think I wasn’t that clever either!
However, I can assure you that if you stick with it (with the help of this guide), you will be able to create the blog of your dreams!
Drag-and-drop website builders like Wix are much easier to start with, and you’ll be able to create a blog with just a few clicks. They also look stunning, and it’s easy to move things around and make them look exactly how you want. But you won’t be able to transform your blog into a growing business as easily as with WordPress. Wix gives you great design options, but it is very limited in what you can customize when it comes to the tools that you need to make money (like plugins for email integration, affiliate marketing options, and more). This might sound fine now, but if you are serious about earning an income with your blog, you’ll find it very frustrating soon enough.
3. Buy hosting for your blog
Although WordPress.org is free, you will need to host your files on a server. If you’re interested in making money from your blog or turning your blog into a business, then paying for hosting is a MUST.
But what is a web host?
Hosting is where you store your data. It’s pretty much your blog disk space. Like the hard drive on your laptop, you need a place online where people can access everything you create. It’s a bit like “the cloud” for your blog.
This option comes at a cost, but you won’t be able to add ads to your website if you set up your blog the wrong way.
How much does web hosting cost?
It can go from $2.95 a month to $100 a month and over!
When I started, after doing tons of research, I selected Bluehost as my web host.
Reasons Why You Should Use Bluehost
- It’s the #1 recommended web hosting company by WordPress.org.
- You get a FREE domain name when you buy a 12-month plan.
- It’s the best affordable hosting for beginners if you are just starting out and you have limited resources to invest in your blog.
Select your plan
Click here to head over to Bluehost and hit the “Get Started Now” button to choose your package.
It’s only $2.95 a month through my link if you sign up for 36 months.
You will be directed to a page where you can select the type of plan you want to purchase. I recommend choosing the Basic plan. With a new blog, the basic plan is all you need to get started, and you can always upgrade later if you need to.

Pick your blog’s domain name
Next, you’ll get to the page where it’s time to choose the domain name for your blog:
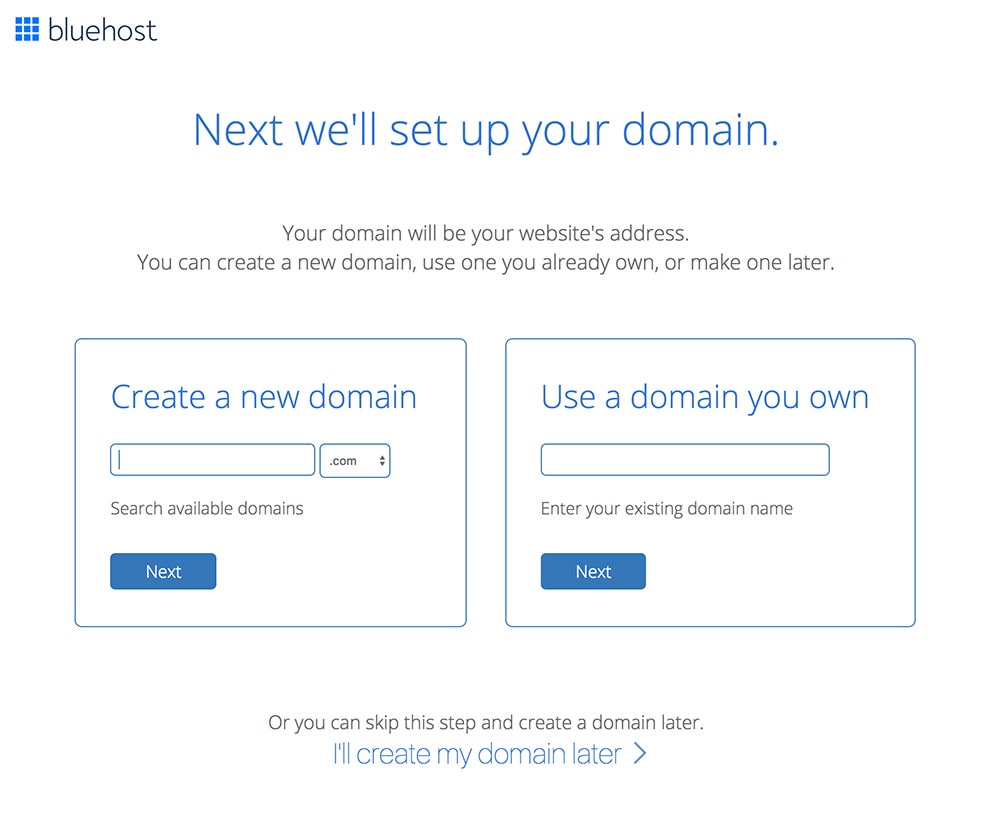
Here you just need to enter the name you picked in the first step (I entered gatheringdreams) and click on next.
If your name isn’t available or you still want to think about it, you can also skip this step and click on “I’ll create my domain later” at the bottom of the page.
Already own a domain name?
If you already own a domain name that you bought before from a website like GoDaddy, you will need to connect it to your Bluehost account. Just choose the second option on the right of the page instead of registering a new domain name. You will then have to log in to your domain provider Account Manager page and follow the specific instructions to connect your domain to your Bluehost server.
Create your Bluehost account
Now you just have to fill in your account details like your name, and email address (make sure you use your most up-to-date email address as all your billing and login information will be sent here!).
You can also connect your Google account to Bluehost to avoid having to enter all your details manually.
Which pricing plan should I select?
The longer your plan is, the cheaper it will be. I strongly suggest you purchase at least a 12-month hosting plan for these reasons:
- If you really want to give blogging a shot, you need to commit to it for at least a year. And having to put some money upfront will make you take this step only when you are ready.
- You will receive a FREE domain for the first 12 months, included in the package.
- The monthly price will be much cheaper.
- If you only purchase a monthly plan, you might forget to renew your plan with the risk of bringing your website down and losing business.
Which hosting plan is the best value for money?
If you have just a little bit of cash….LESS THAN 10 CENTS a day, to be exact, I recommend purchasing a 36-month plan. This is what I did when I started Gathering Dreams. Truth is, there aren’t many businesses out there that you can start for this kind of money. You pay a bit more upfront, but you end up saving quite a lot of money in the long run.

If you want to keep your costs as low as possible, remember to uncheck any extra add-ons. I strongly advise paying for “Domain Privacy + Protection,” which is only $0.99/month, to keep your details private.
Is Domain Privacy Protection necessary?
It’s really up to you! Adding Domain Privacy + Protection masks your personal information from the whois database, which is publicly visible to anyone on the internet. If you don’t pay for it, your personal contact information could be used by marketers and spammers to send you unwanted emails. If you don’t mind receiving some extra spam emails, you can avoid paying for it.
4. Install WordPress
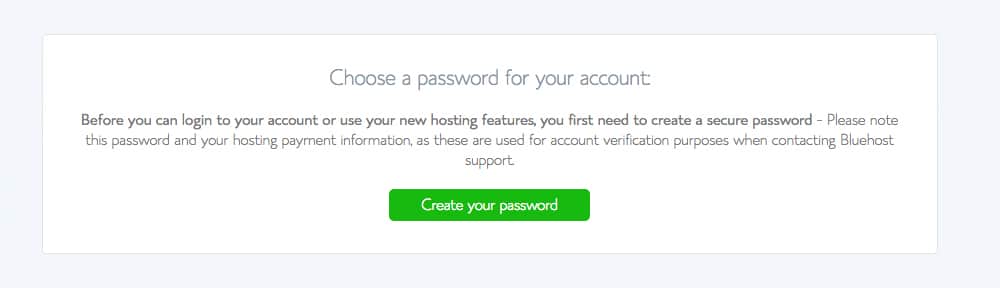
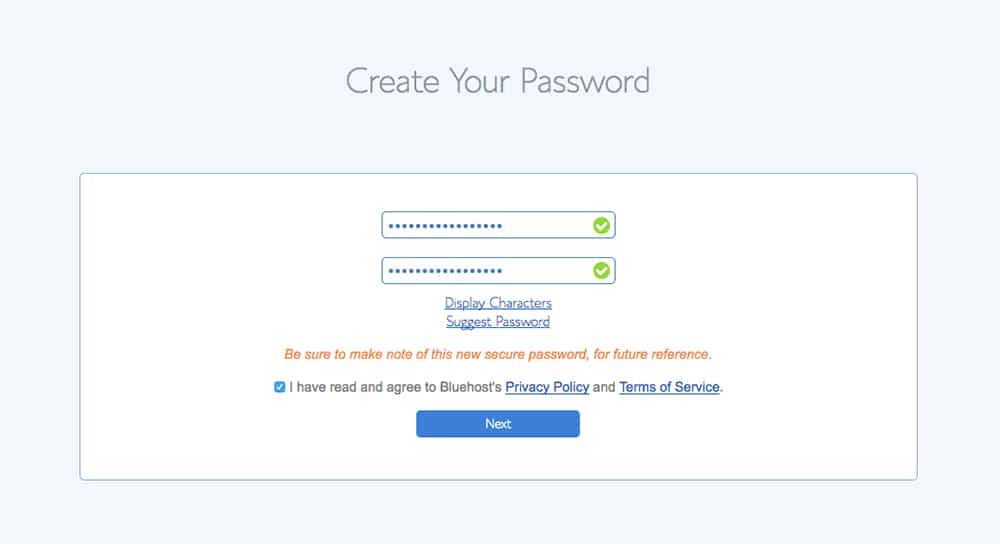
Bluehost makes it very easy to create a WordPress blog.
Bluehost will now automatically install WordPress for you. All you have to do is choose your password!
If you are unsure about what to do during any step, you can open Live Chat on Bluehost at any moment, and their technical support will be able to help in no time.
You almost started your blog! Yeah!
After you have installed WordPress and selected your password, Bluehost will give you the option to select a theme. We will do this later (step 6).
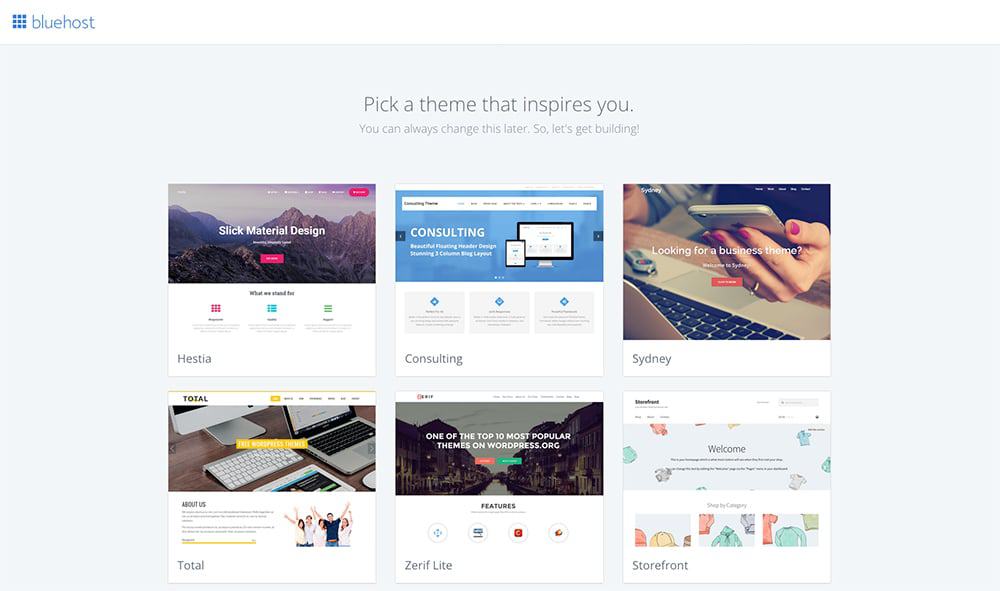
So, here, you can either select any of the themes or simply click Skip This Step below the offered themes.
Now you just need to click the Start Building blue button.

And you will be redirected to WordPress:
5. WordPress Tour & Settings
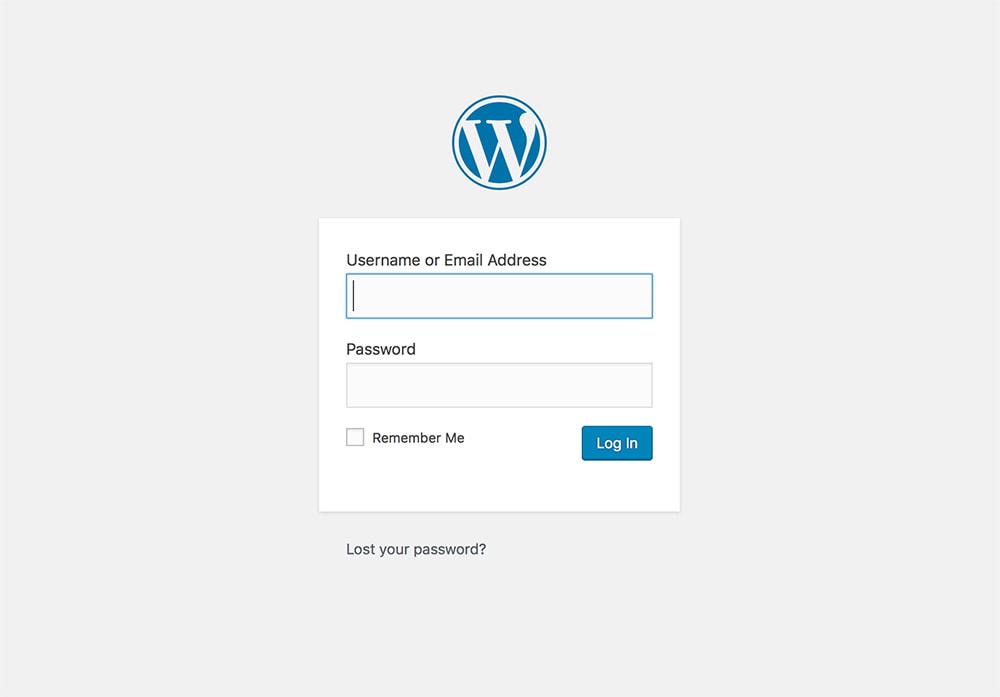
Login to your WordPress blog
To login to your website, you’re just going to type in the domain name and add wp-login.php to the end of the web address. It’s as easy as that.
So, for example, if your domain name was gatheringdreams.com, you would log in to your website from gatheringdreams.com/wp-login.php
The login page will look like this, and you need to use the same username and password that you created earlier in this tutorial.
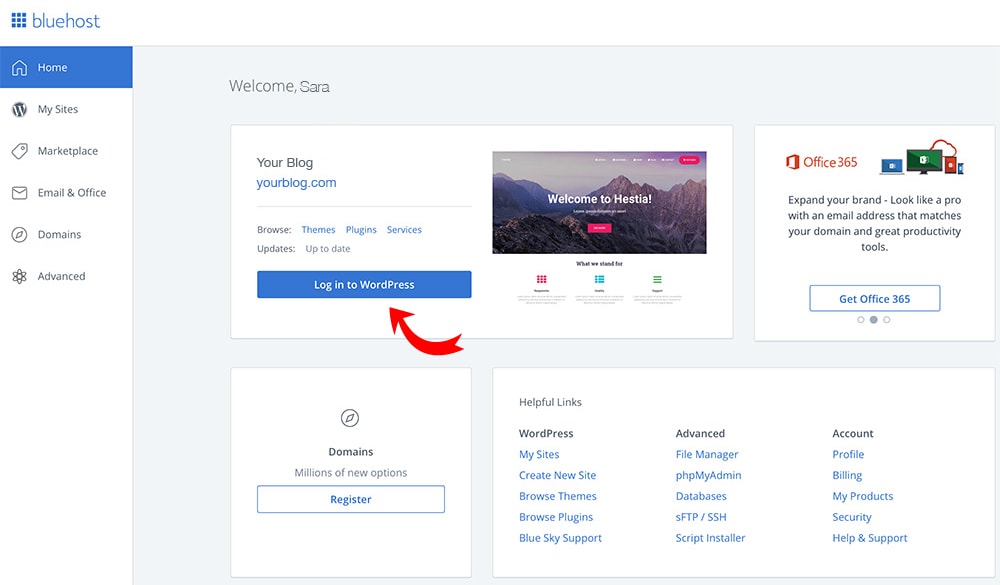
NOTE: For the first 24-48hours, you will not be able to log in to WordPress directly. This is because it will take some time to assign your domain and redirect your website to the correct web address. If you don’t see this screen, you can simply log in to your Bluehost account by going to https://my.bluehost.com/

And click on Login to WordPress:
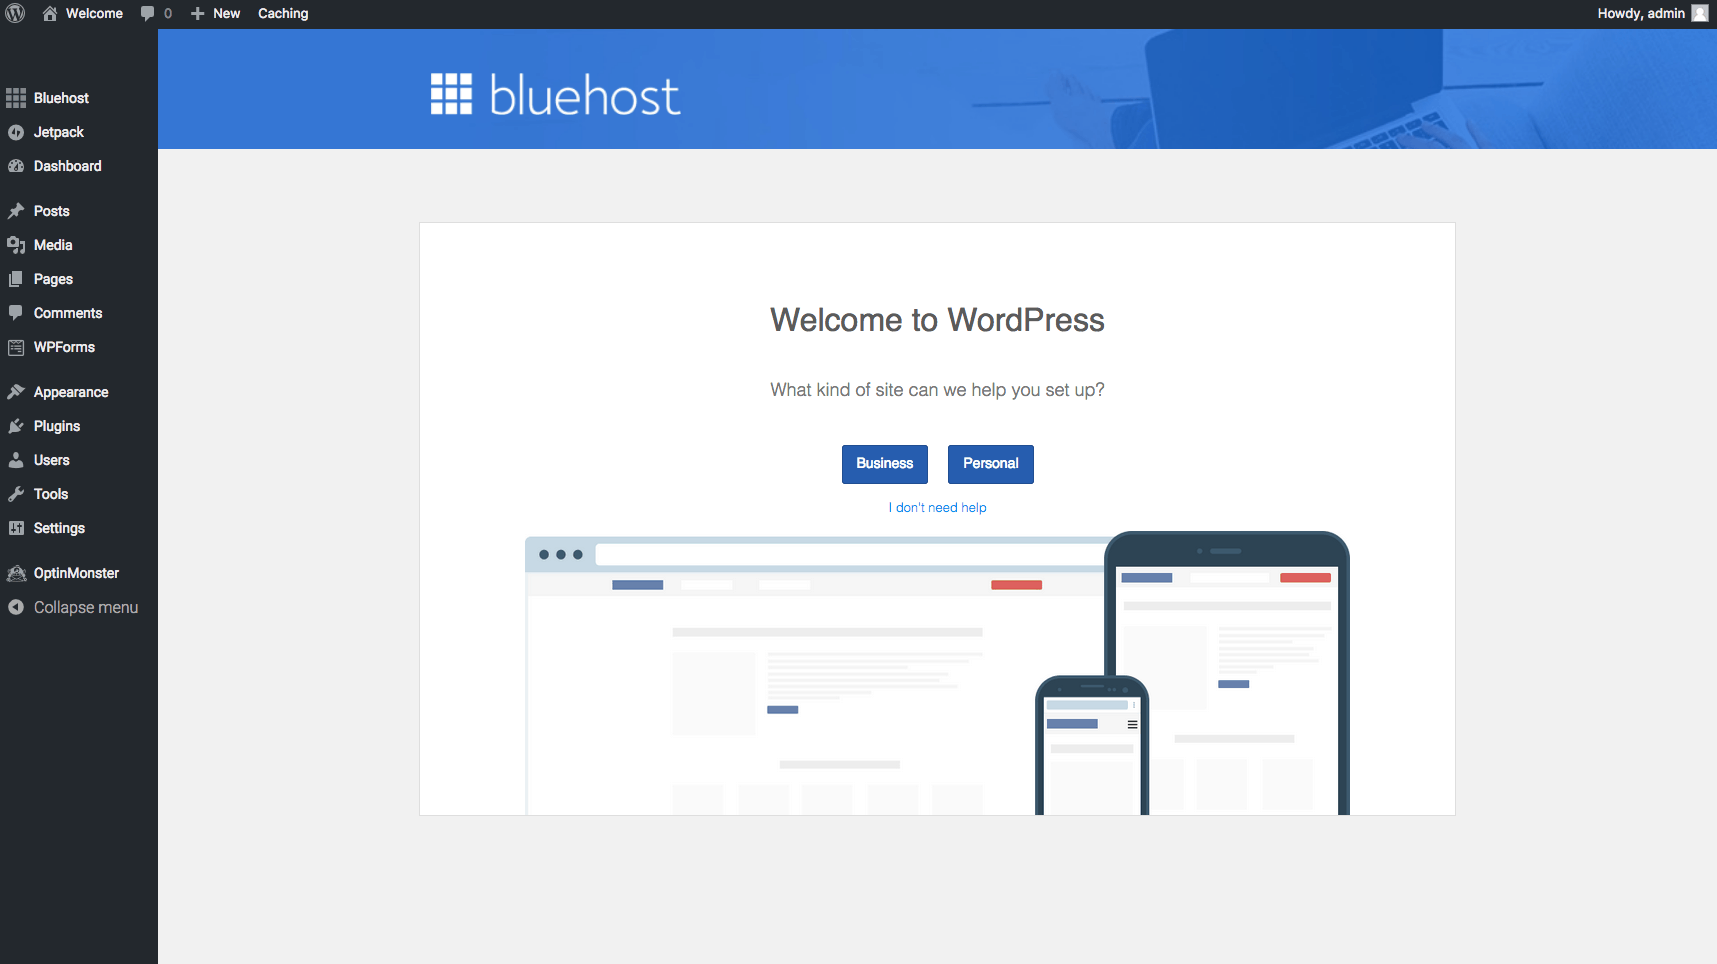
You are now logged into the WordPress Dashboard!
This will become your new best friend (or nemesis) for the next few weeks. I know it looks very complicated. And you will feel like it’s complicated for the next 3-4 weeks, but I promise it will get easier and easier!
It will look something like this:
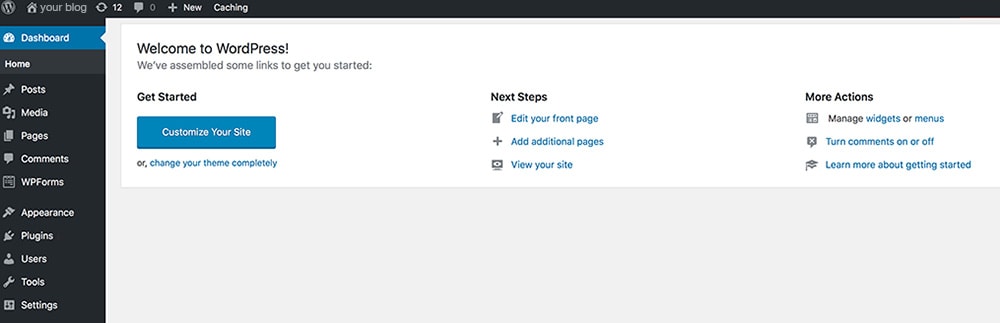
First thing first, you should familiarize yourself with the menu on the left:
Posts:
This is the tab that you’ll click on to write your new blog posts. It’s probably where you’ll be spending most of your time…you are a blogger now!
Media:
This is the library where all of the images that you upload to your website will be stored. You can add, delete, or edit images, videos, and audio right here.
Pages:
This is where you’ll create the different pages that you want to have on your website, including your About page, Contact page, and your Privacy Policy.
What is the difference between pages and posts?
WordPress posts have an official publication date and are displayed by date on your site’s blog page. They also have a more social aspect to them, as comments are enabled.
WordPress pages do not have a publish date and are meant for static, timeless content. Two common examples of content that should be a page are your site’s Contact or About pages.
Comments:
This is where you are going to get social! Here you can check, moderate, and respond to comments that are posted on your website. I think comments are critical as they are a connection between your readers and yourself. I make sure I personally respond to each comment I receive.
Appearance:
This is SUPER IMPORTANT. You’ll need to go here to manage the entire look and layout of your website. We’ll talk about this tab a bit more in-depth in a second. This is where you’ll find your themes, widgets, menus, customization options, and more.
Plugins:
Plugins are one of the most important benefits of using a self-hosted WordPress blog. A plugin is a piece of software that acts as an add-on to a WordPress website. Plugins can extend functionality or add new features to your blog.
I will share the essential plugins you need to install on your brand new blog in Chapter 7.
Users:
Here you can manage the users on your website. Just make sure your main login isn’t called admin. Hackers might try to login to your website, and it’s a lot easier for them to attack you if you use a standard username like admin. Change it as soon as possible for something less recognizable.
Tools:
This tab gives you the option to import/export data to and from other content management systems. Ignore it. I never used it in my blogging life.
Settings:
Your WordPress settings are crucial. As much as you might not understand exactly what you are doing yet, you must set up this tab correctly immediately, or it will be complicated to change things later.
Believe me on this one.
Let’s make sure you set things up right from the beginning!
Your WordPress settings: set it up right
You don’t have to worry too much about every tab under “Settings.” I don’t think I ever even clicked on some of them! But the two tabs you want to update straight away are under General and Permalinks.
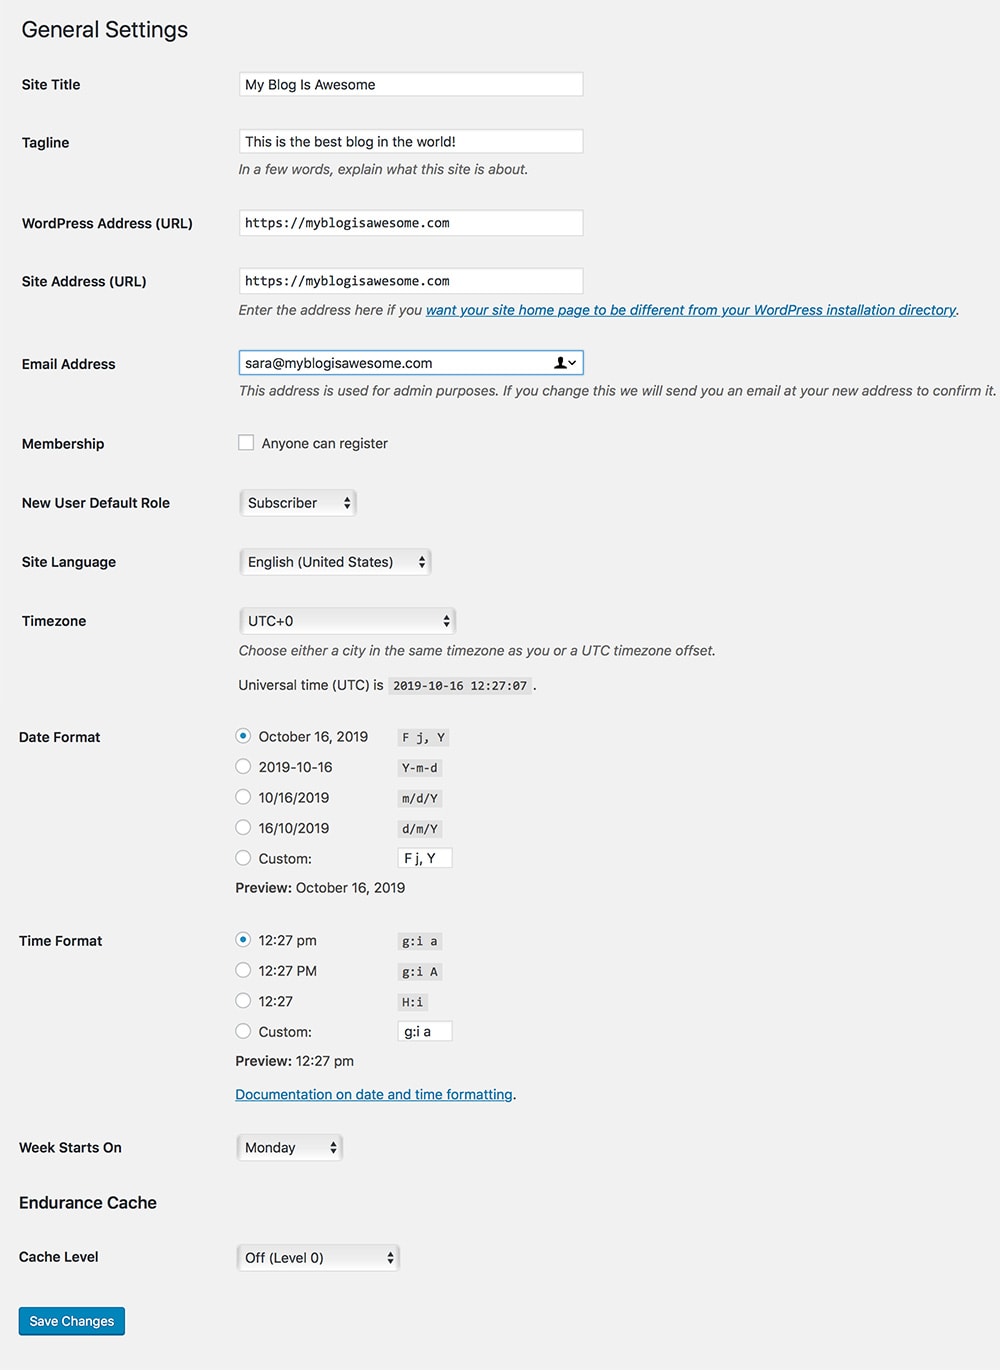
General
Site Title: This will be the name that you want to appear front and center when someone lands on your website. Mine is just Gathering Dreams, and that is what people see at the top of my homepage when they come to my website.
Tagline: This is a short one-liner blurb that tells readers what your blog is about. It appears right below your website name on your website homepage. You do not have to use a tagline if you don’t want to. It is 100% a personal choice, so don’t waste too much time here!
WordPress Address (URL) & Site Address (URL): These will both be your domain name.
Email Address: This is the main email address attached to your website as the primary contact address. You can set up your business email address through Bluehost in about two minutes. Just login to your Bluehost dashboard, go to Email & Office, go Manage, and set up your email account.
You can pretty much leave everything else here as it is or play around with the rest of the settings. It’s up to you!
Permalinks
First of all, what is a permalink?
A permalink or permanent link is a URL that is intended to remain unchanged for many years into the future. It’s the web address of each of your blog posts. Permalinks should be as user-friendly as possible to make it easy for people to remember them.
Why should permalinks remain unchanged?
After a particular post or page is published, the permalink for that page shouldn’t be changed without a very good cause (and in extreme exceptions). Permalinks should remain unchanged because any incoming links the post or page has from other websites will suddenly be pointing to a missing URL.
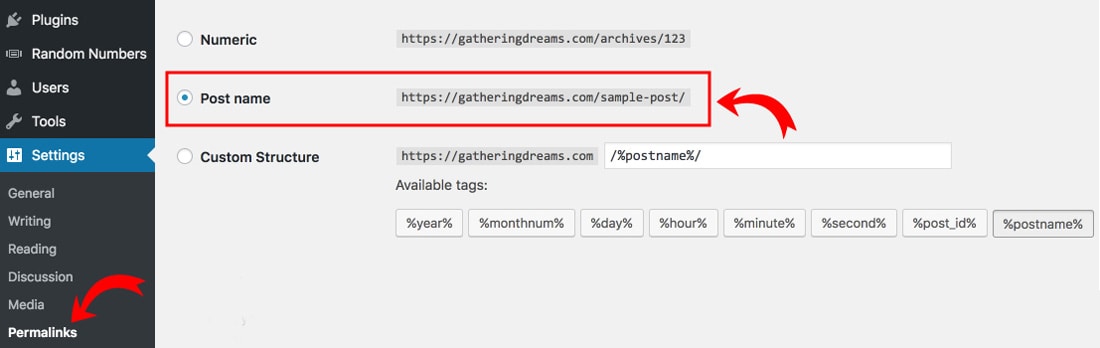
How to set up permalinks correctly
When you set up your WordPress blog using Bluehost, the permalink settings should already be set to publish new blog posts in the format of domain.com/post-name.
If your permalink settings aren’t already set to this format, it’s important to change them right now. That’ll help you rank better in search engines like Google because your title’s text will appear in each of your URLs.
In your WordPress dashboard, hover over Settings and navigate to Settings > Permalinks to make this adjustment. It should look like this here:
6. Select a theme
First of all:
What is a theme?
A theme defines how your blog will look. It provides the framework to create the styling of your WordPress site.
Most themes will provide you with:
- Page layout
- Colors
- Font styling
- Widget locations
- Navigation menus
You have plenty of options between free and paid themes, and you can absolutely start with a FREE theme until you find a high-quality premium theme that you love and can afford.
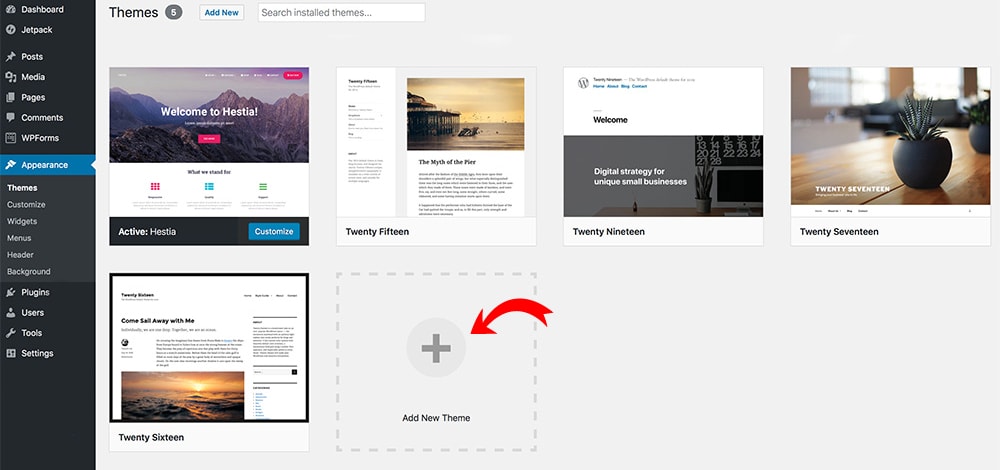
To find a free theme that you like, you can log in to your WordPress dashboard, click on Appearance, and click on Themes.
The themes that you have downloaded will be listed here. If you want to look for more free themes, you can simply click the big + button, and you will be able to pick between hundreds of beautiful free themes.
A few things to remember when you select a WordPress theme
Selecting a beautiful looking theme for your blog can be a lot of fun. But it can also be very time-consuming. And wasting time selecting a theme isn’t how you should be spending the first few days of your blogging journey.
The most important thing about whatever design you pick is functionality. Your blog needs to be easy to navigate, clean, and mobile-friendly.
Top things to look at in a WordPress theme:
- Keep it simple. A good theme needs to be easy to navigate, easy to read, and most importantly, it needs to allow people to share your posts effortlessly. Forget fancy fonts that you can’t understand, and make sure people can engage with your content by having social icons and sharing buttons.
- It has to be responsive. In this day and age, most people will look at your website on different devices. If your blog looks perfect on desktop, but it’s impossible to navigate on mobile or tablet, it’s not going to work out. No matter what theme you select, make sure you check it on mobile, tablet, and desktop. It also needs to work well on different browsers. So check it on Firefox, Safari, and Chrome.
- SEO friendly. There’s not much use in having a beautiful website if no one can find it! Make sure you read your theme’s small print. It needs to be optimized for SEO, or you will find it very difficult to appear in Google search results.
- Do they offer support? If something breaks and you don’t know how to fix it, is there some type of support?
No matter what theme you pick, read ratings, and reviews to ensure there are no glaring issues with it. And remember: you can easily change your theme later, with a few clicks. Being able to update and customize your blog’s look is one of the remarkable features of WordPress.
After saying all of this, my theme is based on the Genesis Framework as its foundation.
What Is The Genesis Framework?
When I started my blog, I kept reading about the Genesis Framework, and it took me a while to understand what it is. And also why I had to pay yet again for something else.
The term WordPress theme framework often refers to a code library that is used to develop a theme. Developers normally build their themes around frameworks to speed up the times it takes to design them and make sure the website’s basic functionalities are robust and easy to maintain.
Genesis is like the basic design of your blog. It’s made up of lines and lines of code that tell WordPress where everything is and allows developers to create beautiful themes on top of it. Honestly, you don’t necessarily have to understand exactly how it works (I don’t!).
The Genesis Framework is one of the best for price/quality and will provide you with a secure and search-engine-optimized foundation for your websites. It comes with built-in features like multiple layouts, high-security, mobile responsive pages, custom page templates, and lots of other cool features.
Once your site runs on the Genesis Framework, you can choose from various Genesis Child Themes, which is the design of your blog.
Here are a few of my favorite Genesis WordPress themes:
Foodie Pro
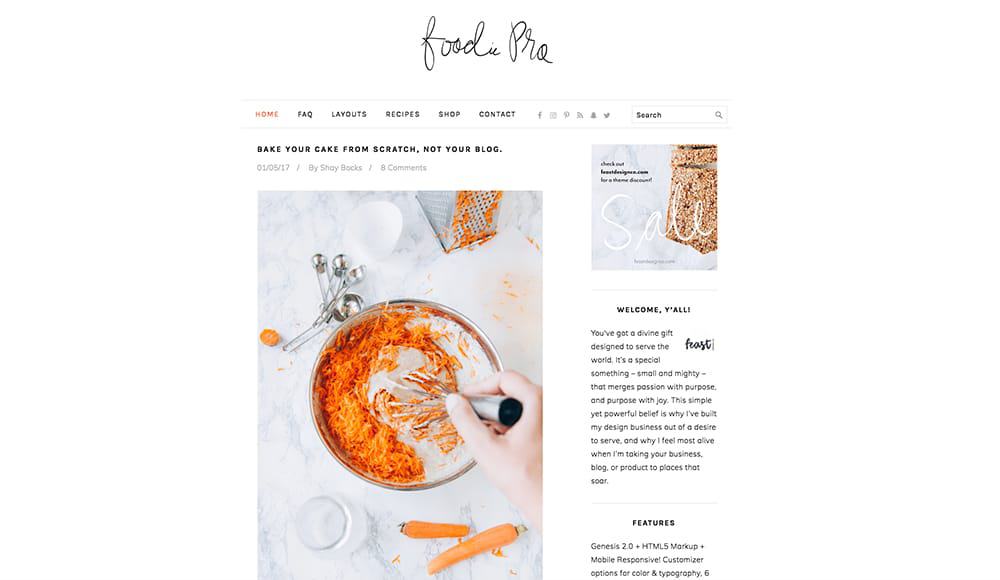
Foodie Pro is the most flexible Genesis theme. It has a sleek and minimal design and plenty of color and typography options. It’s a popular choice for top food and lifestyle bloggers.
Refined
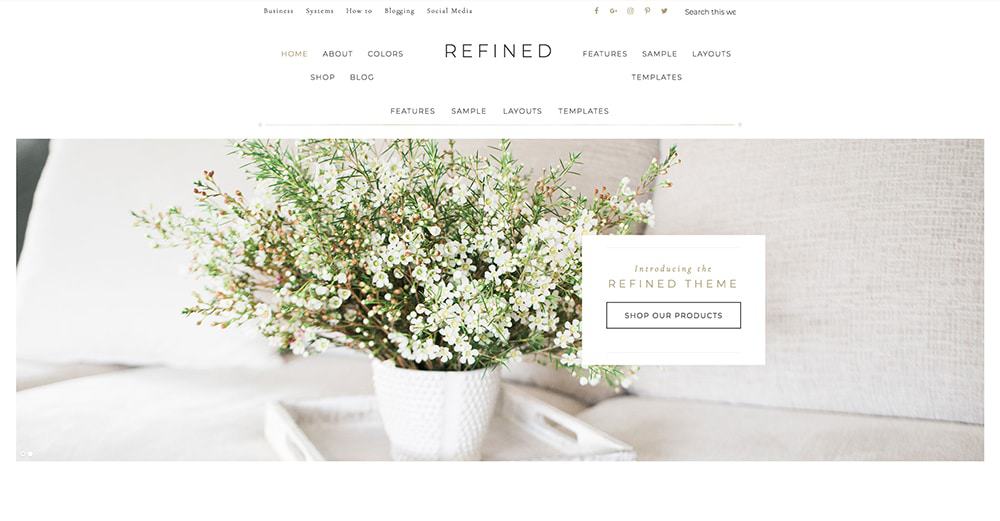
Refined will give you the perfect foundation for your blog. On it, you can showcase your products, you can integrate a shop feature, all while maintaining a simple yet elegant look.
TIP: I know that when you are going to start, you’ll be worried about your logo, your blog design, and many more things! Do not waste too much money by paying someone to create your logo, and don’t spend hundreds of dollars on a theme! No one cares about your blog design but you. People will find you and care mostly about your content and how your post will help them. Just make sure your theme is simple and easy to navigate. Once you start to make money, you’ll be able to improve your design and make your blog look more beautiful. The most important step is to take action and start!
Other frameworks you should look into
Genesis is what I still use after 4 years of blogging.
But WordPress has moved on quite a bit and there are a couple of other frameworks that are just as lightweight as Genesis and are much easier to customize.
Kadence: Kadence is a lightweight theme that will help your site load fast, but it also offers plenty of design customizations. It can be used on its own or with a child theme. You can try it for free for 14 days, and see if you like it. Have a look at some of their beautiful themes here.
GeneratePress: Generated Press is easy to customize with dynamic blocks and has lots of pre-designed themes you can choose from. It’s incredibly fast and offers stellar customer support. You can opt for a lifetime purchase or a year subscription model.
If you decide to purchase a theme, you will need to upload it to WordPress instead of installing a free one. Simply click on Upload Theme, select the file on your computer, and then follow the prompts to upload and activate your theme.
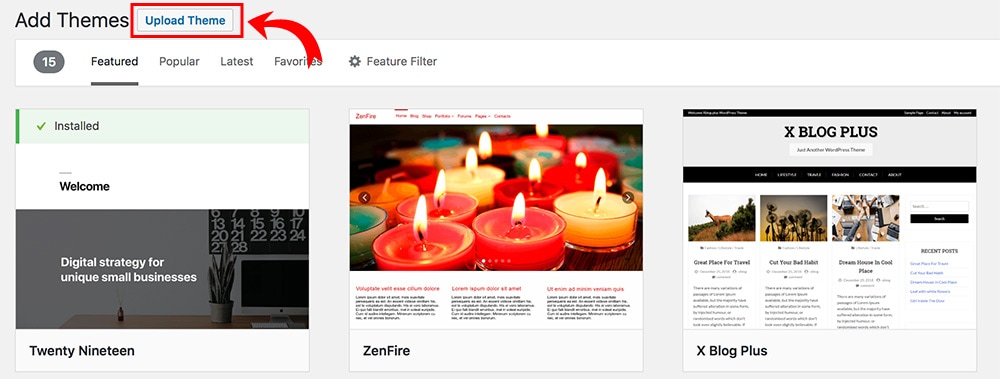
It’s really simple, I promise!
7. Customize the look of your new blog
Now that you have selected your theme, you can start to customize it. You can either click on the blue Customize button under the theme you have installed or select the Customize tab on the left, under Appearance.
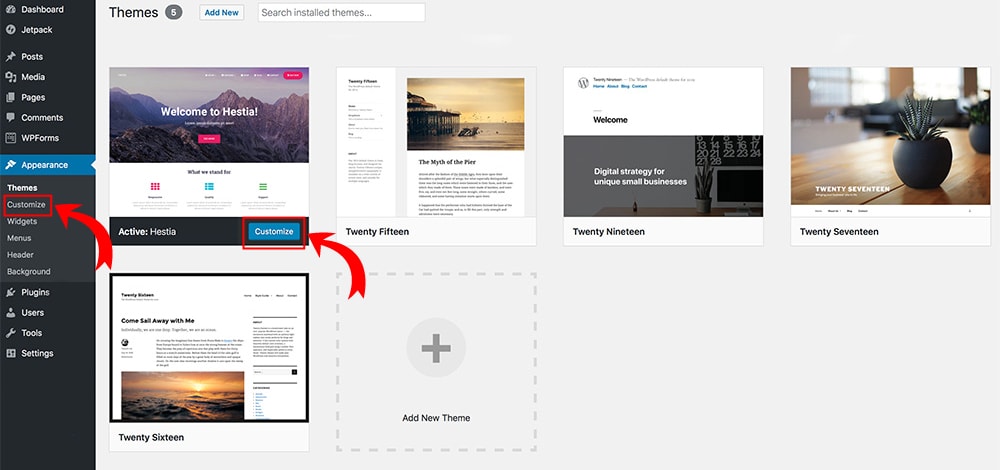
Each theme will have its custom settings, but you’ll normally see a page that looks a bit like this:

You will have your menu on the left and your blog on the right. The cool thing about this view is that you’ll be able to see the changes in real-time. You can also navigate your blog to see how the changes might affect each page or blog post.
Site identity
This is just another place where you can change your blog name and tagline.
Colors/Appearance settings
Here you will be able to play around with all the color settings of your blog, and sometimes fonts too. Make sure you select easy-to-read colors for your text but also your links. Links are vital, and you want to make sure people see them straight away (without being too much on their face).
Header/Footer options
Here you’ll normally be able to add your logo, add your main image or slides, and additional settings.
Menus
Your menu options will vary based on the theme you choose, but here you’ll be able to adjust which menu structure(s) will be assigned to your website.
Widgets
Widgets are simple elements you can use to build your website’s sidebars (and other areas, as well). They enable you to easily add text, links, and other types of information to specific areas (determined by your theme).
To add a widget to your site, you’ll need to log in to your dashboard and then navigate to Appearance > Widgets. You can read a bit more about widgets and how to use them here.
Additional CSS
If you know how to code, here is where you can add some custom bits of CSS (cascading style sheet) styling to your blog.
You should read all the instructions to customize your theme and play around with the settings you have to make it look like you want. Make your blog look like you have it in your head might take a bit of trial and error, but don’t stress out too much about it! You can always come back here and change it at any time.
WARNING: Your blog theme might not look exactly like the template you selected straight away. This frustrated me at the very beginning because I was hoping that with one click, everything will look sensational. But to replicate what you see in the theme demo, you will need to set up menus, pages, blog posts, and add images. Be patient. It will take a few days to get everything looking right. But I promise: you WILL get there.
8. Pages, posts, and categories
Now that you have set up your blog’s look, we need to start to set up the most important pages.
Pages, posts, and categories will create the basic structure of your blog. Like everything before, you can always change things, but it’s important to sit down and develop a good, easy-to-navigate structure for your blog.
Create a new page in WordPress
As I mentioned before, your website pages are the static pages that will remain on your website menu all the time. They normally don’t move from their place on your website, and they don’t change unless you go into your editor to change them.
Some pages I recommend you to set up from day one are:
- Your About page
- A contact page
- A Privacy Policy page
Creating a new page is pretty simple. You just need to select Pages > Add New, and you will find yourself on a page that looks like this:
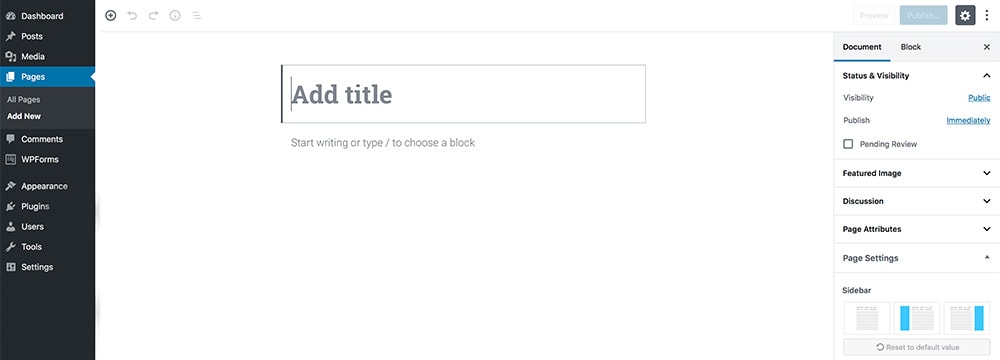
You can then just start typing. Remember to hit the button “Save Draft” from time to time, or you might lose your content. You can also use Google Docs to write your pages beforehand, and just cut and paste the text here when you are happy with it.
Once your page looks good, and you are happy, you just need to hit the Publish button. Scary!
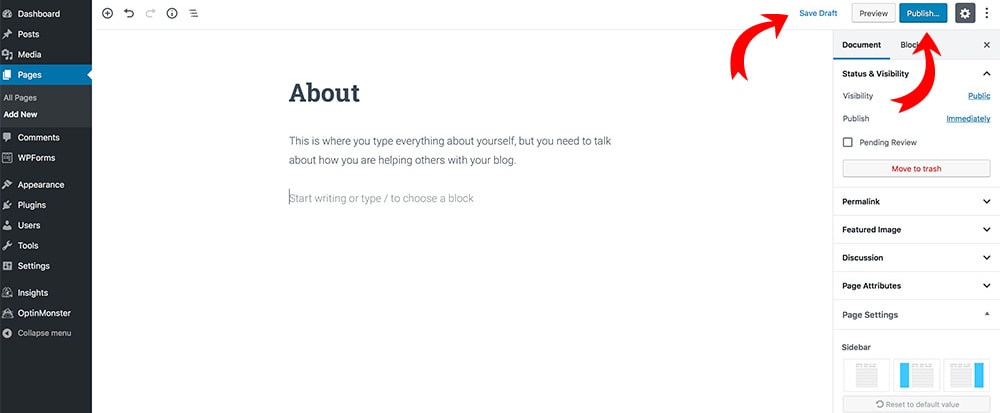
Remember, you can always come back here and change your content at any time. So don’t stress too much about what you write.
Your About page
Guess what? Your About page isn’t about you!
I can hear you saying: really? Yep, really! Your About page should be about what you are going to do for your readers, how you will help them, and what they are going to get out of you if they become your number one fans.
You should tell them how you are going to change their lives and why you will be able to do it.
How to write an About page for your blog:
Your About page is going to quickly become one of the most popular pages on your blog. When people read a blog post and are inspired by you, they’ll want to learn more about yourself. But really, what they want to know is how you are going to help them.
So, before you start writing about your cat and uploading your high school photos, you need to make sure you answer these questions:
1. Who is your blog for?
You need to make sure your About page lets people understand that they are in the right place. Who is your ideal reader? Whoever lands on this page needs to believe they feel like they belong.
You can either just tell them who your blog is for:
“I started Gathering Dreams as a resource to help people reach financial freedom.”
Pretty boring, right?
Or you can show them you understand exactly how they feel, tell your story as if you are telling their story. Be compassionate. Write about your struggles, and how you solved them. Make them understand that you know exactly what they are going through, you’ve been there, and you can help them.
Which option do you think you should go for? I will let you decide.
2. Why should they bother listening to you?
You need to make sure you tell your readers how you are going to help them. Will they have to go through a journey? Where should they start?
Let them know what your achievements are. Whether you have changed your life by moving to a plant-based diet, or your passion for crochet helped you get out of your stressful day-to-day life.
3. What action should they take next?
After they finished reading your About page, what should your readers do? Subscribe to your newsletter? Go through a series of posts? You need to spell it out for them. You can’t just have them hanging in there. If they loved your story, they probably want more. Give them more!
Some other incredibly useful resources you should read about writing a compelling About page:
How to Create the Perfect About Page
How to Write a Sparkling ABOUT Page
How to make your blog legal
As soon as you install some plugins on your blog like Google Analytics, or you start making money with affiliate marketing, you will be collecting some type of information from your readers in the form of cookies and other settings.
If you want your blog to be legal, you need to make sure you inform them of what type of information you are collecting and/or that you are making money from the links you have on your website.
The three important legal pages that every website needs are: Privacy Policy, Disclaimer, and Terms and Conditions.
You don’t necessarily have to have 3 different pages. I have all this information on one page. But you need to make sure the information on this page/s is accurate and based on what you have installed on your blog. Simply cutting and pasting a Privacy Policy from another blog is not going to work.
Disclaimer: I am not a lawyer; therefore this is my own personal advice. If you want to be sure your blog is legal, you should double-check with a professional.
What is a Privacy Policy?
A Privacy Policy is a statement that discloses all of the ways you gather, use, disclose, and manage a reader’s data. It fulfills a legal requirement to protect a reader’s privacy.
Privacy policies are legally required. If you collect personal information from your website visitors, you need to have a Privacy Policy posted on your site.
How to set up your privacy policy
WordPress makes it really easy to set up a Privacy Policy page. You simply need to go to Settings > Privacy, then click on Create A New Page. WordPress has a link to a handy guide that will tell you exactly what you need on your Privacy Policy page.

Check out this post for more information on privacy policy:
Sample Privacy Policy Template
You can also find an alternative free privacy policy generator here:
Privacy Policy Generator
What is a Disclaimer?
A blog disclaimer explains that others should not rely on the information on your blog and that you cannot be held legally responsible for anything you publish on it.
To put it simply, a disclaimer protects you from lawsuits. By having a disclaimer, you “disclaim” or “deny” liability for the content you publish on your blog.
You will need to tailor your disclaimer to your specific niche and blog. For example, if you are a personal finance blogger, you will have to say that people should not rely on your financial information. Or, if you are talking about nutrition, you need to make sure people understand that your posts should not be taken as medical or health advice.
You need to make sure your disclaimer is written in plain English and is easy to understand.
Check out this post for more information:
How to Write a Blog Disclaimer
What are Terms and Conditions?
Terms and Conditions help your readers to understand what they should expect from your blog.
A Terms and Conditions agreement is like a how-to guide for the use of your site. It covers topics like sharing intellectual property, community standards, use restrictions,, and protecting you from liability.
Whether you share travel guides or blog about recipes, you should consider having one – even if you don’t make any money from blogging.
Here you can also protect your work and let people know it’s covered by copyrights. You can also share information about how you monetize your blog and disclosures about your affiliates.
Check out this post for more information:
Sample Terms And Conditions Template
Categories
Your blog post categories are your main topics for your blog. The category labels are used to organize your blog topics and make them easy for your readers to find. They are normally the main sections on your blog’s menu and are used to easily group all your posts to make them easier to sort and find.
For example, on Gathering Dreams, I have 3 main categories:
- Food
- Travel
- Money
To keep your blog layout and navigation simple, you shouldn’t have more than 3-4 main categories.
To create a new category, you simply go under Post > Categories.
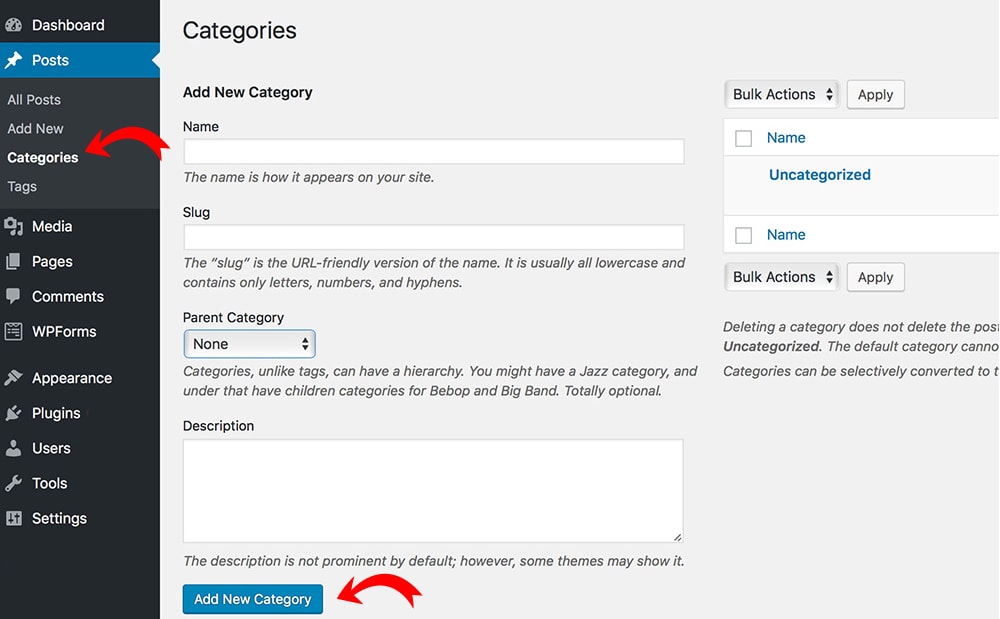
Name
You category name, for example, Food.
Slug
This is the URL of that specific category. For example, for gatheringdreams.com/category/food/, the slug will be simply food.
Parent Category
Each category on your blog can have a parent category.
On my blog, for example, I have 3 subcategories for Money:
- Make Money
- Save Money
- Blogging
When I created these three categories, I chose Money as their parent category.
Description
You can write a small description of what the category is about. Some themes will display this field. Others won’t. Just check your theme’s settings and find out if it’s necessary.
After you filled in all the information, just click on Add New Category, and you are set to go.
9. Menus and navigation
Let’s be clear. Most people will find your website through a search engine like Google or social media like Facebook, Instagram, or Pinterest. They will land on a specific post, and 90% of the time, they will move on and click away.
Your job is to keep them on your blog as long as possible. One way to do that is to make it easy for them to navigate your content. This is why your menu is very important: it’s how people will find your content.
Your menu needs to be clear, simple, and uncluttered. And easy to get to and to navigate. Your theme often dictates the look of your menu. Make sure you select a theme with a very easy-to-use menu, or your readers might struggle to get to your content.
Once you have created your essential pages, creating a menu in WordPress is very easy.
Just go to Appearance > Menus and you can create them in just a few clicks. You will be able to add pages, categories, or even posts to your menu.

But remember: just KEEP IT SIMPLE.
ACTION PLAN
- Pick a domain name. Pick a name that is easy to remember, make it easy to spell, keep it short and if possible, pick a name that relates to what you want to write about.
- Buy your hosting. If you want to make money blogging, using a self-hosted plan is the way to go. Simply click here to start.
- Familiarize yourself with WordPress. Look around your WordPress dashboard and update the basic settings.
- Customize the look of your blog. First of all, select a theme. If you don’t want to spend money, a free theme will be fine to start with. And yes, you can make money using a free theme. Just make sure it has a fully responsive mobile version, and it’s simple and easy to navigate. Remember: user experience needs to go above everything else.
- Set up the essential pages. Before you write your first post, make sure you have all the legal pages and your About page set up. Now it’s also time to think about your categories and main menu for navigation.
Take 30 seconds right now to get your domain name and hosting with Bluehost, the blog hosting provider I’ve used to start Gathering Dreams. By using Bluehost as your web host (see Step 3), you can get a FREE domain for the first year as long as you buy 12 months worth of web hosting.
CHAPTER 3
The secret to creating viral content

How to write blog posts that people will actually want to read
How exciting! You made it this far!
I know all this stuff seems overly complicated, but I promise, if you stick with me for a bit longer, it will all make sense, and you will be able to start a blog the right way. And when I say the right way, I mean you will be able to make money.
Because let’s face it: you aren’t doing this just for fun!
And to make money, you need to make sure you get your content in front of people. As many people as possible!
Indeed, you don’t need to chase page views to create a blogging business, but at the very beginning, heck yes, bring the people on!
So, do you want to know the secret about creating viral content?
Write useful, in-depth content that people WANT to read and share.
Yes, it’s that simple.
What’s not that simple when you are starting is finding out what this type of content is.
But that’s why you are here. And I am going to tell you exactly how to do that.
Who are you writing for?
People won’t come back to your blog over and over because you write often or because your blog looks good (although that can help). They will come back and keep reading your blog because you write helpful content, and give them value.
We talked in Chapter 1 about the importance of having a niche. Once you know the main topic/s of your blog, it’s much easier to narrow down the type of content you can write.
And once you know the topics you will talk about, you need to make sure you know exactly who your people are.
For example, let’s say you are starting a new blog on vegan recipes:
- Are your people seasoned vegan that want delicious recipes in their life?
- Are your people just starting to move to a vegan diet, and you are going to help them in the transition?
- Are your people vegan for an ethical choice, but they miss their cheese and meat, and you are going to help them with delicious, indulgent substitutes?
As you can see, it’s easy to say I have a vegan blog. But deciding who you are going to help will have a massive impact on what and how you will write your posts.
Make sure you nail down who your tribe is. And whenever you write a post, remember that you are writing it to help them, no matter what the topic is.
How to pick a topic for your blog posts
So:
You now know who you are writing for. You need to find out what your people are interested in.
And how do you do that?
You could just sit down with a blank piece of paper and start writing all the possible topics that come to mind. Some could work; some might not work. And you can go on like that for months. Hoping to pick the right topics for your blog posts.
OR:
You could simply write remarkable content about what people are already looking for!
BIG DISCLOSURE: When you are looking for ideas for your blog posts, you are just looking for IDEAS. You need to put your spin on the topics you find with this research, and you need to write 100% original content. You cannot simply copy other people’s posts. If all you are trying to do here is come up with a copy-cat blog, you won’t be around for long. And you won’t make any money. You will simply be wasting your time. Originality and personality are what is going to make you stand out. Full stop.
1. Look for topics ideas on Buzzsumo
BuzzSumo is a powerful tool to help you to understand which topics receive the most social shares.
And if a topic gets a lot of social shares, it means it’s popular. This means people want to read more and more about it.
Normally BuzzSumo is a paid tool, but if you create a free account, you can get a few free searches month (but not many, so make them count).
First, brainstorm some topics and ideas related to your niche. I am going to use vegan lunch ideas.
Then simply type your topic here:

You will then end up on a page like this:
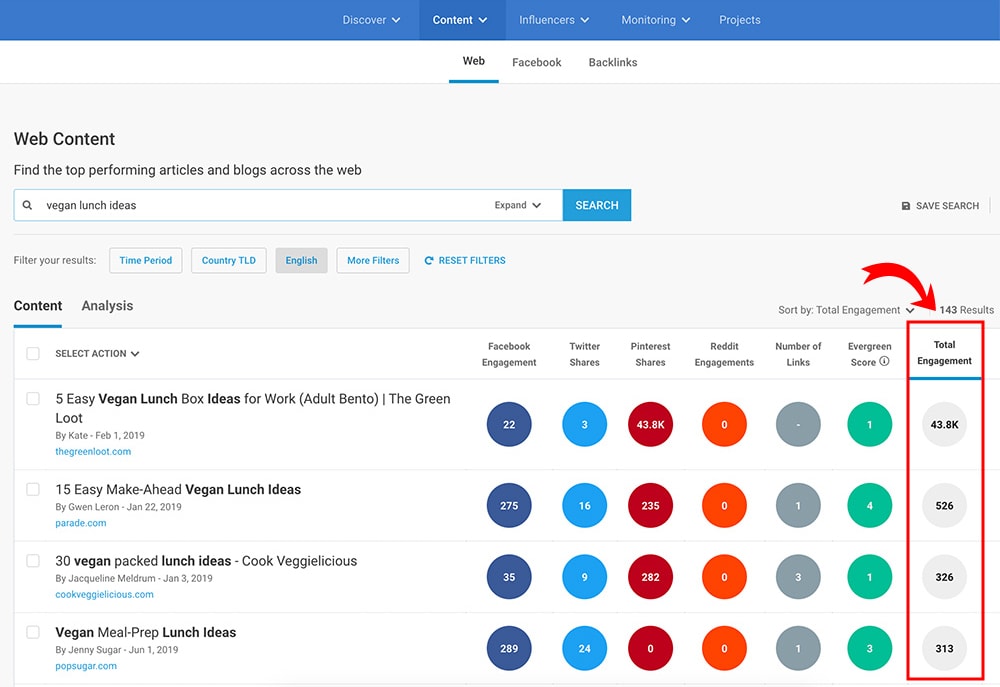
The free version of BuzzSumo will only show you the top 10 pages with the most social shares. This will give you an idea of the type of content that works on that particular topic and also a list of websites in that particular niche that does well.
2. Spy other blogs/websites you love
This is super important. You need to find out who is already doing what you want to do out there. And who is successful at doing it. You might already have bloggers that you love and follow, but don’t stop your research there. You will need a list of at least 20-40 blogs to start with.
And your research will never stop! I still look for inspiration today. And your inspiration doesn’t need to stop around your niche either. For example, if you are a travel blogger, you can look at travel blogs, but you can also look at bigger websites like the travel section of The Everygirl for inspiration.
Find the top articles on these blogs
The top blog posts fall into 3 categories:
- Most shared articles.
- Most profitable (for product sales or affiliate sales).
- Most searched articles on Google.
So how do you do that?
There are several ways to do that.
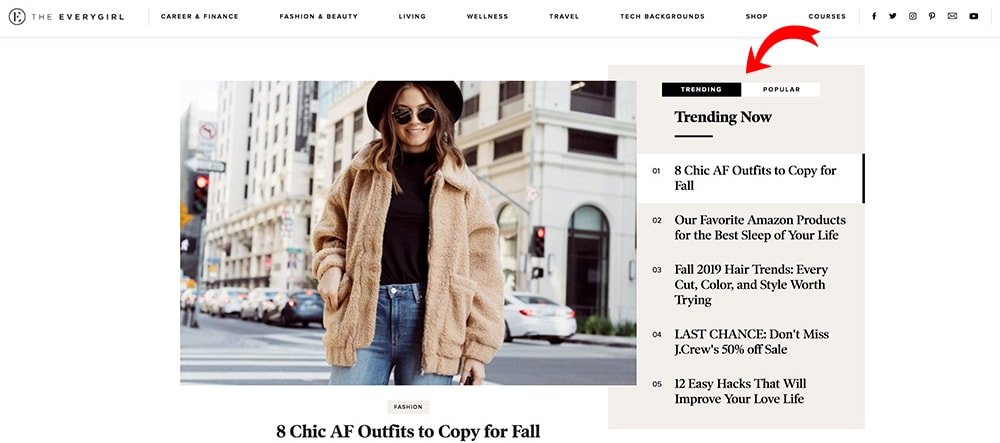
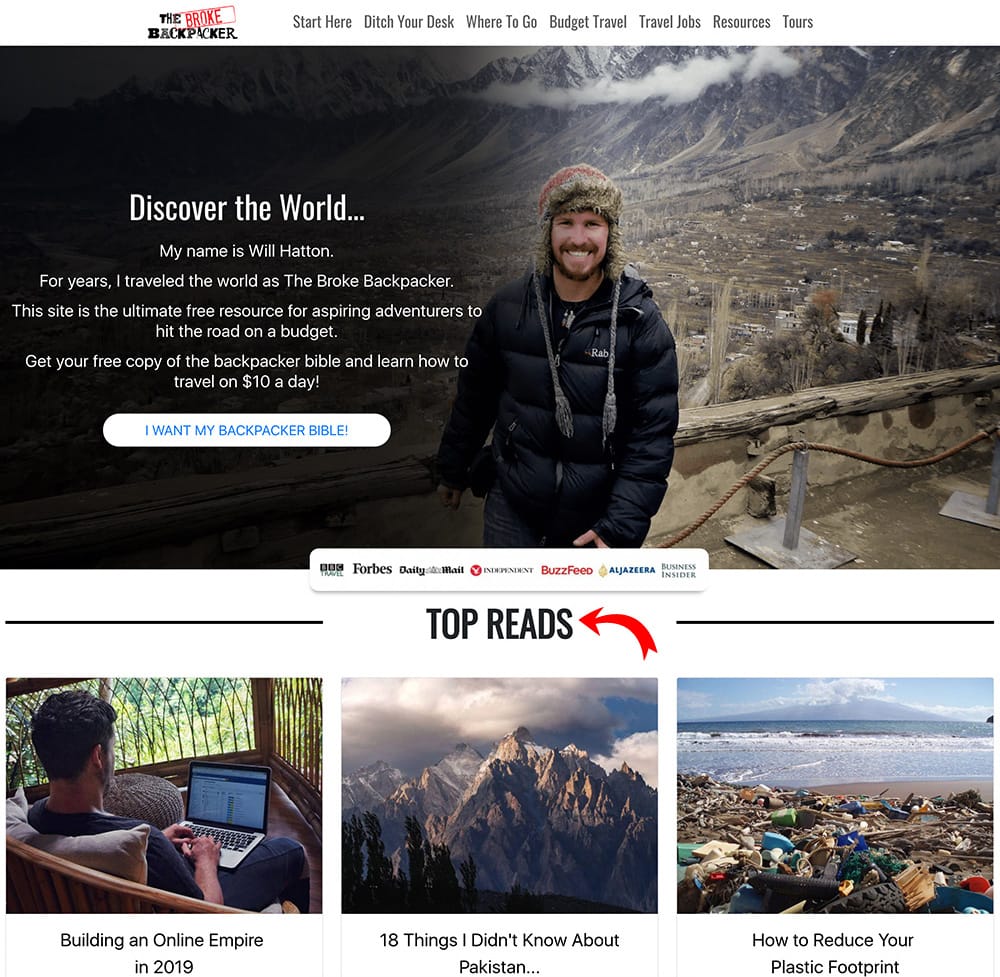
Most popular and profitable blog posts
Most blogs and websites might have an Our Most Popular Blog Posts section somewhere on their blog. Or a Start Here” section in which they collect their most popular content. This will give you some solid ideas to start with. If these bloggers decided to highlight these articles, there could only be 2 reasons:
- They make them a lot of money, and they want you to click.
- They bring them a lot of traffic.
Have a look at the examples below.
The Everygirl
The Broke Backpacker
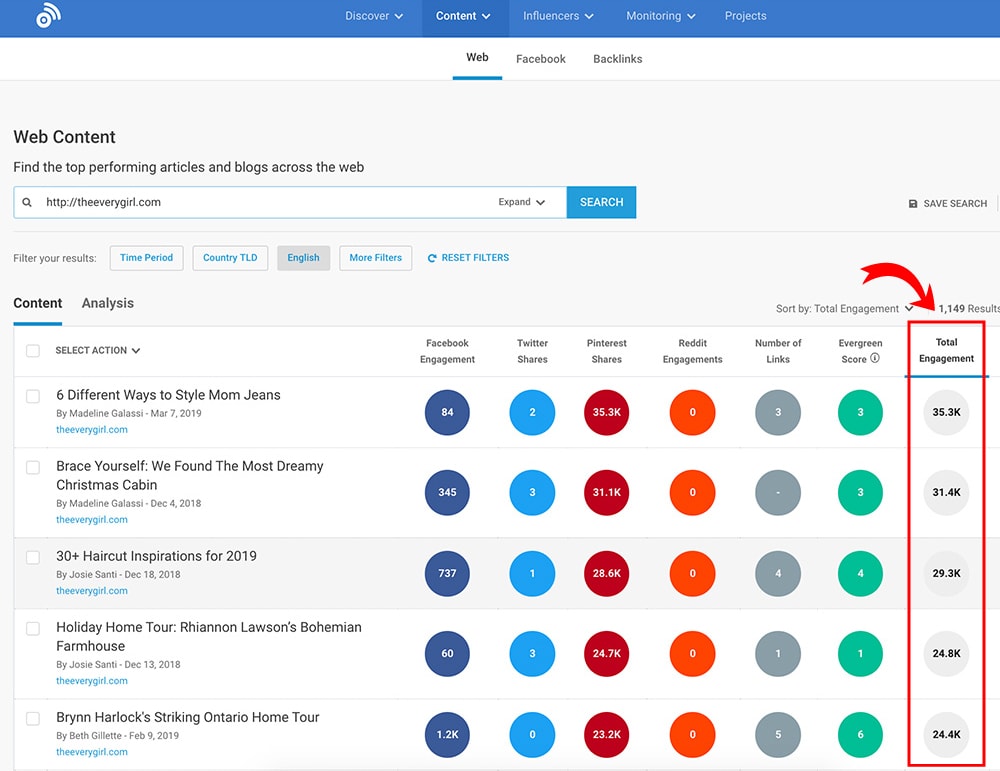
Most shared articles on a website
You already know that BuzzSumo is great to validate your content ideas. But you can also use BuzzSumo to find out exactly which blog posts received the most shares on any website in the last year.
Simply type the name of the blog you want to check, and you will be able to see the top 10 articles that have been shared on Pinterest and/or Facebook on that specific blog.
Are these topics you could write about?
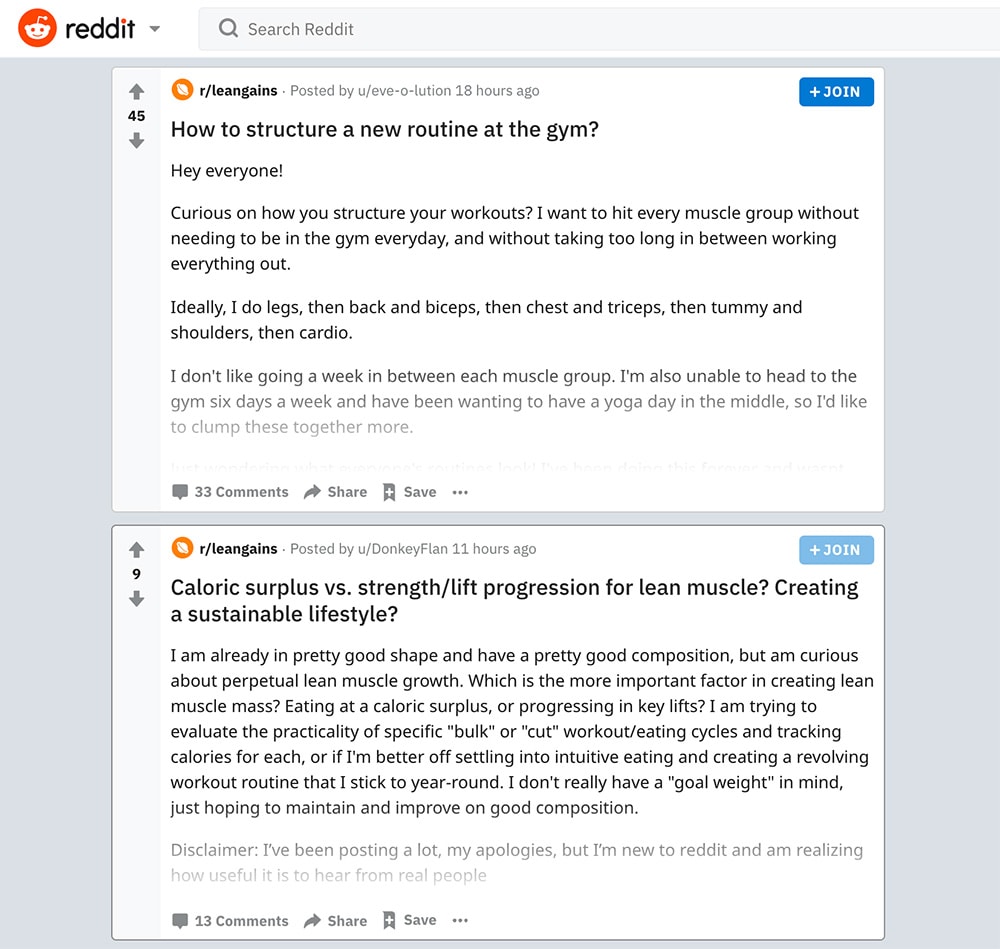
3. Look for topics on websites like Quora or Reddit
Websites like Quora and Reddit are inspiring places to find ideas. Online communities are incredible resources for finding hot topics and questions that your target audience has.
For example, when I head over to Quora and look for the Intermittent Fasting subreddit, I see a lot of questions about how to start and its benefits:
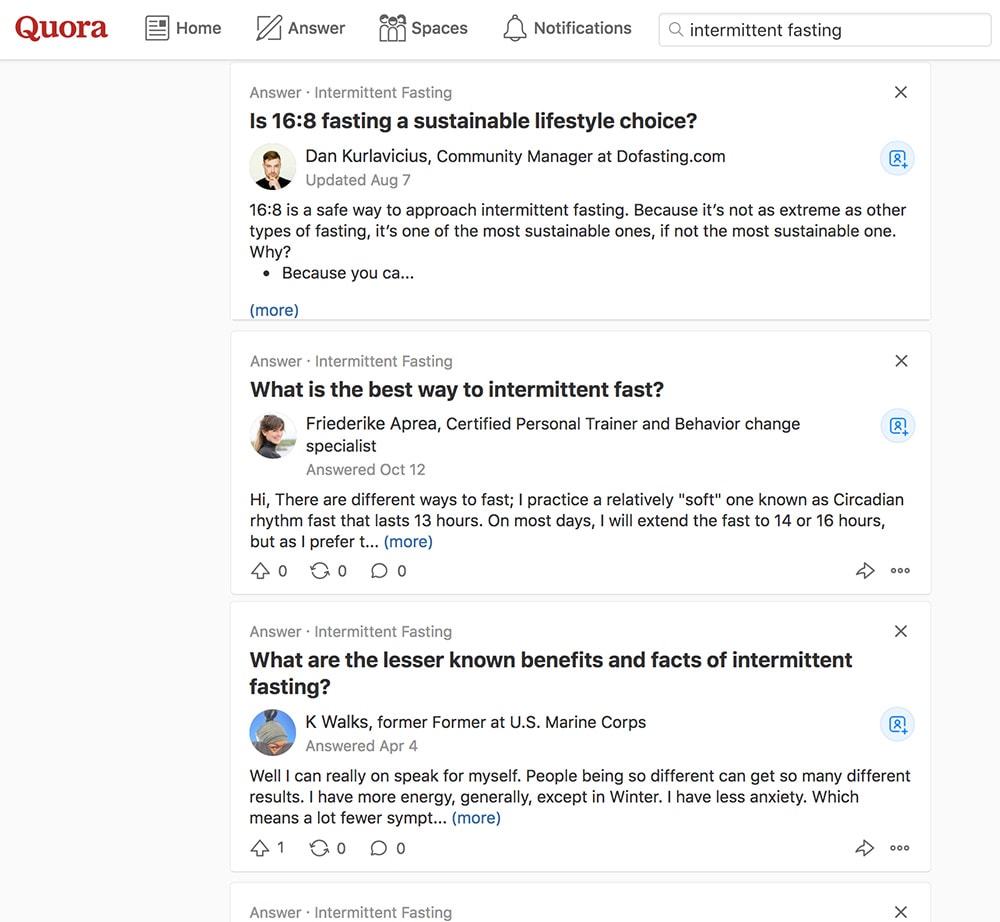
Why is this going to help you?
Most people ask questions on Quora because they can’t find answers on Google.
This means there’s a massive opportunity for you to create content around that question.
You can use the same steps on Reddit:
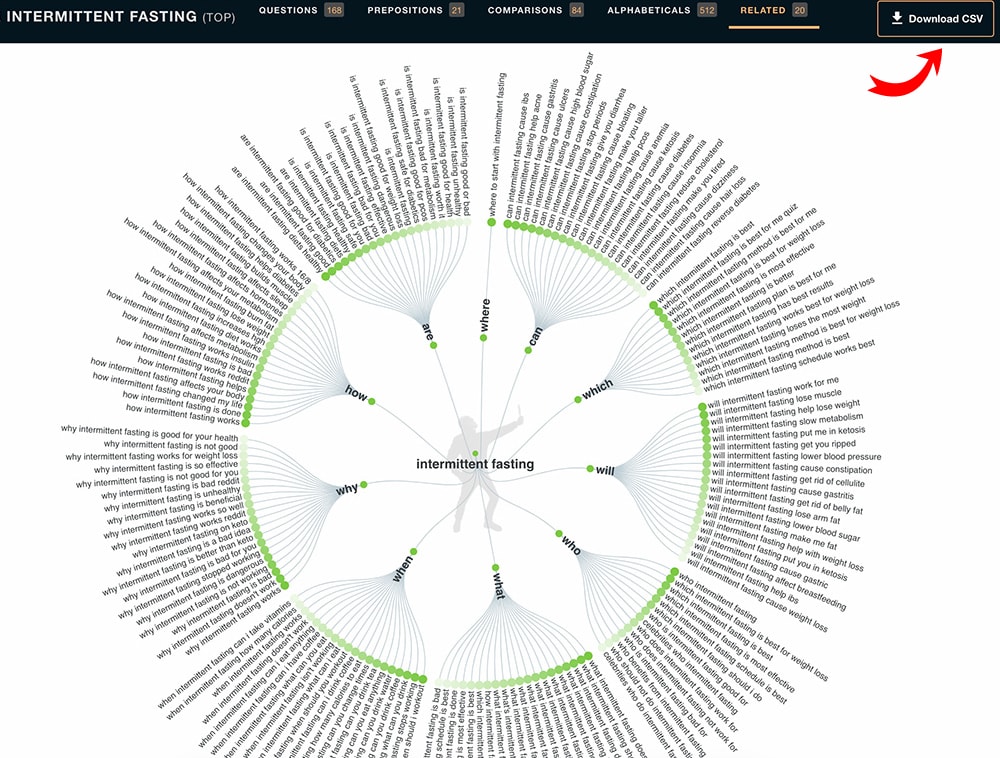
4. Use Answer The Public
Answer The Public is an inspiring website that combines searches from Bing and Google on any specific topic and visualizes it in a sort of search cloud.
You type in your topic or keyword, and it generates all of the questions people are asking regarding that keyword. You will also be able to download a .csv file with all these topics ideas.
4. Pinterest
This is one of my favorite methods to discover popular topics, especially when you start. As I will explain in Chapter 4, Pinterest will become your best friend to generate traffic on your blog, especially for the first 6 months to a year.
And if you want to be successful at generating traffic with Pinterest, you need to pick topics that are popular on Pinterest.
First of all, pick a few ideas related to your niche. Then type those ideas on Pinterest. Let’s say I want to write about saving money.
As soon as I start typing saving, Pinterest suggests a series of topics. These are the hot topics on Pinterest!
As you can see, Pinterest suggests:
- saving money tips
- savings challenge
- saving money
- savings plan

You can then select one of the topics, and Pinterest will suggest some other popular keywords on the top bar:
- frugal living
- college
- debt
- Disney
- etc.
You can click on any of them.

Up until a few months ago, could easily check how many times each pin was shared. This gave you a good indication of how popular a topic was.
Now Pinterest doesn’t give you that option anymore, but I have a workaround that I find pretty useful.
Normally the first 10-15 pins that appear on the top search are the most popular.
Click on one that catches your eyes and go to the actual blog post.
Here I am using one of my pins as an example:

Go on the website SharedCount (yep, it’s 100% free) and enter the blog post URL and click on Analyze URL.
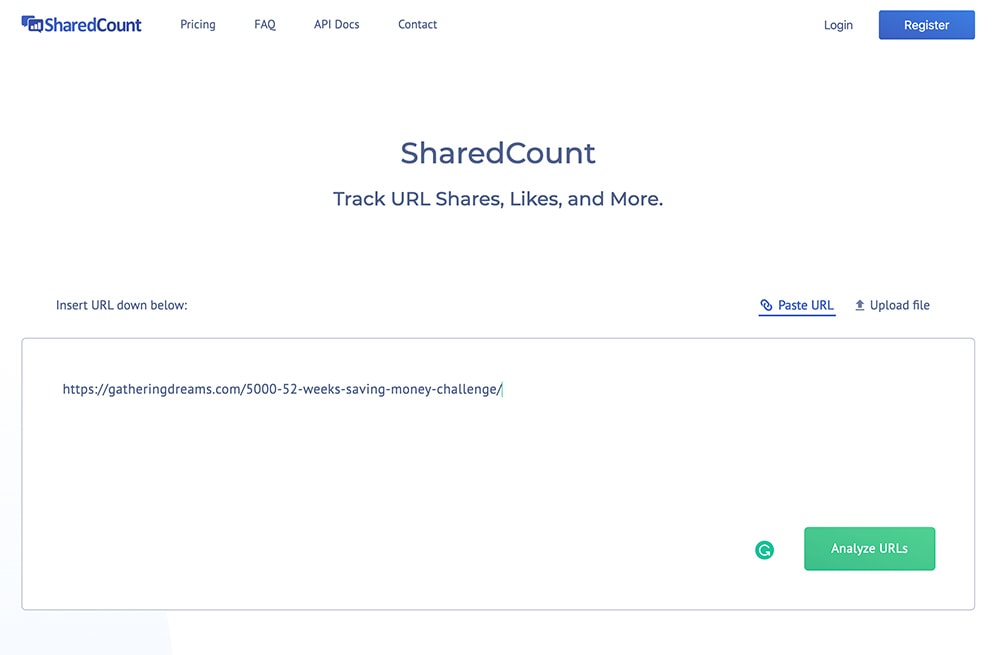
SharedCount will give you an idea of how many times that post has been shared. I find that this isn’t 100% accurate, but it’s helpful enough to know if a topic is popular. Plus, it gives you the number of times a post has been shared on Facebook, which can be extremely useful to know if your target audience hangs around there too.
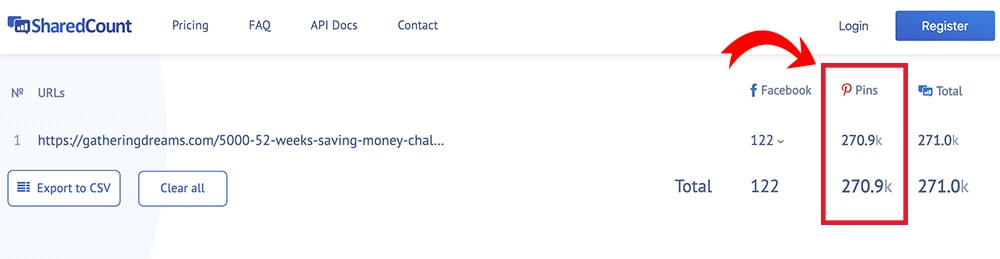
You want to find topics that have been shared at least 2000-5000 times.
And this is how you find popular content on Pinterest.
5. Google
Ok, if you don’t know anything about Google search and SEO (Search Engine Optimization), don’t worry. It’s not as complicated as it sounds. And I will explain a bit more about it in Chapter 5.
All you have to know right now is that finding out how many people look for a specific topic in Google every month can give you a big advantage as you can write about something people look for.
When you look for a topic on Google, you need to look for a keyword.
What is a keyword?
A keyword is simply the search term people type in Google when they are looking for something. A keyword is a word that describes the content of your post.
Let’s say you want to write a basil pesto recipe. You want to find out how many people look for a basil pesto recipe.
There are 2 tools I use for that:
Ubersuggest (free version)
I LOVE Ubersuggest. It might not be as accurate as some paid tools (like Ahrefs or SemRush). But it’s free! And when you are just starting, nothing beats free.
There is also a paid version, but when you are starting out, the free version will be good enough!
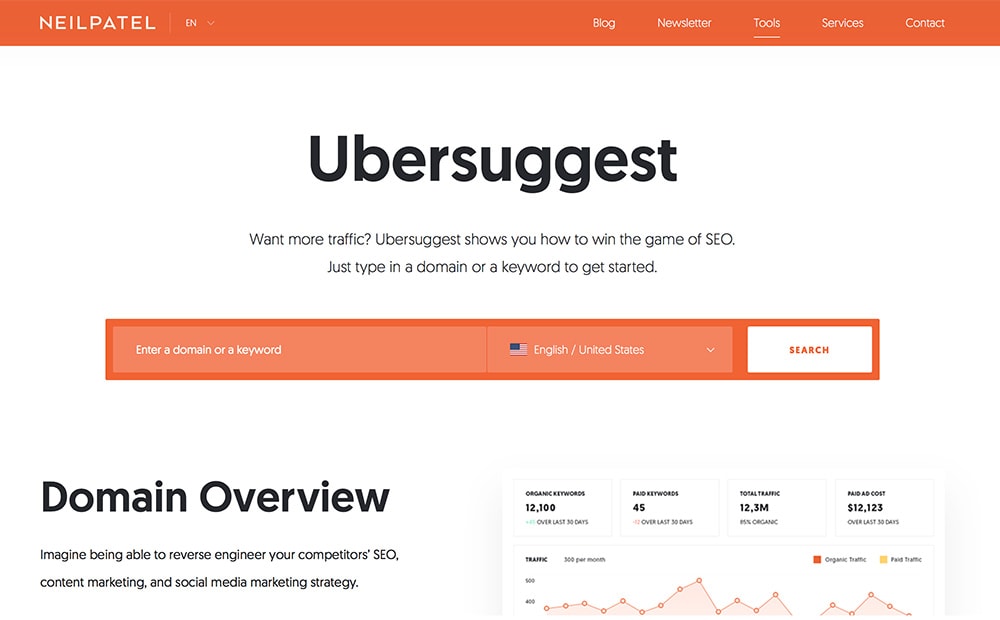
You simply click here, type in the keyword you are looking for (in our case, basil pesto recipe), and you will see something like this:
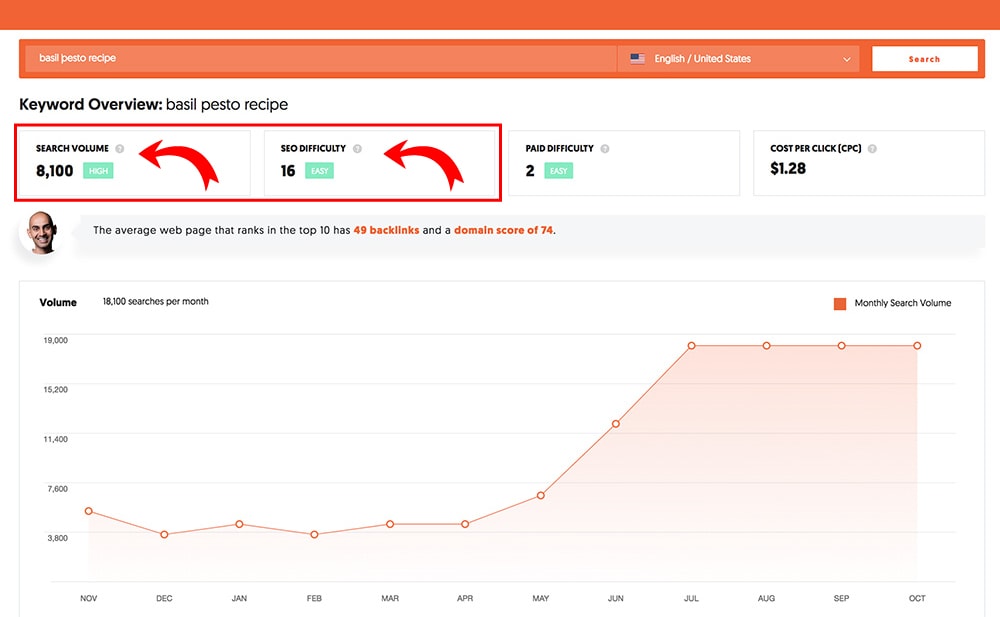
All you should care about for now is:
Search volume: the number of people looking for that keyword every month. I normally look for keywords that are in the region of 1,000-5,000. But some bloggers are doing really well targeting lower volume keywords.
SEO difficulty: this will give you an idea of how hard it is to show up in Google searches for that keyword. 1 is super easy, 100 is pretty much impossible. The higher that number is, the more competitive it is going to be. When you start, I suggest you don’t pick any keywords with SEO difficulty greater than 30-40.
What I love about Ubersuggest is that it gives you ideas on other potential keywords at the bottom of the page. And you can also see which blog posts received the most social shares for that keyword.

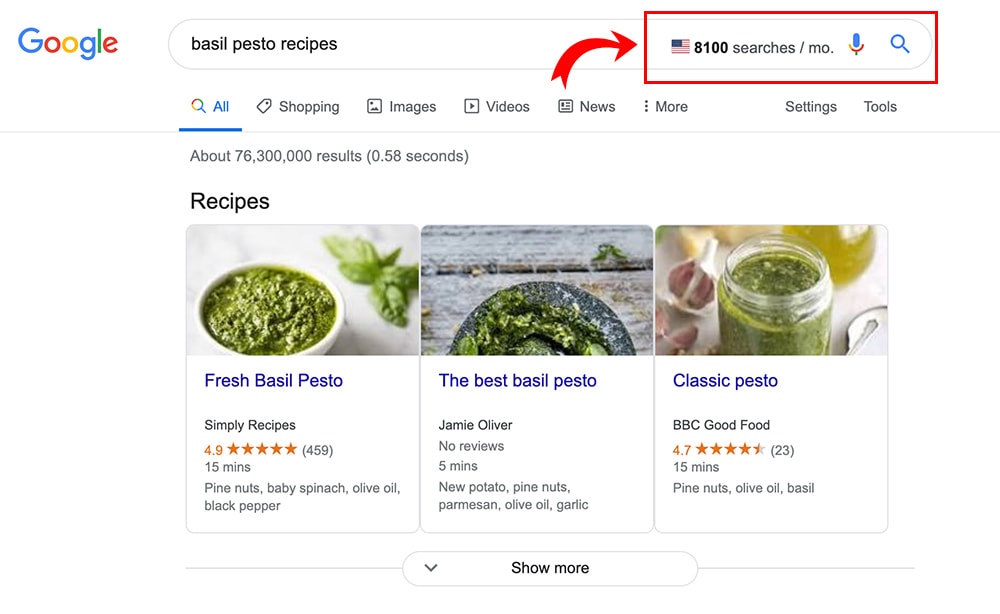
Keyword Surfer
Keyword Surfer is a Chrome and Firefox extension. You can download it here.
The brilliant thing about Keyword Surfer is that it’s 100% free, and it gives you the search volume on Google directly. And it also gives you some other keywords ideas and related keywords on the screen’s right-hand side. I find it really handy.
NOTE: You might notice that the search volume on some keywords, is quite different in Ubersuggest and Keyword Surfer. Which one is correct? Unfortunately, search volume is just an estimate, and each software uses different algorithms to get a result. I wouldn’t stress too much about it, as long as you can find a keyword with a healthy search volume and low difficulty.
Organize your ideas
So you now have a much better idea about finding out topics you would like to write about.
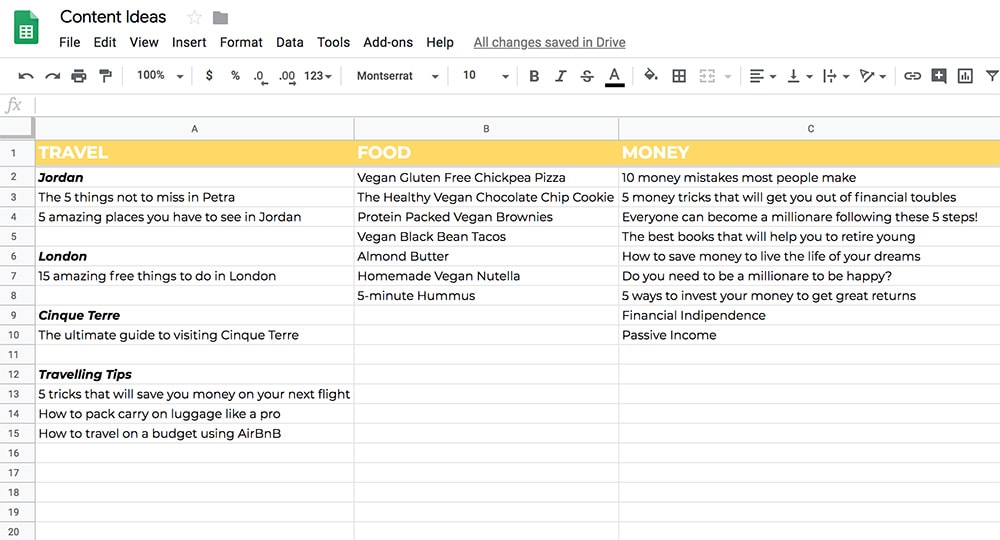
My tip is to write all these ideas down in what I call a Content Idea Worksheet:
- Brainstorm topics: start by writing down topics relevant to your niche, that you think your readers will find useful.
- Use the 5 tactics above to come up with more specific ideas: at this point, you need to narrow down the topics a bit more. If you know you will write a vegan pasta recipe, you might want to know if it’s going to be a vegan pesto pasta recipe or a vegan meatball pasta recipe.
- Group similar ideas together: make sure you are not doubling up on content that is too similar. Group similar topics and discard ideas that you think might not work for you.
- Put all your ideas in a spreadsheet: now that you have all these ideas, you can simply write them down in a spreadsheet and come up with a content calendar.
My Content Ideas Worksheet looked like this when I started Gathering Dreams:
No matter what blog posts you start with, remember:
You need to make sure all these content ideas are useful for your readers and will answer questions to help them solve a problem.
Now you are ready to start.
How to create your first post
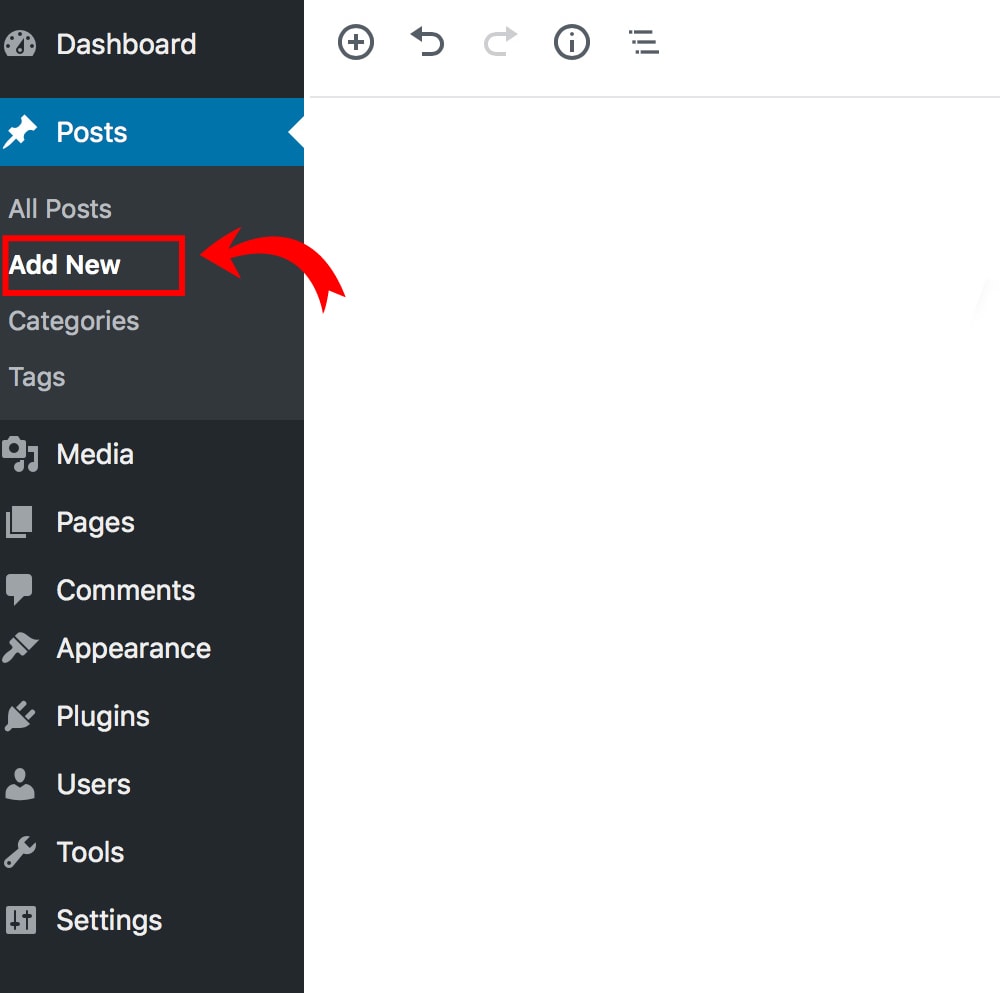
Once you’ve decided on the first blog post you want to write, you’ll navigate to the Add New Post section from your WordPress Dashboard.
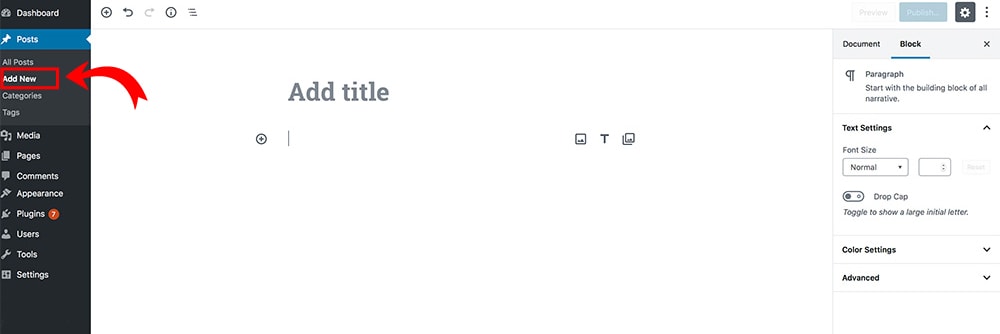
Go to Posts > Add New which will look like this right here:
You will find yourself in front of a blank canvas. You can simply write a title and start to type away. This blog post here will go more in-depth on using the new WordPress editor, Gutenberg, to write blog posts.
Remember to do 2 things straight away:
1. Save a draft as soon as you pick a title
2. Change the permalink to something easier to remember, as close as possible to your keyword:
Trust me. This will help you to show up in Google searches more.
For example, in our case, instead of having an awful long permalink called:
https://gatheringdreams.com/15-amazing-free-things-to-do-in-London
We should change it to something more like:
https://gatheringdreams.com/free-things-to-do-London
You can only change the permalink after saving a draft and before you hit the Publish button. Once your post is live, it’s much more difficult to change it without using redirect plugins and other things you don’t want to get into right now!
You also want to make sure you select the right category for your blog post before you hit publish (although this is much easier to update at any stage).
The secret power of your headlines
Want to know a magic trick?
Learn how to master effective headlines, and you will skyrocket your traffic.
Headlines can be more important than your post.
And you know why? Millions of blog posts are published each day. So your headline must stand out. Grab attention. If people don’t click on your headline, you can write the most magnificent epic post, but no one will read it.
What normally works to create a successful blog post headline is:
- Start with a number (10, 32, 55, or 101) to capture a reader’s attention. Research shows that headlines with odd numbers can get 20% more clicks. Worth knowing.
- Use a combination of emotional, common, uncommon, and powerful words to make the headline flow nicely BUT avoid cheesy click-bait headlines that detract from your content’s value.
- Use questions in your headlines.
- Add parentheses to make it stand out more.
- Leave an air of mystery to tempt people to click.
- But make sure your headline isn’t misleading, or your readers will be disappointed.
If you are not sure about how to write a powerful headline, look at other bloggers in your niche. Check out big publications like BuzzFeed. They generate millions of clicks with their catchy blog titles.
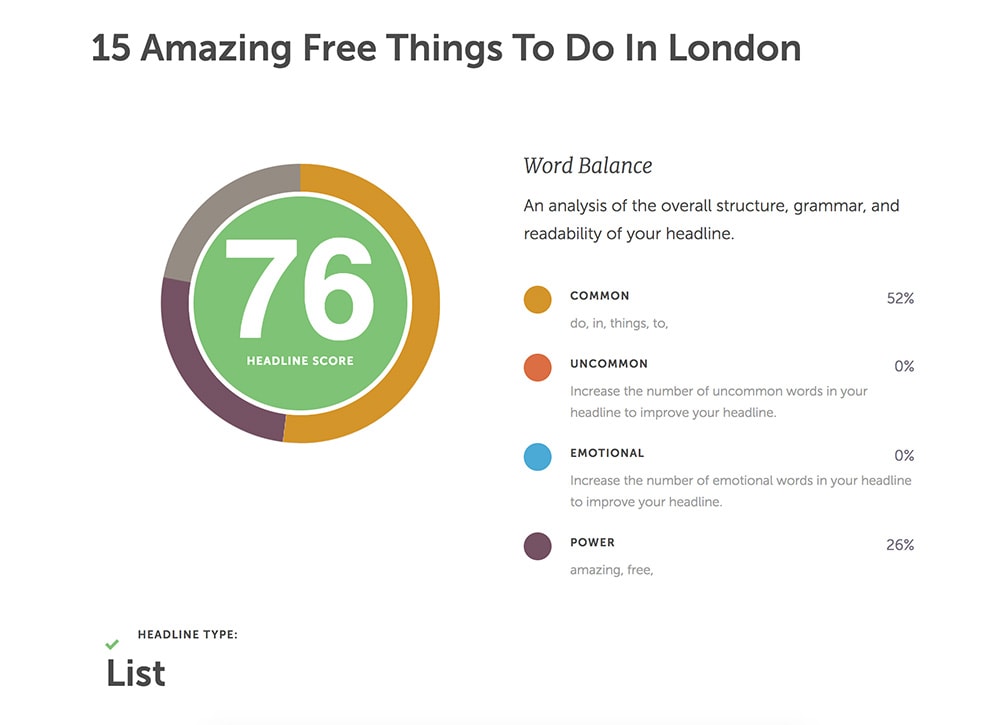
When I write my headlines, one tip I use is to write 4 or 5 and then check how powerful they are by using the free headline analyzer tool from CoSchedule. I love it —you just paste in the headline you’re thinking about using, and it gives you a score on a scale of 0 to 100 (with 100 being a perfect headline), based on their analysis of millions of headlines.
Top articles you MUST read before you write your headline:
We Analyzed 100 Million Headlines. Here’s What We Learned
Here Are The 101 Catchy Blog Title Formulas That Will Boost Traffic By 438%
47 Headline Examples: Steal These Nifty Formulas From Popular Blogs
How to structure your post
As much as blogging is based on informal writing (write as you would talk to your best friend), you need to make each blog post appealing, compelling, and easy to read.
For each post, you need to identify the problem that your readers want to solve. You also always need to produce quality content. That should be your #1 priority. It’s much better to write 1 post a week thoroughly researched and with in-depth, useful content than 3 average blog posts.
For each blog post you write, you need to make sure you hit all of these points:
1. Irresistible headline
Yep, we talked about this before. Your headline is the first thing people see. Don’t be boring, or you might lose people straight away. Make your headline catchy and clickable.
2. Beautiful images
We live in a visual world. Pictures help to break up text and help to connect with your readers more.
3. A catchy introduction
You have one or two sentences to convince readers your new post is worth their time. Or else you’ll lose them. Make sure your introduction is cool enough to make them want to read more.
4. An easy-to-read layout
Break up your blog post into readable paragraphs. And add sub-headers to make it easy to follow. Readers get bored quickly. And looking at a giant wall of text is intimidating and can make people leave your blog.
Add bullet points and use bold and italic to break up sentences.
Which one of these 2 posts do you find more appealing to read?
LAYOUT 1
LAYOUT 2
5. A conclusion
Many bloggers don’t write a final paragraph. They share their tips and just end like that.
But remember: a powerful ending can make a massive difference between a good post and an epic post.
- Use your ending to create a connection.
- Instigate action: what should your reader do after they read your post?
Read this for more tips on how to end your post.
Top articles you MUST read before you write your first blog post:
SEO Copywriting
Storytelling in Blog Posts: How to Add Sparkle and Delight Readers
COPYWRITING: The Definitive Guide
How many posts should you have on your blog when you launch it?
It’s totally up to you. I started Gathering Dreams with around 15-18 posts, which were equally divided per category. Some people suggest publishing your blog with just one post, which is an option.
In my case, having around 15 posts helped me in many ways:
- My blog looked legit from the start: with 15 posts and something to read in each category, people landing on my blog felt I had been around for a while.
- I had several posts to promote on Pinterest,, which helped increase my traffic and helped me earn money from the first month (a staggering $3, but the most rewarding $3 I ever earned!).
- I could apply to Google Adsense and several affiliate programs from the start because it looked like I knew what I was doing (so not true!).
But it is also important to remember that the sooner you launch your new blog, the faster you’ll learn.
If I had to do it all over again, I would probably start with 5-10 posts.
How long should each blog post be?
There isn’t a right length or wrong length for a post.
But remember:
People generally do not read blog posts for interest, but rather to find a solution or learn something. This means everything you write needs to help them to answer their questions. This can mean anything from 1,000 words to 10,000 words.
It depends on what problem you are trying to solve.
If you are writing a pesto recipe, you probably won’t need more than 1,000-1,500 words, but if you are writing an epic guide to backpacking in Spain, you might need 5,000-10,000 words.
The point is:
It’s always quality over quantity, AND only quality counts.
It’s much better to write one long detailed post of 2,000 words than 4 posts of 500 words that won’t help anyone.
ACTION PLAN
- Figure out who you are writing for. If you want to make money blogging, the most important thing you need to understand is that people read blogs to find solutions to their problems. You need to know who you are planning to help before you start writing your first post. Once you identify your ideal readers, it’ll be much easier to write content that will make them fall in love with your blog.
- Research what type of content works. Use websites like BuzzSumo, Pinterest, Quora, Reddit, Google, and Ubersuggest to figure out what content works. Become a bit of a detective and spy on your competitors: what are their top articles? You don’t have to reinvent the wheel with your blog. You just need to put your own spin on things.
- The secret power of headlines. Before anyone even reads what you have to say, they must click on your blog post. And if your headline isn’t intriguing enough, you’ll lose readers before you even start. Learn how to write effective headlines to capture more readers.
- Remember: always quality over quantity. It doesn’t matter how many posts you write. All it matters is how good what you write is. One remarkable blog post is better than 10 mediocre ones.
CHAPTER 4
Why Pinterest needs to become your best friend

The secret to getting traffic to your blog from day one
Let’s recap where we are.
By this point, you have a domain name and hosting, you’ve set up your WordPress blog with a simple and easy-to-navigate theme, and you have a content strategy.
You might even have written your first post. If you have, that’s a tremendous start!
But guess what? No one will come if you don’t go out there and promote your blog!
When I was starting, I read somewhere that you need to spend 20% of your time writing and 80% of your time promoting your posts. And that’s so true. There is no point in writing incredible content if no one is going to read it.
Why you need people to read your blog
The equation is simple:
TRAFFIC = MONEY
No matter what type of monetization you pick, you still need a good number of people to care about what you have to say to make money.
How much is a good number, I hear you saying?
There are different schools of thought here:
Some people say you just need 1000 true fans. Others say that you need to reach millions of people.
This is what I think: you might be able to make a living with 1,000 true fans, but what if you had 10,000 true fans or 100,000 true fans?
Let’s say you have 5,000 visitors per month on your blog. These people love you and listen to everything you have to say. You create a product that solves one of their problems, and every month, you convince 1% of them to buy this $100 product. Do you know how much you can make?
$5,000 a month.
Yes, that’s right.
So you don’t need millions of people to make a good amount of money. But what if you had 50,000 of them showing up? All of a sudden, that $5,000 a month could turn into $50,000!
That’s what I love about blogging: once you set up your blog, the more people you can get on it, the more money you will make.
I wrote blog posts 2 years ago that are still my top performers and make me thousands of dollars every month.
It’s what I call the magic of passive blogging income!
And with ads and affiliate marketing, the more people you can get onto your blog, the more money you will make.
So we need people.
There are so many ways to promote your blog, but one of the easiest and fastest ways to get traffic is to use Pinterest when you are just starting.
Pinterest helped me get over 180,000 page views to my blog after only 3 months, and it now consistently brings me between 150,000 to 200,000 page views a month.
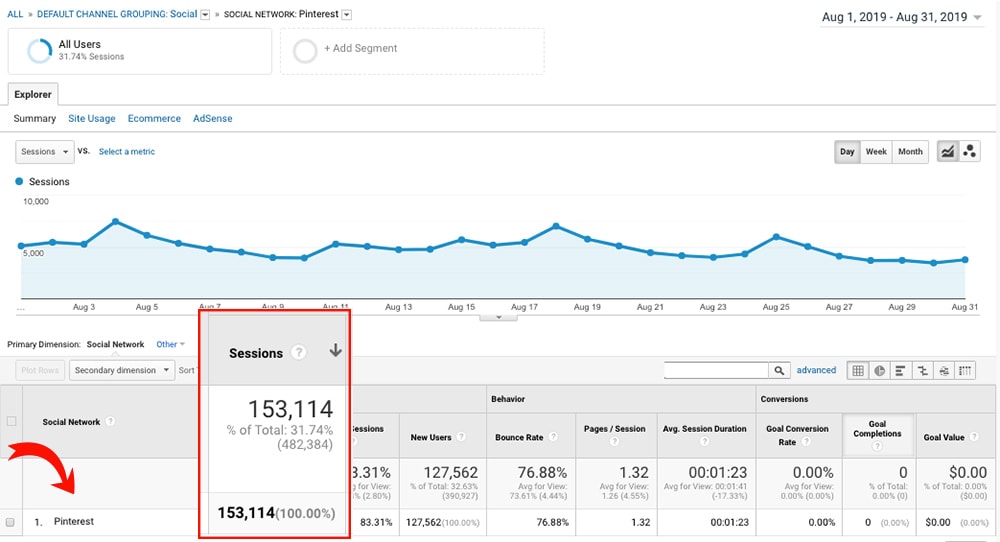
What is Pinterest?
Pinterest is a visual search engine.
It works a bit like a bookmarking tool where people look for and save new and creative ideas.
The images you bookmark are called pins.
A pin is an image that looks a bit like a poster, or a flyer, that captures people’s attention on Pinterest and makes them want to click to read your post.
You can add pins to different boards that you create, so all the information you save is organized by topic, and it’s easy to find later when you need it. Plus, every pin you save on your Pinterest boards includes a link to the website where it originates from, so you can always go directly to the source to learn more details or to buy products.
Creatives, like bloggers and business owners, can open a business account and promote their blog posts for free on the platform.
All you have to do is create eye-catching pins that link to your blog posts.
If you want to get traffic to your blog fast, and you are not familiar with the platform, I suggest you start to spend time on it and become a Pinterest lover straight away.
Does Pinterest still work in 2026?
If you are planning to start a blog, you’ve probably come across people saying that Pinterest isn’t what it used to be only a couple of years ago. And yes, it’s much harder to get traffic from Pinterest today than it was even a year ago.
Pinterest is trying to keep people on their platform, instead of having them click away to come to our blogs.
Things like videos and Pinterest stories don’t allow users to easily click on our website like old image pins.
But this doesn’t mean that Pinterest is dead!
Pinterest can still bring you enough traffic to help you qualify for advertising with Mediavine or other ads agencies. There are still plenty of bloggers that started only 6 months ago, that are now making money with advertising thanks to Pinterest. Yes, it might take you a bit longer, but if you follow the steps below, you can still get traffic!
Before I dive into Pinterest in a bit more detail, I just want to mention that I need to give Carly’s course credit for helping me understand Pinterest. Without her course, I wouldn’t have been able to achieve so much in so little time. And this post just scratches the surface of Pinterest, compared to everything she teaches. Carly has just updated her exceptional course and has given all my readers a lifetime $5 discount. Make sure you use the code PINNING5 at checkout!
How to set up your account
Setting up a business account is pretty straightforward.
Just follow the instructions you can find on Pinterest by clicking here.
Can you convert your personal Pinterest account to a business account?
Yes, you can! And it’s pretty easy.
You just need to log into your personal account on your laptop and click on the three dots on the top-right of the screen:
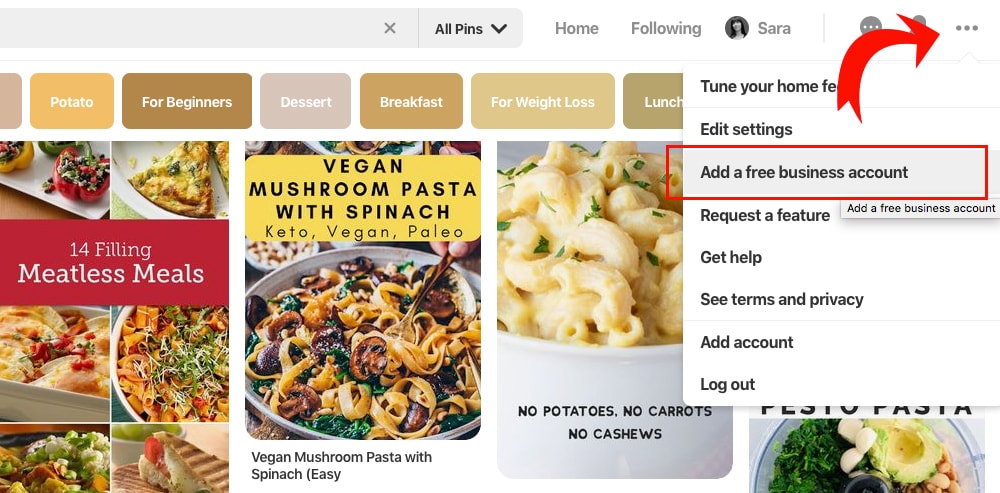
But before you do that, you need to make sure your personal Pinterest profile is relevant to your blogging niche.
For example, if you have been pinning for years your kids’ birthday cake ideas and your blog is about fitness, it might not be a good idea to convert your personal account into a business account.
On the other hand, if you are passionate about vegan food and have been pinning vegan recipes for a long time, and you are starting a vegan food blog, go for it.
But remember: overall, there aren’t many advantages to converting a personal account into a business account. Followers aren’t important on Pinterest, and starting from scratch will help you create a much more relevant account.
How to set up your profile
Let me start by saying that not many people will actually visit your profile on Pinterest.
Pinterest is a visual search engine. Your pins are likely to be discovered by people typing a keyword on Pinterest. This means they’ll come across one of your pins by chance and might never get to see your profile.
This doesn’t mean that you shouldn’t make your profile look professional and relevant.
To edit your profile, simply login to your Pinterest account and click on edit info.
- Make sure you select a relevant photo. Some people say that a picture of your face is more sociable and helps your readers to relate more. I am an introvert and didn’t want to use my own picture, so I decided to use my logo. This worked perfectly well for me.
- Add a display name. This should be your blog’s name, but also make sure you add a few keywords to make it easier for people to find you.
- Your profile info. You have 160 characters to write a description of what your blog is about. Remember what we talked about in the About section. Everything you do is about how you can help others to solve their problems. Your profile on Pinterest is no different. Make sure you describe exactly what you will do to help your followers in a short and concise message.
How to set up rich pins
Rich Pins are a type of organic Pin format that provides extra information.
Think about them as a premium version of a pin.
There are 4 types of Rich Pins: app, article, product, and recipe pins.
The most important thing about rich pins is that each type is loaded with more information than your average pin. This can help improve your potential reader’s experience with your pins. They tell pinners what your article, recipe, or product is about more in-depth and can really help create more clicks to your blog than a normal pin.
Here you can see one of my recipe’s rich pins:
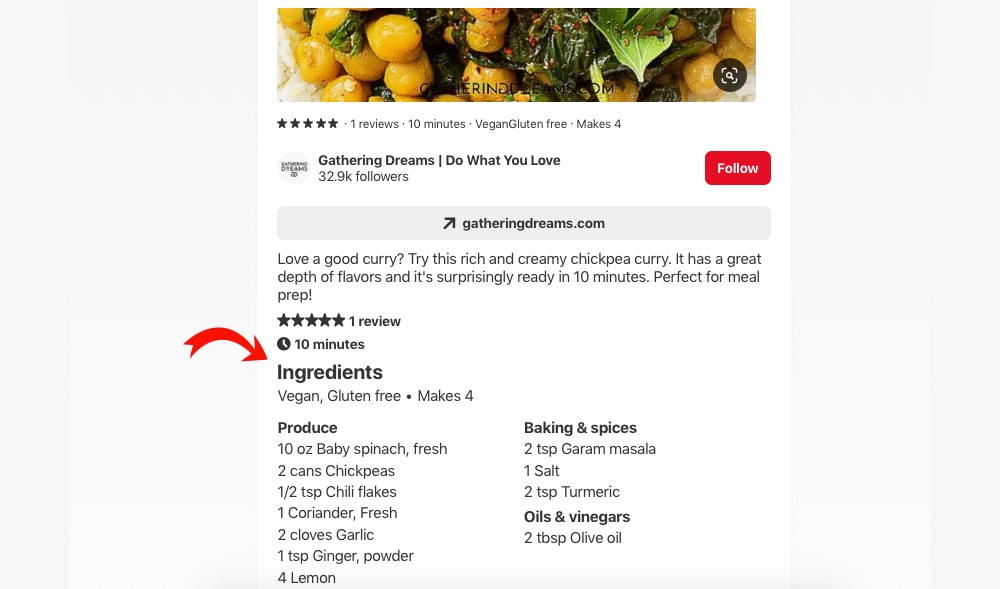
You can see information like the time to prep the recipe and ingredients.
Some bloggers (especially food bloggers) argue that by having the ingredients displayed directly on the pins, you might actually lose clicks. My experience is the opposite.
Our ultimate goal as bloggers is to make the user experience as good as possible and help readers get what they want. If, by looking at the ingredients on a pin, they decide not to click, it’s probably better for you. You only want people clicking on your pins if they are interested in what they are going to find.
So, let’s set up rich pins on your website.
- If you are a technical kind of person, check out this page on Pinterest by clicking here.
- If like me, technical jargon makes you sweat and you want an easier explanation to set up rich pins, you should check out this handy blog post here.
How to set up your boards as a Pinterest master
Setting up your Pinterest boards correctly is one of the most important steps to starting a successful account.
But first of all…
What are Pinterest boards?
Boards are collections of your pins. They let you organize all of your Pins around different ideas, interests, and topics. As a business account, boards show people what your business is all about, like what kinds of topics you write about and what inspires you.
You should see each board that you create as a place to distribute your content and as a destination for people to come and find useful content about your main topics.
How to create your first board
1. Click on your Pinterest profile and select Boards.
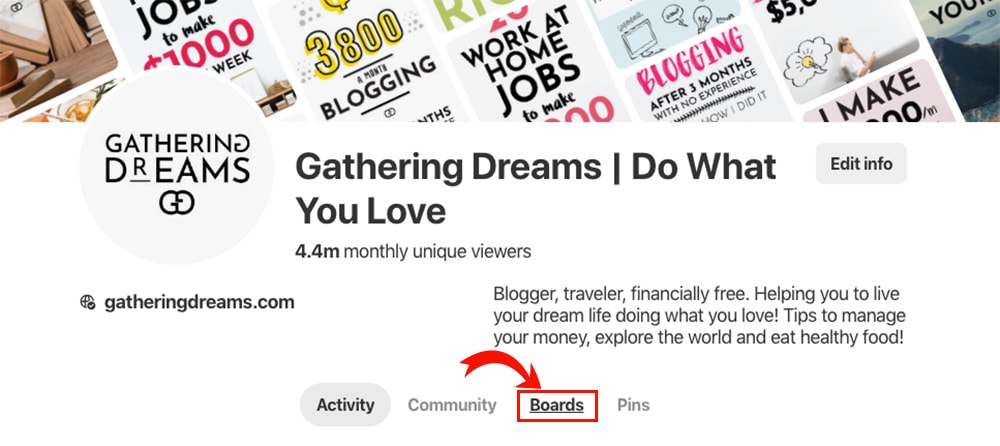
2. Click on the big Plus button.
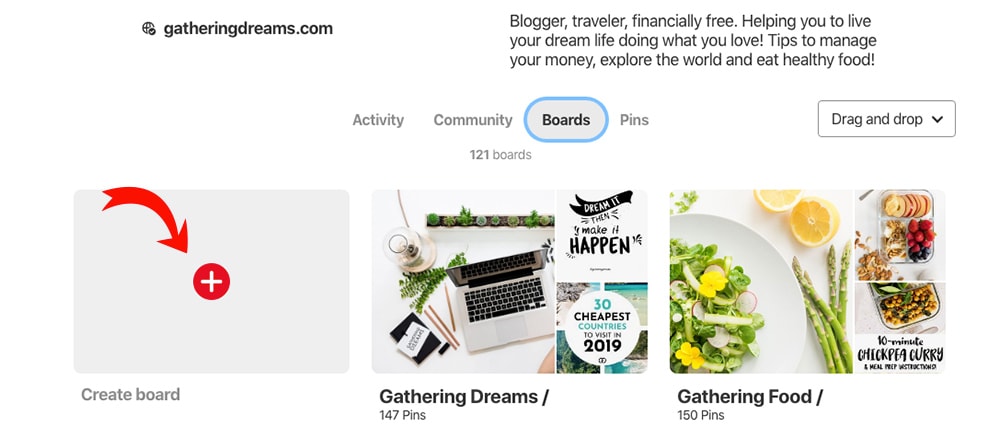
3. Write a name for your board.
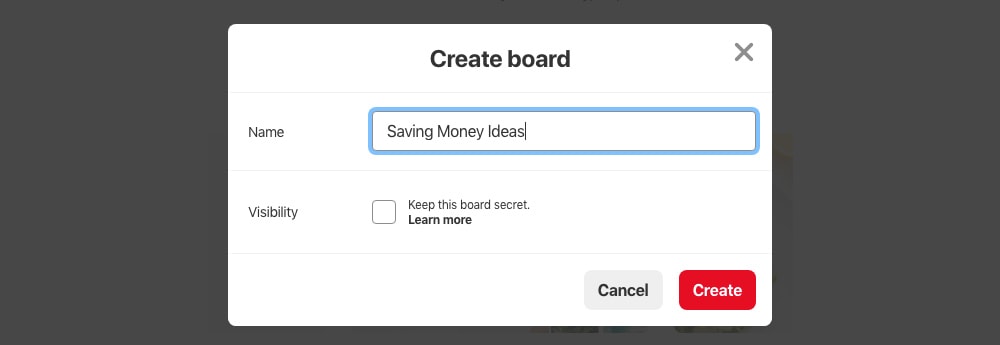
Make sure your board names are relevant and contain keywords: there is no point calling your boards something funny that doesn’t mean very much. Also, don’t use special characters or no spaces between words. Remember that Pinterest is mostly a search engine, and you want people to find your pins and your boards. Keep it simple!
Pinterest will show you relevant pins to add to this board, based on the name you selected (you see why the name is so important?). I would skip this step and finish setting up your board first. Just click Done here.
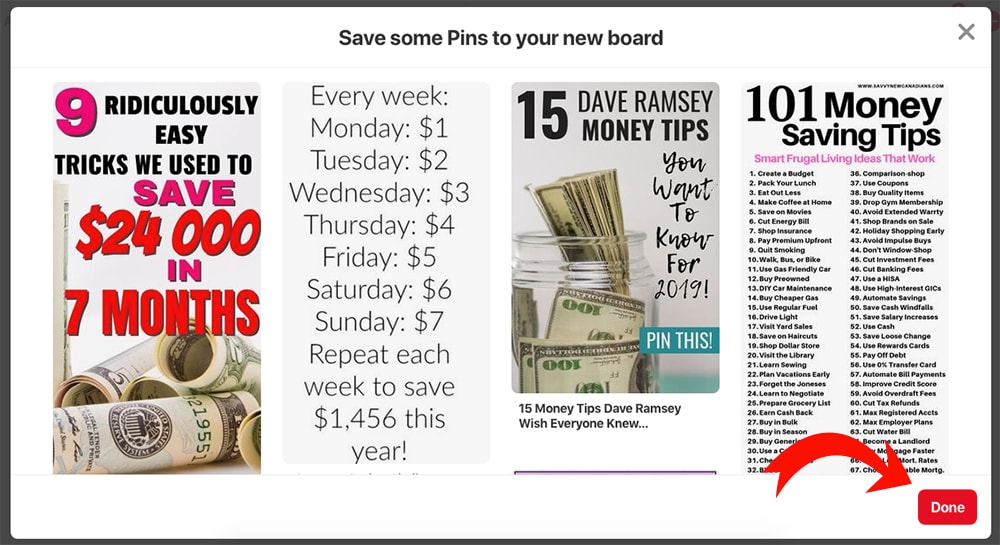
4. Click on the little pencil to edit your board.
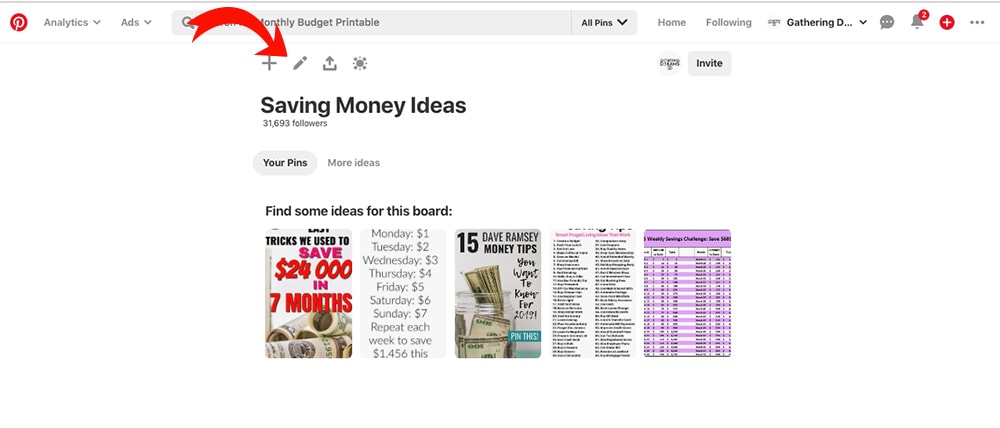
5. Add a description for your board. This should be full of keywords that can help people discover that board. For example, the description for my food board goes something like this:
“The best healthy and easy recipes for your breakfast, lunch, dinner, snacks dessert. Quick and delicious recipes for busy people to cook every day.”
6. Select a category. There are plenty of categories to choose from. Pick the most relevant to your board. And then hit Save.
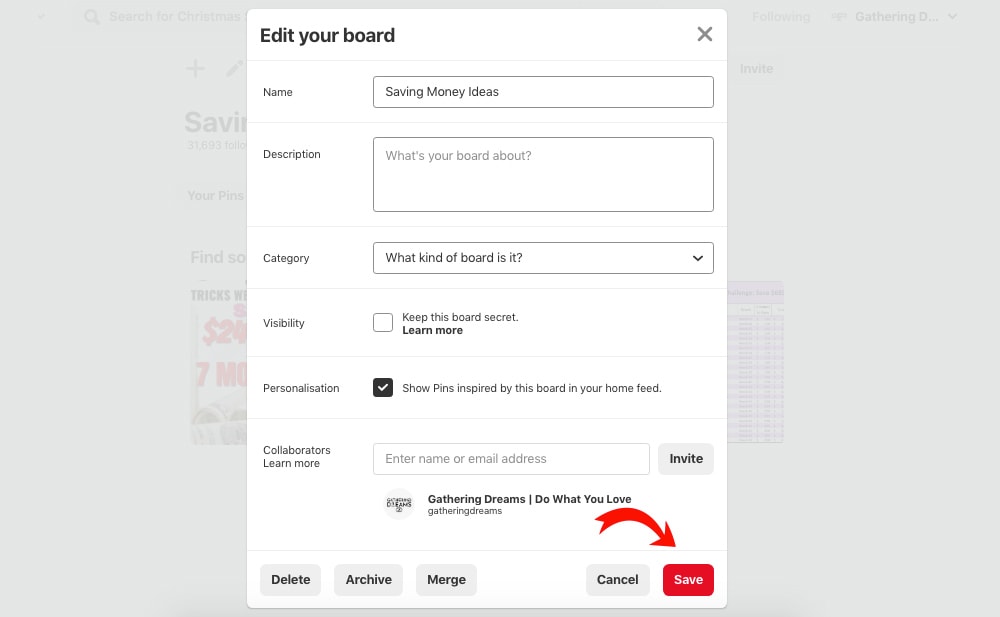
That’s it! You’ve created your first Pinterest board.
How many boards you should start with
As soon as you have set up your domain, you can start setting up your Pinterest boards.
You don’t need to have blog posts written yet. Starting before you do anything else will help you to understand what kind of topics and posts are popular on Pinterest in the niche you picked for your blog.
This is how many boards you should have:
- 1 main Pinterest board for each one of your blog categories. For example, I blog about food, travel, and money. This means I have one board about food, one about travel, and one about money. These are probably going to become your most important boards. They should only contain your own content.
- As many boards about relevant subcategories as possible. I would start with a minimum of 20-30 boards in total for your blog. This means, for example, that for my money subcategory, I can create several boards called: saving money, making money from home, financial freedom, passive income, side hustle, etc. You should fill these boards with at least 20-30 relevant pins from other bloggers to start with. This will help Pinterest understand what the boards are about and help your profile become more relevant on these topics, even before you start creating your own content.
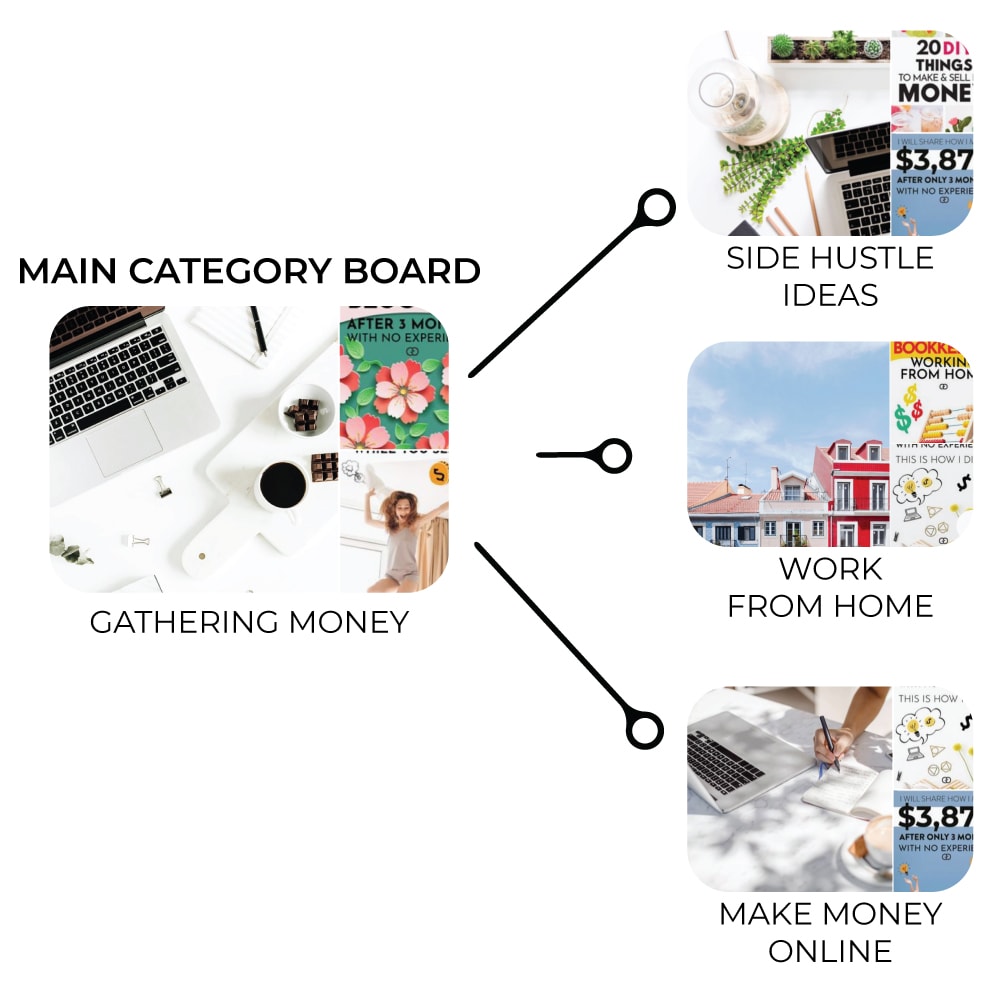
TIP: Pinterest loves new content. This can be adding a new pin every day or creating new boards. I suggest you create a new board every couple of weeks until you have 20-30 boards, especially when you are a new blogger. This will help you to increase the reach of your profile.
How to pin in 2026
Where to pin your first pins
When you create a new pin, Pinterest doesn’t know exactly what that pin is about. It takes the Pinterest algorithm some time to figure out exactly what that image is and where it should show it.
Fortunately for us, there are a few things we can do to help Pinterest:
1. Make sure you pin your pin, for the first time, to your most relevant blog board. This is your main category board that contains only pins relevant to one topic. For example, if I create a new pin for my blog post 5 Lunch Box Ideas, I would save that to my Gathering Food board.
2. When you write your pin description, make sure you use relevant keywords that Pinterest understands. In the example above, I want people to find my pin when they look for Lunch Box Ideas, Lunch Ideas, or Lunch Recipes. Simply type these keywords on Pinterest and see what other keywords it comes up with, and add some of those keywords in your description as well. As you can see below, I could add words like: for kids, for work, easy, etc.

That’s it!
How to set up your daily schedule
There was a time when you had to pin 30-50 pins a day to make sure Pinterest was showing your pins in its feed.
Things couldn’t be more different now. What Pinterest wants is fresh content, and repinning the same pins all over the place many times doesn’t work anymore.
There are 2 types of pins that Pinterest considers fresh:
- New pins related to a new blog post
- New pins/images created for an old blog post
Ideally, you want to create fresh for every new post you publish. I try to create at least 2-3 pins per post.
My current schedule is this:
- I create 2-3 pins every time I create a new post and pin them to my most relevant boards. I just pin each pin on the most relevant board (usually 3-4 boards max), using the Pinterest scheduler. I leave 3-4 days between each pin, to make sure Pinterest doesn’t think I am spamming my boards with the same post too often.
Example: If I create a new recipe for “Vegan Breakfast Cookies”, I would create 2 pins for it (PIN 1 and PIN 2). I would then schedule PIN 1 on my Gathering Food board, and 2-3 more relevant boards (i.e. Breakfast Ideas, Vegan Recipes, Healthy Snacks) at intervals of 3 days. I would then pin PIN 2 on the same boards at the same interval, but starting a few days later, to make sure there is always a bit of time between each pin.
Do you need a generic board for your blog?
A few years ago, some courses and blog posts suggested you should have a generic board for your blog, called something like The Best of Your Blog. For example, The Best of Gathering Dreams.
The issue with that is that unless you write about just one topic, that board will end up with pins linked to several categories. Pinterest will not know exactly what these pins are about. This can end up hurting the reach of your pins. You can still create a generic blog board, but only add pins to it that have been around for a while and are established.
Are group boards dead?
Group boards are boards owned by other people. They can invite you to “pin” into their board, and once you are in, your pins will get in front of their audience. This used to be an excellent way to get your pins in front of more people when you were just starting out.
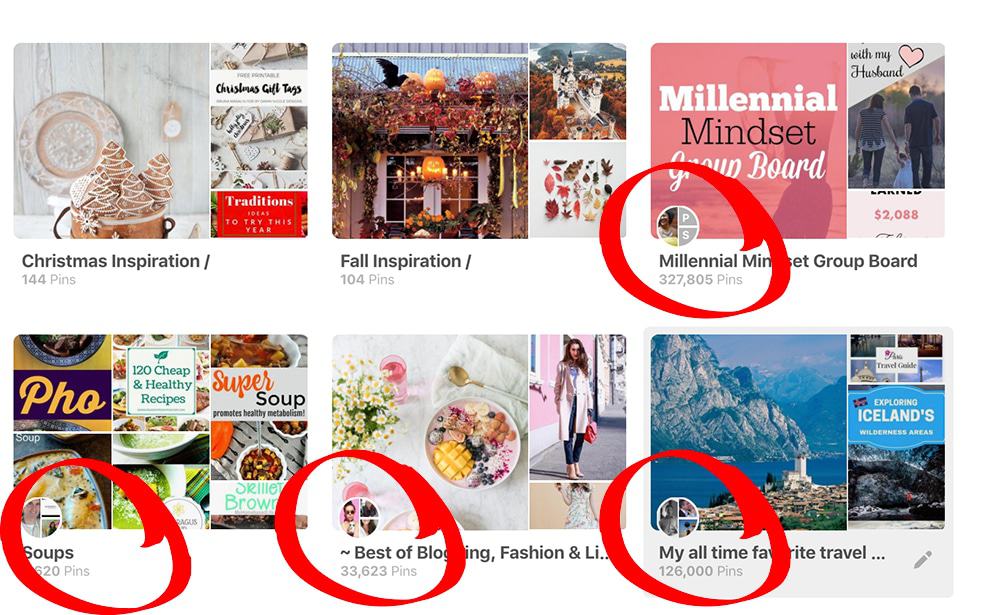
Up until a few years ago, Pinterest gave a lot of weight to pins pinned to group boards. If you could manage to get accepted on a group board with lots of followers, you had a bigger chance of your pins taking off and being seen by thousands of people in a matter of days.
These days, Pinterest seems to value your own boards and profile a lot more. This is a good thing because it means that if you create your boards correctly and keyword them properly, you won’t have to worry about applying to group boards as much as you did in the past.
I stopped pinning to group boards entirely, and I suggest you don’t bother with them anymore.
How to create beautiful pins
Your pin design can make or break your success on Pinterest.
But the one million dollar question is: how can you create click-worthy beautiful pins?
I will share something with you that I don’t like to admit: my first pins looked awful! People might look at my pins now and think I was a graphic designer in a past life, but that couldn’t be further from the truth.
Don’t believe me? Have a look at these 3 pins below. DON’T JUDGE!
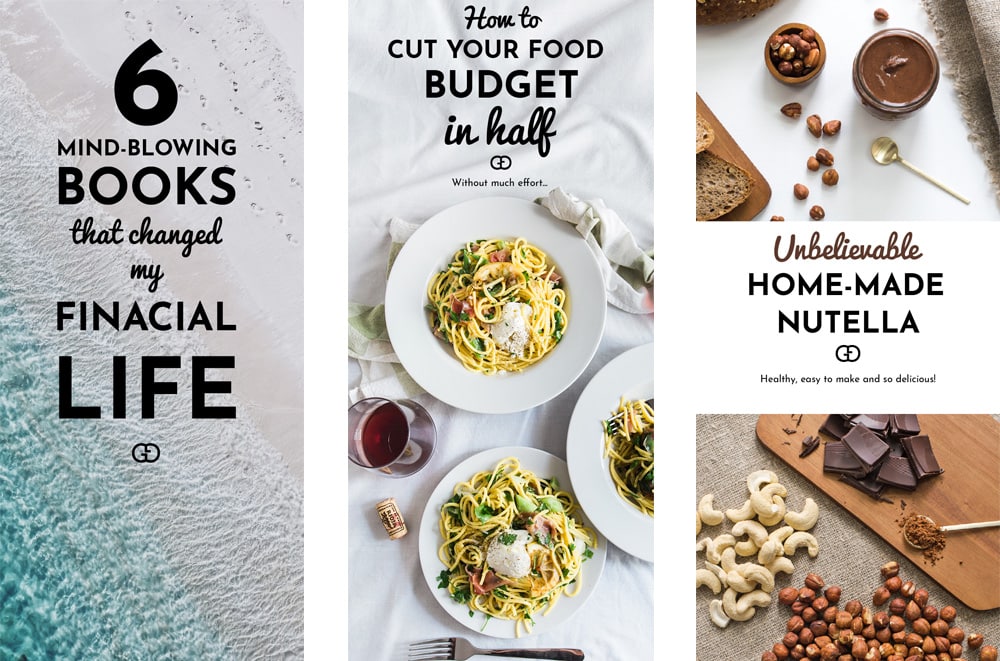
Would you click on them? Well, not many people did.
Mistakes I made:
1. The font is a bit small and hard to read.
2. The image on pin one isn’t relevant to the topic. I am talking about books and I picked a beach? What was I thinking? You need to make sure your image is on point, or you will confuse people. Yes, you can try to be provocative, but pinners scroll their Pinterest feed quite fast and if they see something that is not relevant, they won’t stop.
3. For recipe pins, you want your food to be the main attraction point: you need to zoom in, and show exactly what the final dish looks like. Here I kept my photos too wide and not detailed enough.
Like everything else in blogging, you need to observe, adapt, and learn from your mistakes.
What really helped me was:
- Spend time researching Pinterest accounts that did really well to check what worked for them.
- Scroll my Pinterest feed for hours, and save on a secret board each pin that caught my eye. Why did I stop? What made me want to click? Was it the color of the font? Was it the wording? The image? Learn everything you can from your own experience on the platform, and replicate what works.
- Some trips to bookstores: if you think about it, book covers and magazines are just like pins. They need to stand out amongst thousands of other books for you to pick them up. Publishers spend thousands of dollars to get the design just right. And you can get inspiration for free! Just go to your local bookstore and look around, and use them as inspiration for your next pins. If you see a weird girl taking pictures of book covers, it might be me, lol.
After a few weeks of using the tips above, this is how my pin design changed:

How to create captivating pins that will bring you traffic
1. Be at least 1000×1500 pixels in size. Pinterest recommends that you use a 2:3 aspect ratio for all of your Pins. Aspect ratio sounds complicated, but it’s just a way to talk about an image’s width compared to its height. A 2:3 aspect ratio means that your image’s width is ⅔ its height. I find that slightly longer pins still work a bit better for me. I normally use 1000×2000 pixels or 1000×1700 pixels.
2. Use relevant images. When people see an image, they need to be able to associate the pin’s topic with what they see.
3. Use only fonts that are easy to read, big and bold. Avoid cursive as much as possible. You can use it as an element of your design, but it’s much harder to read, especially on mobile.
4. Use bright colors and simple light backgrounds. Bright colors and a simple background that leaves your text space can help catch people’s attention.
5. Use an intriguing title. Why would people click on your pin? Write something that creates anticipation and curiosity. But don’t go too far with click-bait headlines. If your post is not on point, people will click away quickly.
6. Have your website logo on all your pins. This will help people recognize your brand, and if someone steals your pins and redirect them to another website, it’ll be easier to ask Pinterest to remove them.
7. Write helpful descriptions. A useful and engaging description tells people what your pin is about. Be persuasive, write something that makes them want to click, and include #hashtags. Hashtags help people discover new content: use words or phrases that describe your pin, make sense, and are relevant to your post.
8. Check your pins on mobile. Over 80% of Pinterest traffic comes from mobile. When you design your first pins, you will see them quite big on your laptop, and they might look fine. But people will see a much smaller version on mobile. Make sure they work on a smartphone screen.
For my pins, I use a combination of Adobe Illustrator and Adobe Photoshop. I know they are a bit on the expensive side, but I love them and can’t live without them. If you are not ready to invest in them yet, a free tool that most bloggers recommend is Canva. I never used it, but it has some free templates that can help you start out.
And if you need some free templates to get you started, check out Carly’s free templates.
Learn more about Pinterest
Pinterest is an incredible platform to master and can give you fast results if you are ready to invest your time on it from the start.
When I started my blog, I knew that Pinterest was the first thing I needed to crack, and I didn’t want to spend countless hours figuring it out myself.
That’s when I discovered Carly’s Pinteresting Strategies.
As a new blogger, if you want to learn everything about Pinterest and how to create a strategy that works, I cannot recommend Carly’s Pinteresting Strategies course enough.
This course helped me to skyrocket my Pinterest traffic from 0 to over 10,000 page views in less than 2 months, and well above that in month 3. It’s packed with value and Carly updates it regularly with what works and what doesn’t work on Pinterest.
Pinteresting Strategies: Carly’s course on how to pin is very helpful when you are starting out. It makes you understand what Pinterest is about, and her strategy is very useful when you are familiarizing yourself with Pinterest. Carly has just updated her exceptional course and has given all my readers a lifetime $5 discount. Make sure you use the code PINNING5 at checkout!
ACTION PLAN
- Set up your Pinterest account the right way. Pinterest can be an incredible platform to get traffic to your blog from day one, as long as you use it correctly. Create the right amount of boards, fill them with relevant content, and use the best keywords to get your pins discovered.
- Pin your pins in the right place. Pinterest needs time to understand what a pin is about. Help it by pinning your pins to your most relevant boards. This will ensure your pins get discovered by the right people.
- Create beautiful click-worthy pins. If you want people to click on your pins, you need to make sure your design is clean and simple and use eye-catchy titles. You must create anticipation and curiosity to get people on your blog. Check out Carly’s free templates here to get you started.
CHAPTER 5
Get Google to love you: the power of SEO

How to master free organic Google traffic
What is SEO?
The biggest challenge I faced as a new blogger was that there was so much to learn; I felt some days my head was about to explode.
I could barely keep up with Pinterest, let alone understand what SEO was. It sounded like something very technical and out of reach, especially as it was something I didn’t even know existed. But I also knew that if I wanted my blog to make money for years to come, relying on one single source of traffic was a dangerous game. If Pinterest changed its algorithm or closed my account (it can happen), I could lose everything I built overnight.
But what does SEO even mean?
SEO stands for search engine optimization and it’s all about what you need to do to get traffic from search engines such as Google, Yahoo, and Bing.
Here we will concentrate on Google as it’s by far the biggest search engine out there, accounting for over 79% of all organic traffic, with over 63,000 search queries every second, which translates to over 5 billion searches per day. Can you imagine how getting even a tiny tiny portion of that traffic could transform your blog’s earning potential?
After understanding how much traffic you could be losing by not implementing SEO, I decided to dive deep into it.
And learning SEO was the best decision I could take to diversify my traffic.
Now over half of my traffic comes from Google.
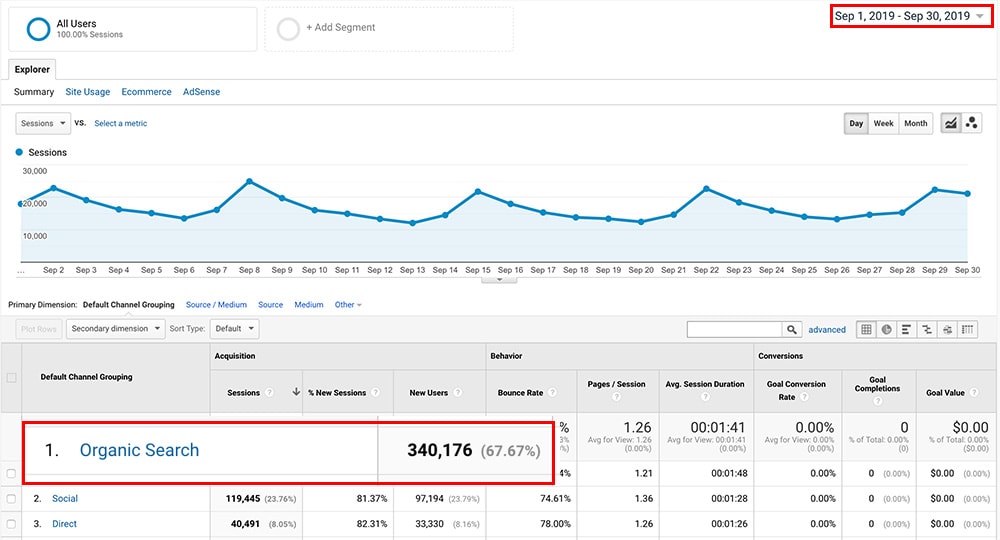
So, how did this happen?
First of all, Google’s organic traffic isn’t like Pinterest traffic: it takes time to build. Google needs to trust your website, and it’s a process that takes time and patience (it could take anywhere from 6 months to a year for you to see a significant increase in organic traffic).
But if executed correctly, it can bring you free, focused traffic.
Traffic from Google is so important for the following reasons:
1. Google traffic is extremely targeted. Pinterest visitors sometimes are just scrolling and looking for ideas without clear intent. A visitor searching on Google is actively looking for information and/or a solution to their problem. This means it’s much easier to sell them an affiliate product or get them onto your email list.
2. Google traffic is largely passive. Once you are ranking in Google, you don’t have to do much maintenance to make that traffic stick (unlike with Pinterest, where you need to keep creating new pins, new boards, and joining group boards).
3. Google traffic is much more consistent. Yes, there are constant Google algorithm changes as well, but unlike Pinterest, it doesn’t change every 5 minutes (although it does change and you have to keep up your game).
Let’s dive into how to get traffic with SEO.
How to get traffic on your blog with SEO
1. Nail your keyword research
When you start, it’s important to decide what you want your blog to be known by Google about.
On Pinterest, you can easily be successful by writing about a completely different range of topics. On Google, not so much.
The reality is that the more you niche down, the more Google sees you as an authority on that particular subject, and you are much more likely to rank for it.
The first step you need to take is to decide what you want your main keywords to be and create content around them.
For example, if you are blogging about quick and easy family recipes, you might decide that you want to rank for:
- easy dinner recipes
- quick recipes
- family meals
- 10-minutes meals
And you can start to create your content around these topics. This means that each recipe that you create needs to have these keywords in mind. There is no point in making a recipe that takes 3 days if it’s not what you want your blog to be about. Just concentrate on your niche.
So, you are telling me to niche down, but you have a lifestyle blog on several topics. How does that work?
I am not going to lie. It’s much harder to get Google to love you if you write about more than one topic. But, as long as you keep your topics clear and write epic, in-depth content, you can rank in Google even if your blog isn’t niched down. You just need to make sure each niche is very relevant on its own. Think about it as having a niched-down blog for each category you write about.
For example, on my blog, I write about food, money, and travel. But for each one of my categories, I have a clear idea of what I want to rank for. I am not going to write about backpacking, luxury hotels,, and staying in hostels in the travel category. As long as your content strategy and vision are clear, you can rank in Google as a multi-topic blog.
Long-tail keywords
Long-tail keywords are keywords made up of 4 or more words. And they are the type of keywords you want to go after when you are starting out.
Why?
Because it’s much easier to write more specific content, which means you can rank faster.
For example, it will be much harder to rank for a generic term like Pasta Recipes than to rank for a long-tail keyword like Gluten-Free Pasta Recipes.
To find out exactly how many searches per month a keyword gets and how difficult ranking for it will be, simply type the keyword you want to rank for in Ubersuggest:

As you can see, 90,500 a month in the United States alone look for Pasta Recipes on Google. That is a lot of people! But the SEO difficulty is 50, which is really high. As a new blogger, you should only aim at keywords with an SEO difficulty below 30-40, or you will never get to page 1 of Google for that search term. And page 1 is where 95% of the traffic is. If you are top of page 2, you might as well be on page 10.
Let’s now look at Gluten-Free Pasta Recipes.

This is much better! A lower search volume, but an SEO difficulty of 25. This is a term that we could rank for as new bloggers.
Your goal when you are starting out is to find high-volume, low-difficulty keywords.
3. Keep search users happy and on your page
Now that we have found a potential keyword for our blog, we need to make sure what we write is exactly what people are looking for. This means we need to nail user intent.
User Intent = What a user is looking for when they enter a search query on Google.
User intent takes into consideration the keywords used in search queries but goes beyond them, trying to understand the context and the intention behind those words.
How do you figure out what the user intent is when you select a keyword?
Simple: look at the first 10 results in Google.
In our example, you could write about two different types of recipes: you could create a list of gluten-free pasta recipes, or you could actually write a recipe to make gluten-free pasta. Which one will Google want?
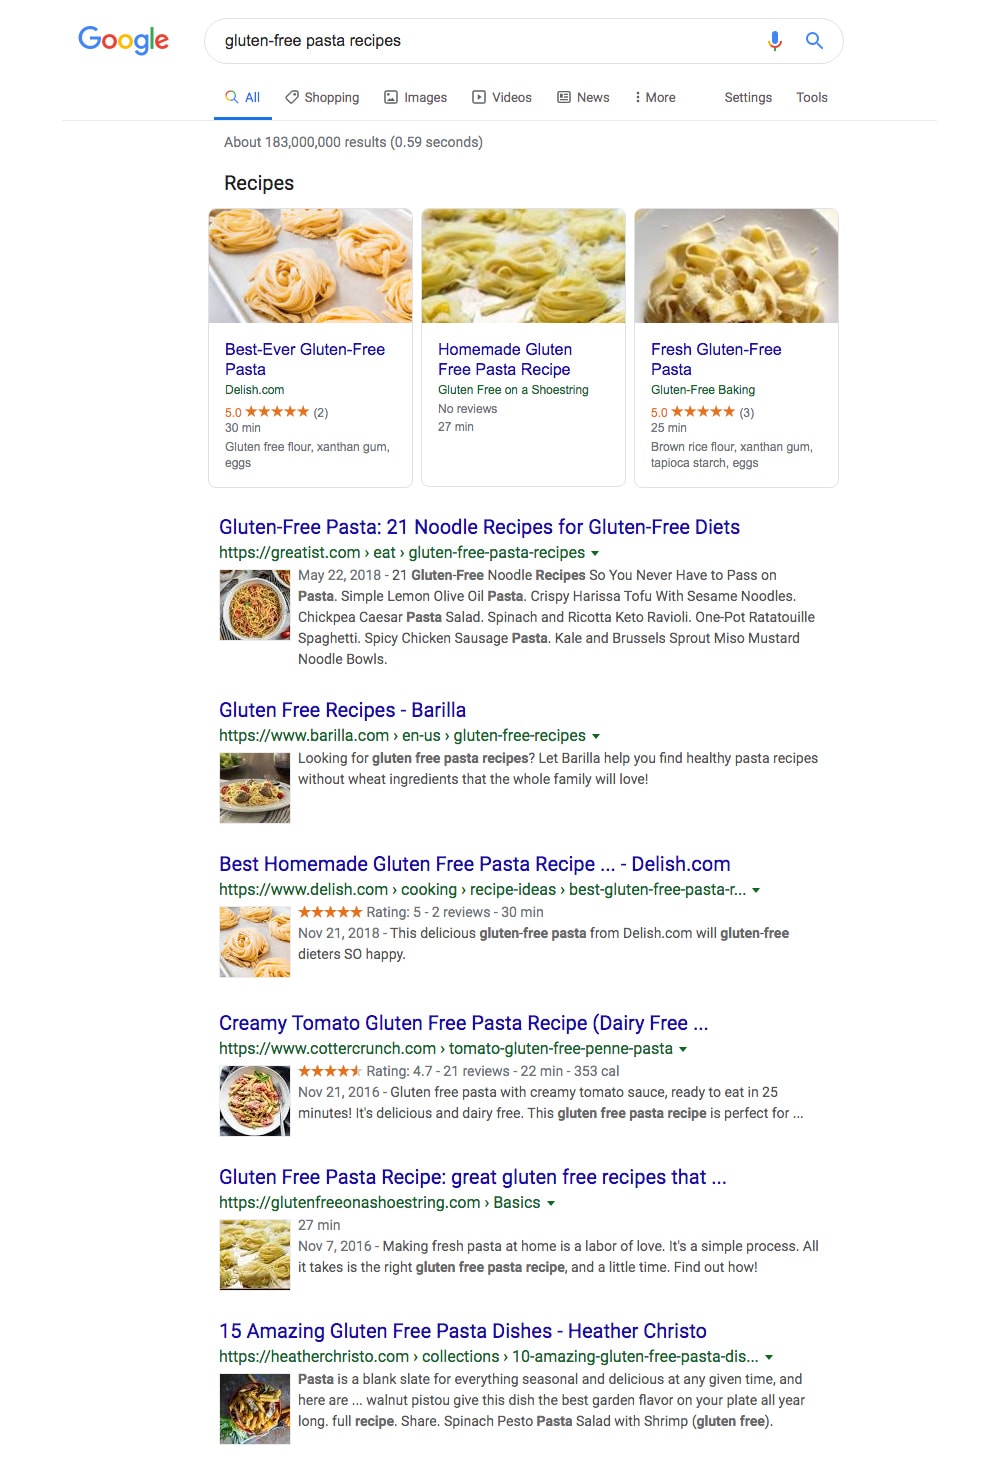
In this particular case, Google seems to prefer recipes to make gluten-free pasta, just slightly above a list of recipes. As a new blogger, you could write a post about 15 Gluten-Free Pasta recipes you can make at home and nail both the list aspect of it and the actual gluten-free pasta recipe idea.
But before you go off to write your post, I would suggest you check the Domain Authority of who is on page one.
Domain Authority (DA) is a search engine ranking score that predicts how well a website will rank on search engine result pages. A Domain Authority score ranges from 1 to 100, with higher scores corresponding to a greater ability to rank. When you are starting out, your DA will be 1.
The lower your DA is, the harder you will have to work to end up on page 1 of Google.
And when you have identified a keyword, you want to make sure that with your low DA, you can outrank your competitors. If, for example, all the results on page 1 of Google for a keyword have a DA above 60, it will be challenging for you to beat them.
But if you can find top results from bloggers with DA around 20-40, you might have a chance to beat them by writing epic content.
To check the DA of who is ranking on page 1, install the free Moz toolbar (Chrome extension), create an account, and log in. Now every time you do a Google search, you can see the DA of who ranks on page 1 by clicking on the extension.
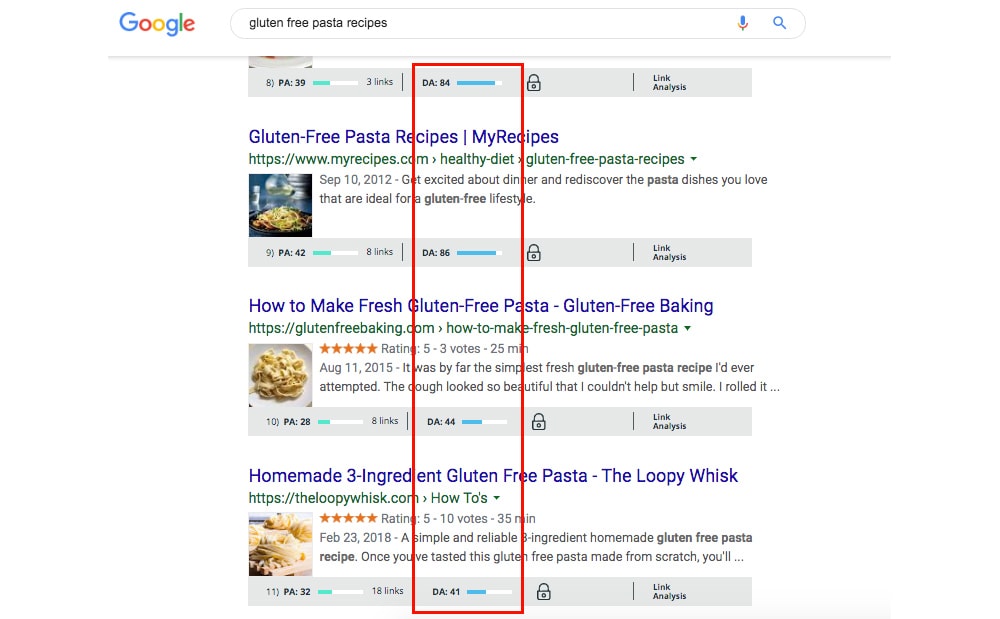
4. Create epic, optimized content
We talked about the importance of creating incredibly useful content in Chapter 3. But how can you make sure your content is also optimized for Google?
Ultimately, Google wants people to find what they are looking for. That’s why it’s the most used search engine in the world. Google doesn’t want users to click on your page and then click straight back to Google because you didn’t answer all their questions.
If you want Google to love you, you need to create comprehensive, resourceful content that matches user intent and answers the user’s query.
In short, you need to create the best piece of content that exists anywhere online for that keyword.
How can you do that?
1. Research: analyze the first 10 results in Google for the keyword you are trying to rank for. Check how long the posts are on page 1, what questions they answer, and what topics they talk about.
2. Outline: create an outline that covers each and every possible question the user could have about that keyword. You could use again Answer The Public, to find out what questions people are asking for each specific topic. Or check Quora and Reddit on the subject.
Another great tool to make sure you answer all the questions that people might have about a topic is People Also Ask, a free content idea tool that will help you identify real questions that people ask in Google.
Simply type in your main keywords, and find some magic questions to answer!
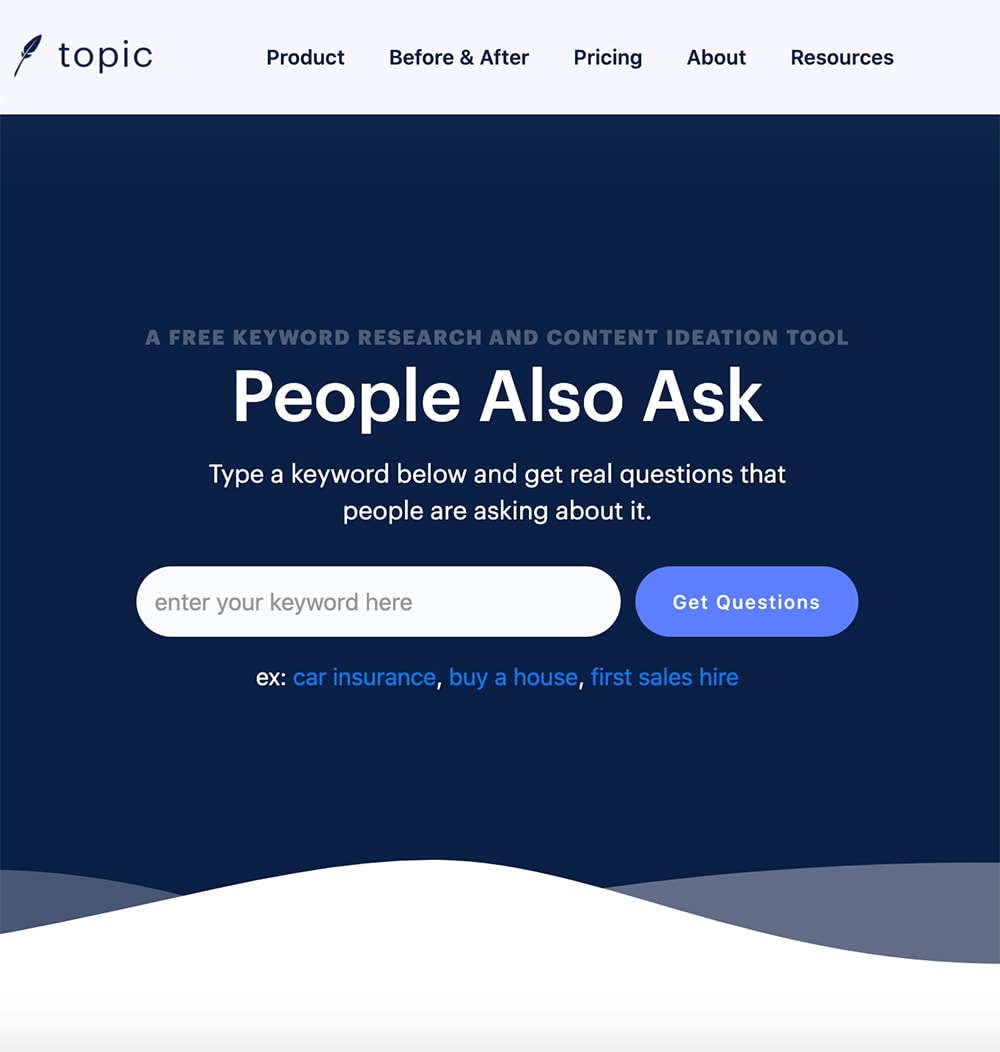
3. Write: write the most comprehensive guide out there on the subject. This doesn’t mean long and boring. For some keywords, you might need to write an epic 10,000 blog post, for a recipe, 1,000 words might be plenty to explain all the steps. But make sure your post is the best, most engaging out there.
4. Optimize: make sure your content is optimized with related long-tail keywords. Google doesn’t like it when you fill your content with the same keyword over and over again. But you can use terms or phrases that are closely tied to your primary keyword (synonyms or variations of your keyword).
To find some related keywords ideas, you can use Ubersuggest again. Simply type your main keyword, scroll down, and click on related. Try to add some of these keywords to your content.
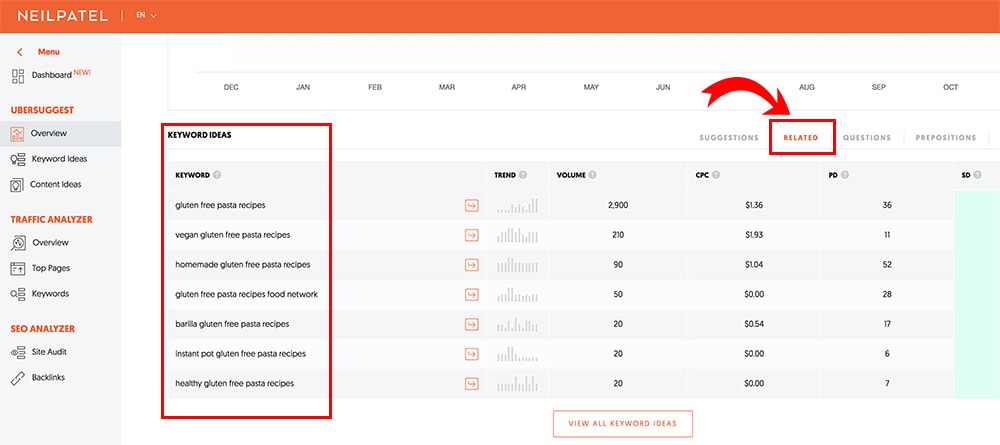
Also, add internal links to other relevant posts you have. And always add a few external links to relevant sources.
5. Backlinks: the importance of promoting your content
One of the most important ranking signals in Google is having backlinks.
A backlink is a link one website gets from another website.
Think about it this way: if FoodNetwork links back to your pesto recipe, Google thinks, “Hey! This must be a good recipe! If a big website links to it, it’s probably worth something!”
This means you absolutely have to spend time promoting your content and trying to create backlinks to your blog and blog posts.
The best ways to generate backlinks are:
- Sharing content on social media: Sharing your posts on Instagram, Facebook, and other social media platforms can help you generate traffic and backlinks. If another blogger or journalist comes across your blog post and finds it valuable, you might get a link back to your blog.
- Guest posting: Writing a post and getting published on someone else’s blog gives you a chance to get a link back to your blog.
- Reach out to other bloggers/websites: Send personalized emails to other bloggers and journalists to promote your post. The secret here is only to reach out if you have something of value.
- Use Facebook groups: There are some Facebook groups that post collaboration opportunities. They will ask you to link to your recipes or write 150-300 words on a topic in exchange for a backlink. Bloggers Roundups and RoundupPalooza are good examples for food bloggers. Just look for blogging groups around your niche, and you’ll discover opportunities to create backlinks.
If you want to learn more about generating backlinks, read this extremely in-depth post about link building for SEO.
ACTION PLAN
- Find the best keywords. Aim for long-tail keywords with high search volume (1,000-5,000 searches a month), with low difficulty.
- Nail user intent. Make Google happy by giving users what they are looking for.
- Write epic content. Analyze your competitor’s content and write the best in-depth article out there on the subject. Yes, it’s that easy.
- Promote, promote, promote. There is no point in writing epic content if no one reads it. Get your content out there, and generate backlinks. This will help Google understand your blog is relevant, and it will reward you with lots of free organic traffic.
CHAPTER 6
How to make money blogging!
Because we are not doing this just for fun
What I really love about blogging is that there are almost infinite ways to make money with it.
Here are just some of them:
- Display advertising
- Affiliate marketing
- Sponsored content
- Offering your own services
- Selling products (from physical products like t-shirts and mugs to digital products like courses and printables)
- Creating a membership site
- Flipping websites for money
My favorite ways to make money blogging are to display advertising and affiliate marketing. I find these two ways complement each other really well, are the most passive and require little to no maintenance once they are set up. Once you create a blog post with good conversion, all you have to do is update it, check it once in a while, and keep getting paid for it.
They are also easier to master when you are just starting out.
Other forms of blogging income, like creating a course, can require much more active work from you (like supporting all your students) but can, of course, be very profitable.
Make money with ads
Displaying ads on your blog is one of the easiest ways to make money: once you’ve set the ads, you don’t have to do anything else.
Big companies pay you to display advertising on your pages, and you get paid every time someone sees the ads or clicks on them. The more people visit your blog, the more money you can make.
How much can you make with ads?
It really depends on your niche and the company you use to display ads. Income can vary quite a lot, also depending on the time of the year. Companies are much more likely to spend big bucks closer to Black Friday and Christmas, for example. And spend a lot less in January, when people run out of money.
But let’s say that on average, you could make anything between $10-$20 (or more) per day, every 1000 people. This is what advertising agencies call RPM (Revenue per 1,000 impressions).
This means:
- $10-$20 per day with 1,000 daily page views
- $300-$600 per month with 30,000 page views
- $450-$900 per month with 45,000 page views
- $1,000-$2,000 per month with 100,000 page views
As you can see from the numbers above, if you want to make money with ads, you need to get a significant amount of traffic to make a good income. But it’s not impossible.
Here is a list of some of the ad networks you can use to display ads on your blog:
- Google Adsense: This is the easiest Ad Network to apply to. It doesn’t have a minimum number of page views or sessions you need to have in order to apply. You just need to have your blog up and running with a few posts to be approved. But keep in mind that it’s also the least lucrative Ad Network out there (I never made more than $5-$8 RPM). Some bloggers don’t bother applying at all, but I think it’s a brilliant way to see some money coming in, even if it’s a few dollars a month in the first few months. And while I was waiting for my application with Mediavine to go through, I made over $1,000. Not bad!
- Monumetric: the great thing about Monumetric is that you only need 10,000 page views a month to apply. You need to pay a $99 application fee, but you can make that money back in less than a month if you have that number of page views.
- SheMedia: Since Mediavine increased its requirements from 25,000 to 50,000 page views, I have been looking for other ad networks that have great customer service and are highly rated by fellow bloggers and SheMedia has popped up several times! You will need around 20,000 page views to apply. You can check their full requirements here.
- Mediavine: Mediavine is my favorite Ad Network and the one I use on Gathering Dreams. Their customer service is stellar, and I cannot recommend them enough. You will need to prove that you reached 50,000 sessions within the last 30 days to apply. You can check out the difference between sessions and page views here, but normally 50,000 sessions equate to 60-65,000 page views per month.
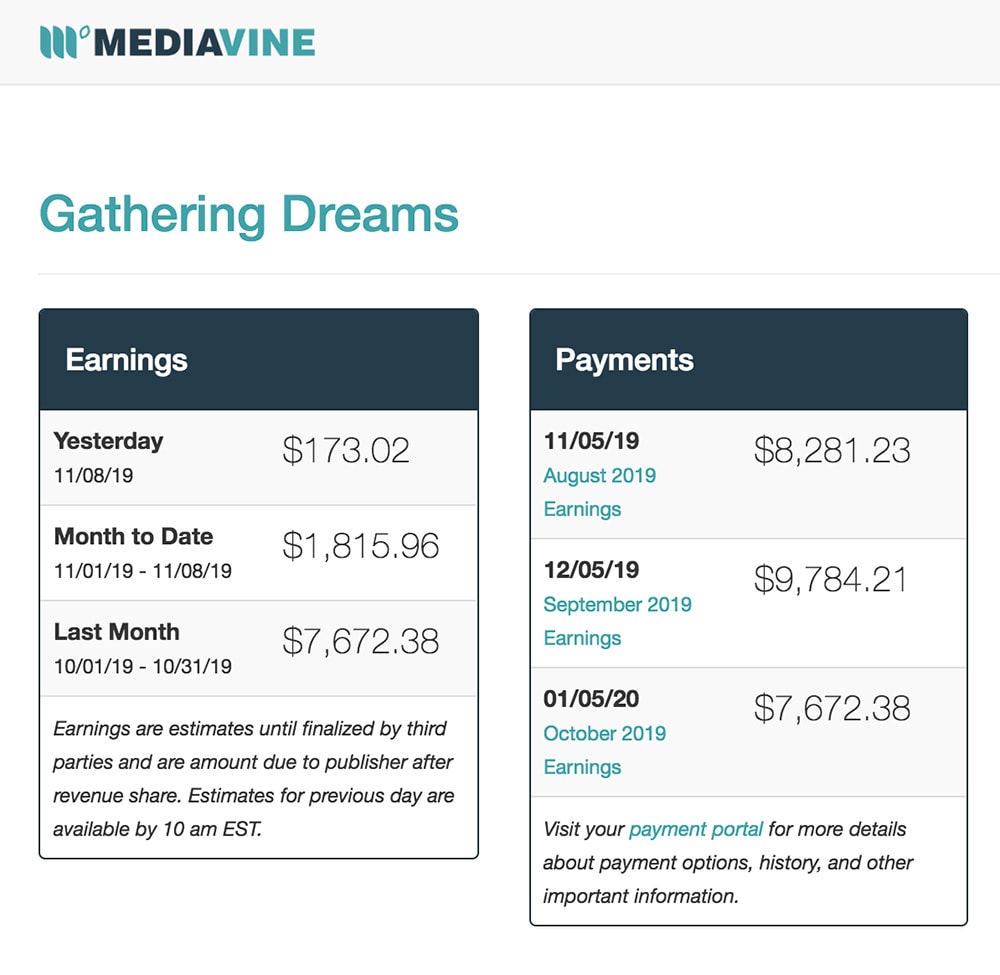
- AdThrive: you will need 100,000 monthly page views to join AdThrive. As this number is higher than Mediavine, some bloggers think they need to switch from Mediavine to AdThrive when they reach that level. The truth is earning potentials between Mediavine and AdThrive are very similar. It really depends on your niche, and they are both great networks.
Make money with affiliate marketing
I love affiliate marketing. I earn over $10K a month with it.
It’s one of my favorite ways to monetize because is one of the most passive ways to make money with your blog!
You can create a post or a review and still generate passive income years down the line with very little work needed to maintain it.
Affiliate marketing allows you to make money (earn a commission) for recommending products and services to your readers. You get paid only when your recommendation converts into a subscription or a sale.
Here’s how affiliate marketing works: you get a special tracking link from the company you’re an affiliate for. Then, you place that link within relevant posts on your blog or email it to your blog subscribers. When someone clicks on that link and completes a purchase or signs up, you earn either a set fee or a percentage of that sale.
If you want to know everything about affiliate marketing, check out my in-depth guide here: Affiliate Marketing for Dummies: A Smart Guide For Beginners.
Other ways to make money
Freelancing
Starting a blog isn’t a get-rich-quick scheme. It takes time. And patience. And some more time.
But some of you might need money now.
One way to grow your blog while making money is to use all the skills you have (and are learning) to land a freelance gig. And using your blog to showcase your expertise is a tremendous way to find your first client.
You could manage other bloggers’ social media accounts or design their pins, or become a virtual assistant and work for them on various tasks. You could write blog posts for others or offer your own services, like design, marketing, or photography.
Make sure your key pages (About, Contact) are set up and contain a few examples of the type of work you offer.
Here is just a small list of services you can sell to make money from your blog from day one:
- Writing
- Proofreading
- Virtual assistance
- Design
- Photography
- Video creation
- Marketing
- Social media management
- SEO
But pretty much anything can be monetized, so be creative with what you can offer! A solid way to find opportunities is to reach out to local businesses and network in blogging Facebook groups.
Sponsored content
Sponsored content is made up of images, videos, or articles you write for companies, and you place them on your site or social media accounts for a fee. Brands pay you because they want to get in front of your audience.
This means you actually have to have an audience. But as more and more bloggers offer sponsored content, having a huge following isn’t necessarily the best way to make money with brands. Some brands look for what they call micro-influencer: bloggers and Instagrammers who have a small but very loyal following interested in a particular topic.
For example, if I am a gluten-free flour brand, do you think I would prefer to pay a blogger that only publishes gluten-free recipes and has 10,000 page views or a generic food blogger with 100,000? As a brand, I will have much better chances to reach the right people by working with the gluten-free blogger.
As long as you have value to offer and the right audience for a product, you can get out there and pitch your favorite brands, even with a small following.
Creating sponsored content is a lot less passive than affiliate marketing and display advertising. You get paid once per post, and that’s it. But there are bloggers that make a full-time income just by reaching out to brands and creating well-curated content for them, without having to invest as much time on SEO and traffic generation.
If you are interested in sponsored content, here is a useful podcast you can listen to about making money from sponsored posts when you have a small audience. Rachel from Joyful Derivatives shares some insightful tips for landing sponsorships and other opportunities!
Selling your own products
Selling your own products can be a very lucrative way to make money blogging.
But what can you actually sell?
You can sell anything digital from printables, ebooks, online courses, or even physical products like t-shirts, mugs, or prints.
Digital products are an incredible source of passive income because you put in the effort to create them once, and they are automatically delivered to the buyers without you having to do anything (as long as you have the right systems in place).
I made over $1,500 from a printable I created as an experiment in the last six months. It might not sound like much money, but it took me two days to set it up, and design, and that’s now $200 a month that hit my bank account without me having to lift a finger.
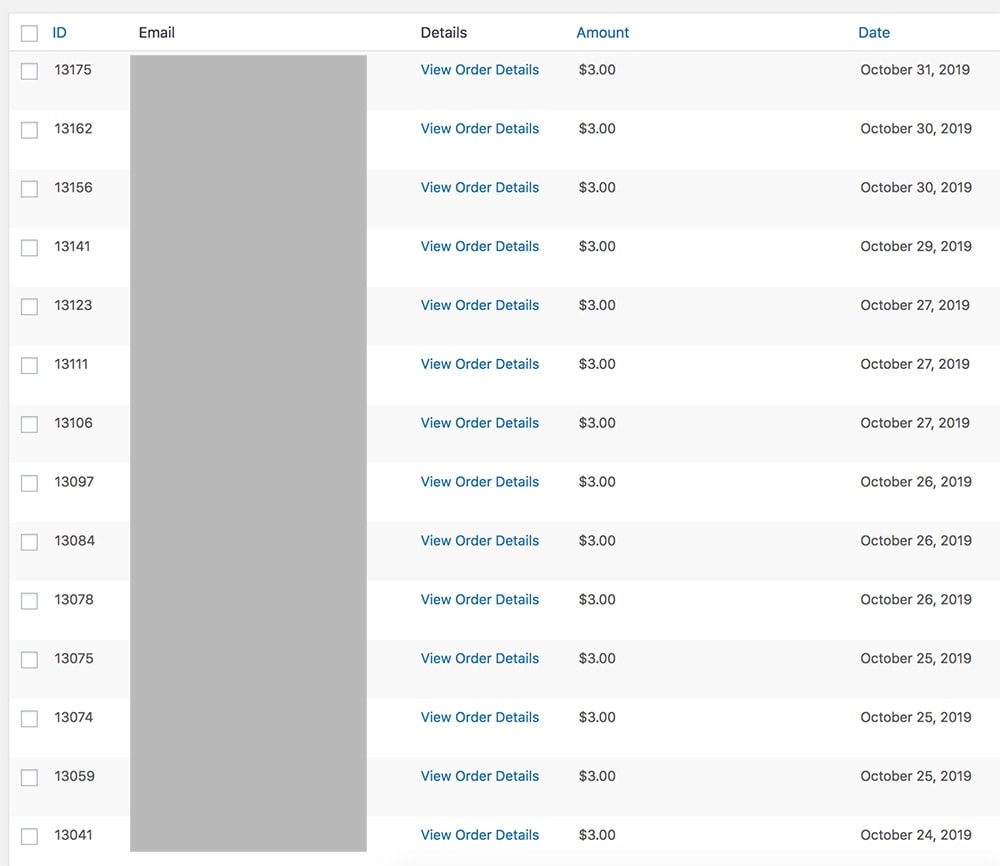
Products can really be the difference between making ok money blogging and reaching the stars.
Most people get worried about selling something they made: who would actually want to buy this? Will it ever be good enough? Are people really going to give me money?
But remember this:
Just start with something small. Solve someone’s problem. Get a taste of what selling products can be like, and when you are ready, move up to a more expensive product to sell.
ACTION PLAN
Figure out how you are going to make money with your blog. There are hundreds of ways you can make money online. By focusing on what works for you, you can leverage the right type of content to increase your income as quickly as possible. Mix and match all the options above to figure out your monetization strategy.
CHAPTER 7
The essential resources you need for your blog
Everything you need to make your blogger life easier
Essential WordPress Plugins
A plugin is a piece of software that can be added to any WordPress website. It can extend functionality or add new features to your blog. Plugins basically make your life much easier, as you don’t need to learn how to program or be too technical.
And they can help you with everything from SEO, to backups, to optimizing images.
The only issue with plugins is that there are literally thousands of them and if you install too many, your risk slowing your website down. And a slow website equals a bad user experience. Remember what we said? User experience always comes first.
Luckily for you, I put together a list of the top free essential plugins you need when you are just starting out.
Yoast
We talked about how important SEO is. And Yoast is by far the best SEO plugin around. It’s a must-have on your site, and it’s completely free. Yoast helps you to optimize your blog post titles, descriptions, content length and other elements across your entire blog so that search engines can easily find you.
And before you ask, no, you don’t need the premium version. The free version is good enough forever.
Akismet Anti-Spam
Used by millions, Akismet is one of the best ways in the world to protect your blog from spam. Askimet checks your comments and contact form submissions against spam content to prevent your site from publishing malicious content.
ShortPixel Image Optimizer
Your images are one of the most important assets on your blog. They help you to stand out and engage with your readers. But they can also significantly slow down your website. You need to make sure each image you upload is optimized by using minimal resources. Optimized images mean better user experience, better page speed Insights, better Google ranking, and more visitors.
I’ve been using ShortPixel for over a year and I love it. It has dramatically improved my page speed without reducing my image quality. You can optimize up to 100 images a month for free, which will be enough for most people. If you have more images to optimize, they offer very affordable packages, starting at $9.99 for 10,000 images.
Grow
Having your visitors share your content on social media is one of the best ways to get more exposure. I can’t tell you how many blogs I visit that don’t have social share buttons. You need to make sure you make it very easy for people to promote your content.
Grow (previously known as Social Pug) is one of the easiest to use social sharing plugins out there, and it’s what I use on Gathering Dreams. It lets you add highly customizable social share buttons that will integrate beautifully with your website’s design. You can place the social sharing buttons before and after the post content or have them follow your readers as they scroll up and down the page, in the form of a social media floating sidebar.
The free version of the plugin comes with five of the biggest social media platforms, mainly Facebook, Twitter, Google+, Pinterest, and LinkedIn.
Google Analytics Dashboard for WP (GADWP)
This is my favorite Google Analytics plugin for WordPress. This plugin enables you to track your site using the latest Google Analytics tracking code and allows you to view key Google Analytics stats in your WordPress install.
Connect Google Analytics Dashboard to your Google Analytics account (you can sign up for a free Google Analytics account right here) to find out who’s visiting your site and what your most popular blog posts are.
Updraft
Imagine spending months writing blog posts, and then for a technical glitch, you lose everything! You must install a backup plugin straight away on your blog. Updraft is reliable: it takes backups locally, or backup to Amazon S3, Dropbox, Google Drive, Rackspace, (S)FTP, WebDAV & email, on automatic schedules. The free version will do everything you need.
And if anything happens you can easily restore your backup on your server.
Insert Headers and Footers
Sometimes to edit your theme, you’ll have to add code snippets to your header or footer (it’s not as technical as it sounds). However, doing it in the code of your theme can cause issues. This plugin allows you to easily insert code or text in your WordPress blog’s header or footer blog, without breaking anything.
WP Recipe Maker
If you are a food blogger, you need a recipe plugin to display your recipes correctly. WP Recipe Maker is easy to use and configure. Plus, its SEO settings are spot on to help you get more visitors. The free version is perfect to start with, but once you start to make some money, you might want to move to the premium one, as you’ll be able to add nutritional values and an easy switch between US and metric units.
Chrome extensions that will help you succeed
There are 3 free Chrome extensions that I use pretty much every day:
Grammarly
Grammarly helps me to spell-check everything I write: from my blog posts to my emails. Grammarly automatically detects grammar, spelling, punctuation, word choice, and style mistakes in your writing.
MozBar
MozBar lets you check every website’s Domain Authority on the go. This helps when you are doing keyword research and establishing if you can outrank another blogger on a specific keyword.
SimilarWeb
I told you before how much I love analyzing (or shall I say spying) other websites. The SimilarWeb extension lets you check any website’s statistics. With a single click, you can get in-depth traffic numbers and sources for any website. Keep in mind this is just an estimate. Based on my research, SimilarWeb statistics are on the lower side by half. For example, if you check a website and it says it gets 100,000 page views, the real number is probably closer to 180,000-200,000. But it still gives you a good insight into the popularity of a blog.
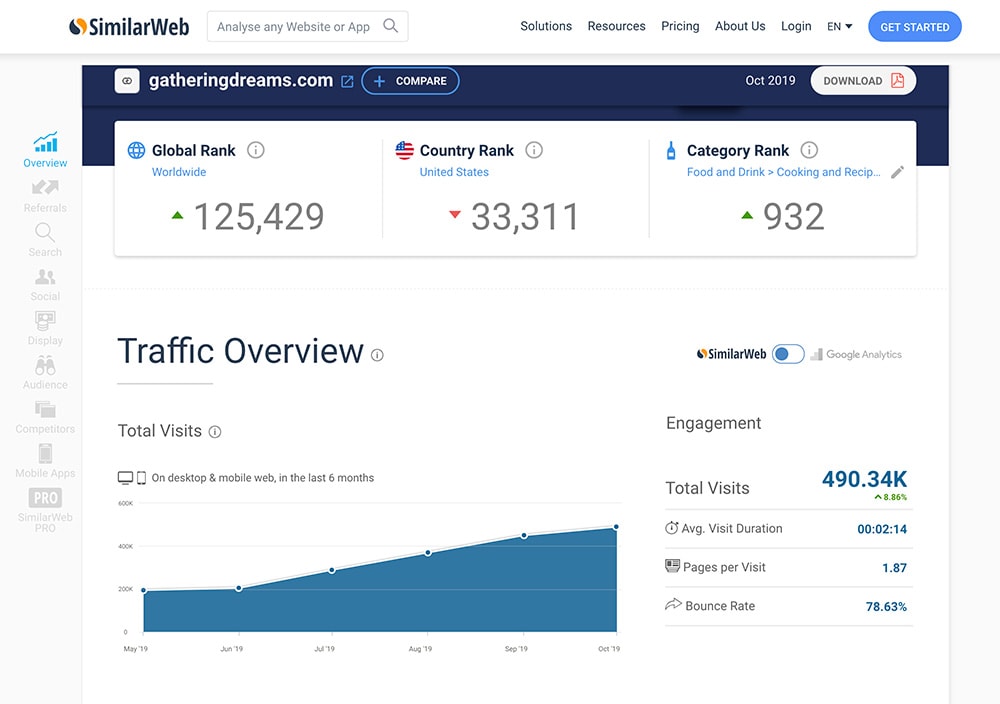
TIP: If SimilarWeb doesn’t give you a traffic estimate for a blog, it means that the blog is relatively new or doesn’t get a significant amount of traffic
Courses I personally recommend
I have a confession to make: I became obsessed with learning everything about blogging and, if you speak with Dan, he can tell you that I have a little problem with buying courses. I normally buy laser-focused courses that help me to learn everything about a specific topic.
Investing in courses has been the best decision I could ever make for my blogging journey. If you want to fast-track your success, you need to invest some money.
And as much as I hate departing from my money, I made this money back 50 times over in the last year. An astonishing return on investment, if you ask me.
But not all courses are made equal. If you were a close friend (and you are), I would only recommend a handful of them.
And here they are:
Carly’s Pinteresting Strategies: Carly’s course on how to pin is very helpful when you are starting out. It makes you understand what Pinterest is about, and her strategy is very useful when you are familiarizing yourself with Pinterest. Carly has just updated her exceptional course and has given all my readers a lifetime $5 discount. Make sure you use the code PINNING5 at checkout!
Mike’s Stupid Simple SEO: I can’t recommend Mike’s course enough. I am so happy I decided to invest in it! It’s full of helpful step-by-step videos, and he teaches something as complicated as SEO in a very straightforward way! He clearly knows what he is talking about. This course is perfect for anyone serious about improving their organic traffic, and I especially love the way Mike approaches keyword research (with an eye on your competitors).
Facebook groups that will help you to grow your blog
Blogging can be a bit of a lonely journey sometimes. Many of your friends and family won’t probably understand what you are doing, or won’t be very interested. When I started blogging, I didn’t use social media very much, but I found Facebook Groups incredibly useful to create connections and a safe place to ask simple questions when no one else could help.
But not all Facebook groups are created equal. There are some incredible ones that stand out.
These are my favorites, and you might see me hanging around in them:
Blogging Like We Mean It
This group is one of my favorite, Carly from Mommy On Purpose owns it. Carly shares a lot of her tips and tricks here, especially about Pinterest. There are also many other helpful bloggers willing to share their knowledge and ready to answer any question you might have.
Food Bloggers Central and FBC Social Sharing
If you are a food blogger, or food is one of your topics, you must join these groups. Nagi from RecipetinEats is the owner of the group. Food Bloggers Central is all about support. FBC Social Sharing is brilliant to submit your recipes to sharing threads or to roundups.
DNW – Making Money From Blogging
Sharon from Digital Nomads Wannabe owns this group. She often shares her SEO tips and it’s especially useful if you are blogging about travel. There are also opportunities to collaborate with other bloggers.
Bloggers Roundups and RoundupPalooza
Mostly for food bloggers. Here you will be able to find other bloggers looking for recipes to share. By submitting your recipes here, you can build important backlinks that will help you with SEO.
BONUS
Where to find click-worthy images for your blog and your pins

Because sensational images = enthusiastic readers
Images are an essential element of your blog: they can break up your content, offering a much better user experience, and can also help you to connect with your readers.
Simply adding a few visual elements can almost double the number of views you are getting, and significantly increase the shares a post gets.
But where can you find the right images to use on your blog?
As a blogger, there are 4 ways to add visual content to your website:
1. Take your own photos
This, by far, is my favorite way to create images for my blog posts (well, using Dan to take photos is actually my favorite way!). You don’t need a professional camera (although it helps). Taking photos with your smartphone can be good enough when you are starting out. By using your own images, you will be able to stand out.
This is especially true if you are a food or travel blogger.
But I understand not everyone has the time or the skills to do this. If you are looking for a simpler way to enhance your content, move to point 2.
2. Using free stock photos
These days, there are many high-quality sites that offer incredible photography that’s completely free to use for your blog.
Free stock photos are free from copyright restrictions or licensed under creative commons public domain. This means you can copy, modify, and distribute them, even for commercial purposes, all without asking permission.
In some cases, some photos may require attribution. It is crucial that you triple-check yourself if you can use them, especially if you are doing so for commercial purposes.
Here are some of my favorite websites with great free stock photos:
1. Pixabay
2. StockSnap.io
3. Unsplash
4. Pexels
5. Burst (by Shopify)
6. Reshot
7. FoodiesFeed
8. Gratisography
9. Freestocks.org
10. Picography
11. Picjumbo
12. Kaboom Pics
13. SkitterPhoto
14. Life of Pix
15. StyledStock
16. Jay Mantri
17. New Old Stock
18. Death to the Stock Photo
19. Good Free Photos
20. Morgue File
21. Tookapic Stock
IMPORTANT NOTE: Even if you use an image you believe to be free, you could still be liable for using it illegally.
Anyone can upload images on these websites. There have been instances where a photographer’s image was shared illegally. If they find out that their image was used without their permission, and you are using it too, you can be liable for that. If you plan to use a free image, make sure you are allowed to do so, and provide the proper attribution when necessary.
3. Using other bloggers’ photos
Yes, you can use other bloggers’ photos on your blog BUT you always have to ask for their permission. And when I say always, I mean always.
If you’ve read somewhere that is ok to just upload an image on your blog, as long as you link to the original blog, because you are doing the other blogger a favor just know this: no, it’s not ok. You are infringing the blogger’s copyright, and you can be sued. It just takes 5 minutes to send an email and ask for permission. And if you don’t receive a reply, find another image and move on.
Some bloggers even state in their Terms & Conditions, Privacy Policy, or FAQs if you can use one of their images. Check there before you email them.
For example, here you can see The Minimalist Baker‘s permission page:
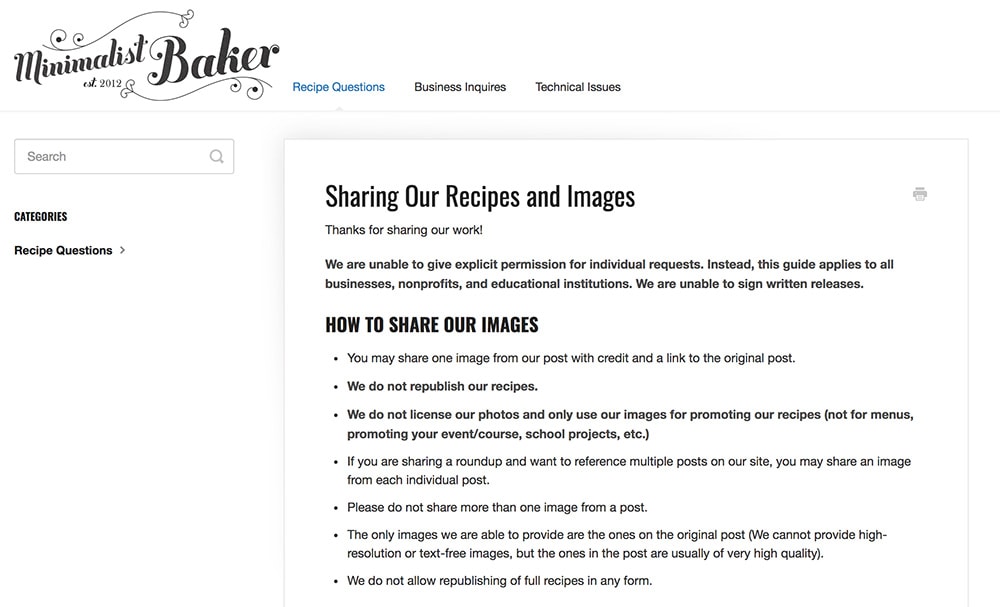
4. Pay for licensed photos
Royalty-free is a type of license used by stock photography agencies to sell stock images. You pay for the license once, and you can use it forever within the accepted terms, without any further payment obligations.
This gives you the peace of mind that no one can come after you, looking to start a legal battle over an image you used.
If I can’t take a picture myself for a blog post, or I don’t get permission from a blogger, I normally pay for all my other images.
I use 3 websites to purchase all my images:
1. DepositPhotos: One of my favorite stock photos websites, mostly because a couple of times a year I get an irresistible deal (you can get 100 images for $49). If you are on my blogging email list, I will email you when the deal is live.
2. Shutterstock: Probably the most comprehensive collection, but not cheap. I use it when I need to purchase something very specific. But what I love is that you can get 10 free images if you sign up here. You will need to enter your credit card details, but won’t be charged. Just remember to cancel your subscription before the month is over (I set a reminder on Google Calendar to help).
3. Adobe Stock: another brilliant website, with a gorgeous selection of photos and a good search tool. Same as above, you can sign up for a trial and get 10 images for free. But remember to cancel!
How blogging can change your life
Imagine this is a year from today. You wake up slowly…no alarm ringing…no commute looming, take a long relaxing shower as the aroma of your coffee fills the house. You go for a long walk. You come back, open your laptop and you see all the money you made while you slept.
Is this a dream? Nope. This can be you.
Start your blog today, and in a year’s time, your life can be completely different.
If you take action today, this can become your reality.
How do I know? Because I did it, and so can you.
You may look at my blog and think I have everything together but the reality is a bit different.
I am not an expert in anything. I am not a writer. When I started I had no experience working online (unless you count buying things on Amazon as work…).
I am just a person that was willing to take a chance, put in some good hard work, and learn something new every day.
It wasn’t always easy, but it was so worth it.
Now you are ready to start a blog!
You are at the beginning of an extraordinary and rewarding journey. It will take you time, hard work, and patience, but by following all the steps I highlighted in this post, you will get there!
I did it, and you can too!
If you have any questions about starting a self-hosted WordPress blog, please leave me a comment or send me a message via the contact page or drop me an email.
I will be more than happy to respond to you! Blogging has helped me live my dreams and I am here to help you to do the same!
I reply to EVERY single email! (Although it might take me some time…so be patient).
If you know someone that wants to start a blog or website, and you have enjoyed this post, I would be very grateful if you can share this guide with them!
Check out all the best resources for your blog! I find all these resources so valuable, and I am sure they will help you as much as they helped me.


Hi Sara,
Thank you so much for writing this comprehensive and excellent post. I agree with Imoni – Unlike other bloggers, this post is very specific and super helpful. Also thanks for Henneke’s link too – I’ve been looking for a course about writing (English is not my first language, but I’ve been practicing and learning to write on my blog).
Thanks again!
-Novi
You are more than welcome, Novi! English isn’t my first language either. I was quite self-conscious when I started writing. But sometimes you need to get the message out there without worrying about spelling mistakes 😉
I’m close to setting up my first blog, so I’ve been doing endless research. This blog post is by far the best thing I’ve read so far. You give so much detail and explain everything so in depth, thank you thank you! I’m still taking notes but this post is so informative I’m book marking it for later!
Thanks so much for your kind comments. Lexi! Best of luck starting your blog!
thanks for sharing your content. it really helps to start blogging and generate earning
Thanks Bihar 🙂
Hi Sara!
I’m so grateful to have found this amazinggg post. It’s super in depth and resourceful! Most posts that I’ve come across are pretty repetitive and generic and not very helpful at all so thank you so much! I’ve been planning/researching for a while now to prepare for the launch of my blog and although I’m super excited to start my blogging journey I can’t shake the overwhelming feeling of nervousness. I want to connect with my readers so they’ll keep coming back. I know writing and keeping your readers engaged is extremely important and I’m no journalist..so what resources do you recommend for tidying up your writing skills so you’re able to make comprehensive and engaging blog posts every single time?
Hey Imoni,
Thanks so much 🙂
For copywriting skills I love everything Henneke writes. Plus Backlinko’s guide.
Hey Sara, what an amazing read. I have read around hundreds of posts about starting a successful blog and believe me this was one of the best. And no wonder this is the reason it’s on page one. Google certainly likes good content, a content that helps others and first time I found an article that wasn’t stuffed with keywords or too much affiliate link. Just loved it and the way you presented it. Learnt a lot of practical things both written and executed in the post.
Thank you so so much, Ruchi! 🙂
Thanks for providing me with so much value. There’s a sea of knowledge in this post. Thanks a lot for all. Am really impressed.
Thanks, Ross! 🙏
thanks for sharing your content. it really helps to start blogging and generate earning. really really a best guide for a blogger
Thanks so much, Avi 🙂
Hi Sara,
I cannot even describe how happy I am to have found this glorious and very resourceful blog post of yours!
Ever since I started blogging myself, the way I view others’ blogs has completely changed and it has made me appreciate every valuable high-quality content, such as this one, SO MUCH! 🙂 Because I know just how much effort it takes to put something so comprehensive together, for us to enjoy, and free!
You’re the best!
Sending you so much love and gratitude lovely ❤❤❤❤
Hi Keiu, thank you soo much for your kind comments!❤ You have no idea how much it makes me happy!
Thank you so much for sharing all you know about setting up a blog. It really inspired me. Untill… I started my own investigation. One of your tips is to read, read, read. See what others do in your niche. I found some really good blogs, started reading, and than… I stumbled over the same stumbling stone as always: if it is already there, why should I add one more…?How do you get beyond this feeling of beiing overwhelmed and overruled instead of feeling expired by all there already is? I know, you probably can’t answer this, I have to find the answer myself, but maybe someone else recognises this.
Oh, Maartje 🙂
If it’s already there, you should add your own voice to it. Think about it: there are millions of restaurants out there. Why would we need one more? Because the cook in that restaurant might be the best 3 Michelin star chef of tomorrow and he/she doesn’t even know it 🙂 And that could be true of your blog. With your experience and expertise, you could provide more value, have a way to connect with your readers that others could only dream of!
And to avoid feeling overwhelmed you need to take things one at a time.
Stop reading and start doing! Reading is essential, but if you don’t put what you learn into action, what’s the point of knowing so much.
Alan Donegan once said: “If the answer was more information then all librarians would be billionaires.”
If you really want to start a blog, just start from step 1 and get going!
If you need more help, just ask here 🙂
Hi Sara, I have a newly created blog and each time I make a post, it will show small excerpts with a”read more” option under it and I don’t like this. Please, how do I make a post that will show my full page content instantly when someone visits my blog.
Hey Daniel, that’s normally a setting of your theme. What theme are you using? Go under Setting>Reading and see if you have the option to show the full text. Click on that and you should see the whole post.
You’ve come up with awesome post. What an ecouragement this to all starters out there.
Thanks so much, Con! Glad you found it useful! 🙂
Great read! I remember this from my favorite forum. It works for us. You’ve come up with awesome post.
Thank you, Jkey 🙂 Glad you found this post useful!
This is a great post! I know a lot of people can get imposter syndrome which will stop them from starting a new blog. I hope that more people read this and develop the courage to start one. Keep up the great work!
Thanks so much, Jeremy! Imposter syndrome is so real and stops far too many people that have amazing things to share and don’t even know it! I hope this post will give them some inspiration to start 🙂
Great and comprehensive post! Indeed, you need to provide value to people first and money will come in after! If you can solve a problem, people will read your blog and you can monetize in time…
Thank you, James! And yes, 100% to help people solving a problem!
Hi Sara! I really loved your post! I’ve saved it so I can come back to it when I need inspiration. I am trying to start my blog and am almost constantly overwhelmed by negative thoughts. “What if my content isn’t interesting or good enough? Will I ever be able to make money?” It’s just a never ending cycle! I am trying to motivate myself and I’ve come to find that needing inspiration is crucial. I’m thinking of blogging in the personal development niche. Is this a niche that could potentially be profitable? Like you, I am on a path to try and earn money with my blog as quickly as possible. Thank you!
Hey Kelsey,
Thanks so much for your kind words! As I often say to people like you that are worried about whether people will find what they have to say interesting, JUST START 🙂
Everything has been said before, but you’ll bring a new spin on things and you’ll explaining things with your own voice and that will 100% relate to someone.
I think the personal development niche is growing a lot right now. Just look at Lifehacks or Zenhabits!
Of course, there are many areas in the personal development niche…just do as much research as possible, and then jump right in! 🙂
Thank you for this Sara! Yes, on Upwork I do offer proofreading and virtual assistance, but I’ll try to scout on some of the groups you mentioned too. I really appreciate your idea on the proofreading niche – I’ll definitely try to think of something like that. I wish you the best!
Take care!
Sara! Please accept my apologies for the “h” on your name in my previous post. I was in a hurry to post it! *peace*
Oh Gresa, don’t worry about the H! I am quite used to it! I should probably just add it to make it easier lol!
What are you offering on Upwork? Is that proofreading? I am sure there are ways you can sell your services quickly. Have you tried Facebook groups specializing in your niche? For example, if you join some freelance writing groups that allow posts for jobs, you could connect with potential clients. Blogging groups can be great for that too! Just ask permission to the admin before posting your proposal, but most people will be happy to let you post in there, and you’ll be surprised by how many bloggers might need help. But before you do that, I would suggest having a website up, even a few pages with your services and an about page. It’ll make you look so much more professional! It could even be a free website!
In terms of passion and profession, I think it’s up to you. If you love what you do, you can write about your profession.
Nutrition and proofreading don’t really go together BUT you could have a blog about nutrition and just a few pages in which you can sell your freelance services and mention that you specialize in proofreading for nutrition-based businesses. Having a niche in proofreading could be very helpful, and can narrow down your client base!
It’s just an idea 😉
Hi Sarah!
Fellow introvert here! I just want to thank you for this extremely detailed article (I love it!). I really appreciate the time you spent writing this article, you deserve the success this blog brings and more! Reading this felt like taking a paid course on how to write a blog, and the fact that you made it free for everyone makes it feel like a blessing for each reader who comes across this. I am a CoVid furloughed worker, and since none of my Upwork proposals have been read nor any of my job applications accepted, I am thinking of starting a blog while I have time (and hope to continue it further).
I am passionate about nutrition and being Introversion, but I am also a proofreader who does not have her own website yet. I don’t think I can combine everything in one blog, so I am curious about your opinion on this: is it better to blog about your passion? or blog about your profession?
I certainly look forward to your thoughts and I wish you all the best!
Amazing and very informative content! I like the fact that you’ve added all together in this post – from the technical stuff to content, SEO and promotion and all the other details! Thank you!!!
You are welcome, Florin! I wanted something that could be useful for beginners all in one place 🙂
Hi Sara,
I am now sharing this comment because I managed to reach the end of your blog. At first, I thought this was a lengthy post and now I am here at the end wishing it could go on and on. In other words I absolutely love this blog! This is the most genuine and helpful blog post I ever came across, and I have been through hundreds of blogs. I am here thinking I should be paying you for this quality information I’ve digested in a few days, yet its all here for FREE! You remind me of me. I am a perfectionist, and perfection is all over this blog. I can see you spend your time to do things the right way. I will be launching my blog soon and I will be reaching out to you for some tips…if that’s okay. Oh! and before I forget….Thank you, Thank you so so much!
Your comment, Julian, makes me extremely happy! 🙂
Feel free to send me an email with any questions! I am here to help 😉