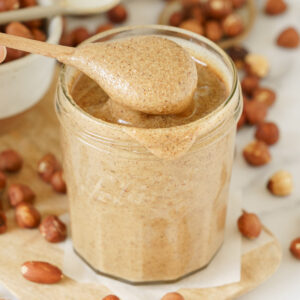
Homemade Hazelnut Butter
This one-ingredient hazelnut butter recipe is ready to go in minutes and couldn’t be easier to make. Plus, it’s creamy, smooth, and perfect for spreading, swirling, or dipping!
Servings: 12
Calories: 126kcal
Ingredients
- 2 cups raw hazelnuts - see note 1
Instructions
- Preheat your oven to around 350°F (175°C).
- Spread the hazelnuts in a single layer on a baking sheet. Roast them for about 8-10 minutes or until they're fragrant and the skins are blistered (Note 2). Shake the pan halfway through to ensure they roast evenly.
- Remove the hazelnuts from the oven and let them cool. Once cool enough to handle, rub them between your hands to remove some of the skin. If some skin remains, it is fine (it’s all extra fiber).
- Place the hazelnuts in a food processor or blender. Grind the hazelnuts on high power. First, they will turn into a coarse meal, then slowly start to clump together and, after several minutes, turn into a smooth and creamy butter. This process may take anywhere from 5 to 10 minutes, depending on your machine. Stop and scrape down the sides as necessary (Note 3).
- Transfer the hazelnut butter to an airtight container and store it at room temperature in a dark place for up to two months. It’s not necessary to keep it in the fridge. In fact, it will become harder and not as spreadable.
Notes
Note 1- Raw nuts: It’s best if you can find unroasted hazelnuts. Roasting raw hazelnuts before making your own butter will help to release the oil from the nuts, making it easier to reach a smooth, velvety consistency.
Note 2 - Do not overcook your nuts: Make sure not to overcook your hazelnuts. They will keep roasting even when removed from the oven, so remove them at 10 minutes max. Otherwise, your hazelnut butter might become bitter.
Note 3 - Be patient: Remember that the key to smooth nut butter is patience; keep processing, and eventually, it will become creamy. If your blender or food processor is struggling, give it a rest to prevent overheating, and then continue.
*Nutrition information is a rough estimate per serving.
Nutrition
Calories: 126kcal | Carbohydrates: 3g | Protein: 3g | Fat: 12g | Sugar: 1g